In Chapter one, we had already discussed around “What is EC2 instance in AWS, EC2 instance types and pricing“. So, let’s talk about “How to launch EC2 instance in AWS“. In chapter two, you will get to know, what are pre-requisite and steps to launch the EC2 instance.
I have also covered details of all the options, you will find during launching EC2 instance. This post is really helpful, if you have just started your cloud journey. So stay focused and let’s deep dive in.
Pre-requisite to deploy EC2 instance in AWS
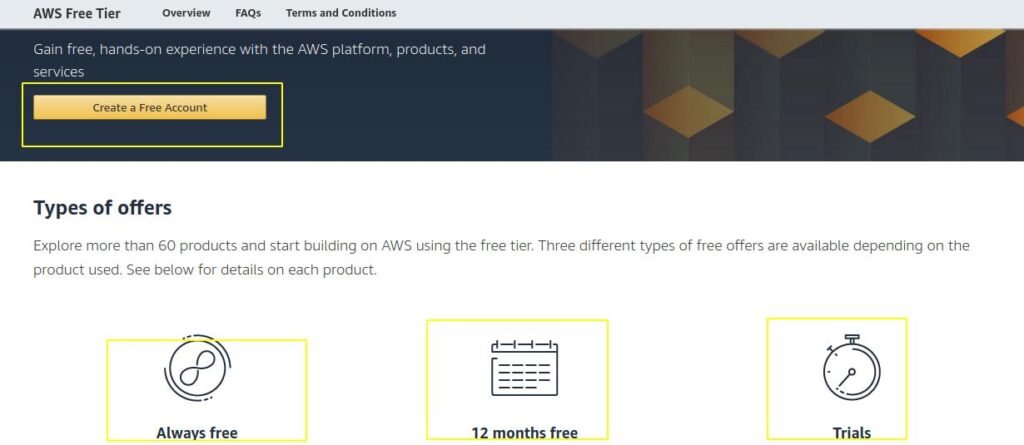
AWS login ID or subscription – is the only requirement in my view other than a system and internet. If you already have an AWS login ID, then you are good. otherwise, you can create one with AWS free tier.
You can explore more than 60 products in free tier for around one year. Also, some AWS services are always free.
If you still have doubts and finding it difficult to create free Amazon web service account. Watch out this amazing video from AWS support.
Video1 – Step by Step video on “How to create and activate Amazon web services account”?
Let’s move ahead and launch EC2 instance step by step –
How to Launch EC2 instance in AWS
- Login to AWS console
- Search for EC2 instance and click on Launch Instance in EC2 dashboard
- Choose AMI
- Choose the instance type and configure the instance
- Add Storage and Tags
- Add security groups
- Download Key pair and Launch your Instance
- Login to your Instance using SSH or AWS EC2 instance connect
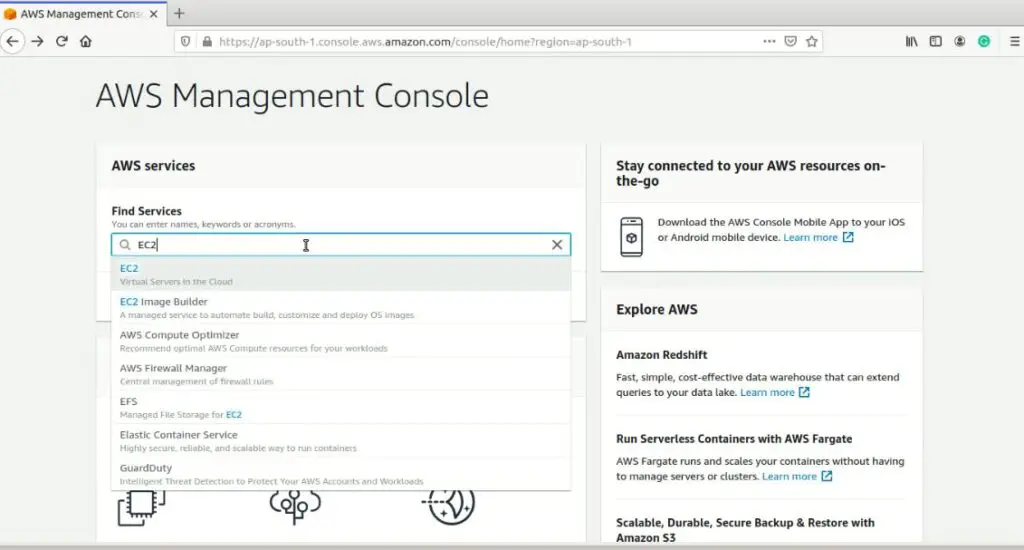
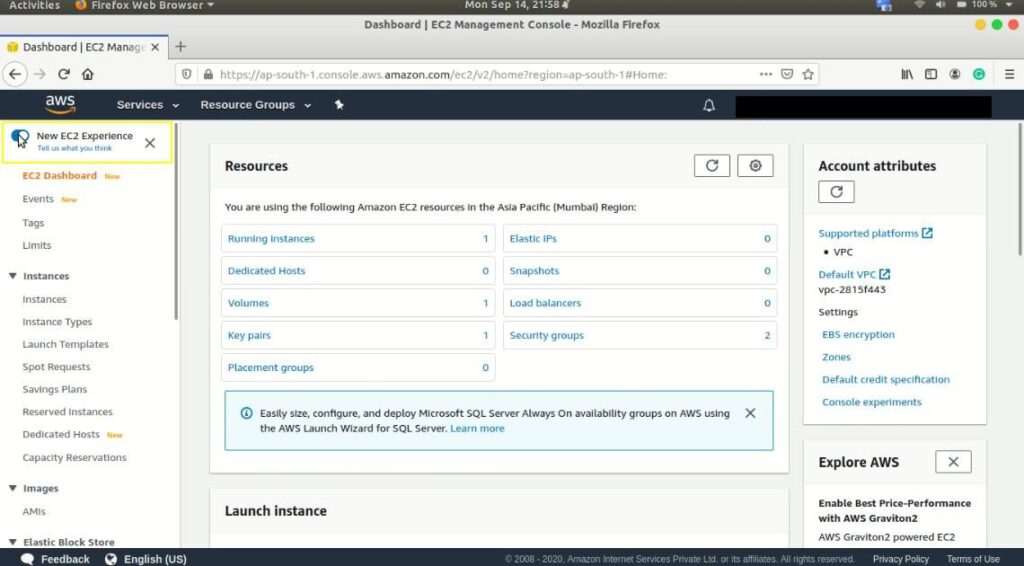
Step #1 – Login to AWS portal
Login to AWS console with your ID and search for EC2 instance
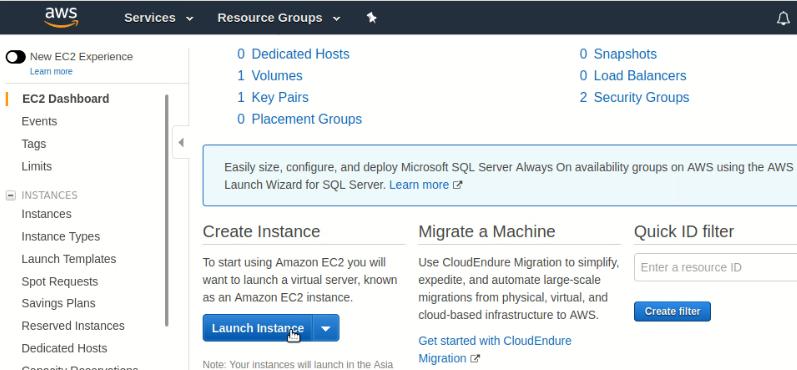
Step #2 – Disable new EC2 dashboard and Launch instance
AWS has introduced a new EC2 Dashboard but it is still in the testing phase. I am habitual of old EC2 dashboard. So I will disable this by provided slider switch in the left upper corner.
Click on Launch Instance. This step is same for old and new EC2 dashboard.
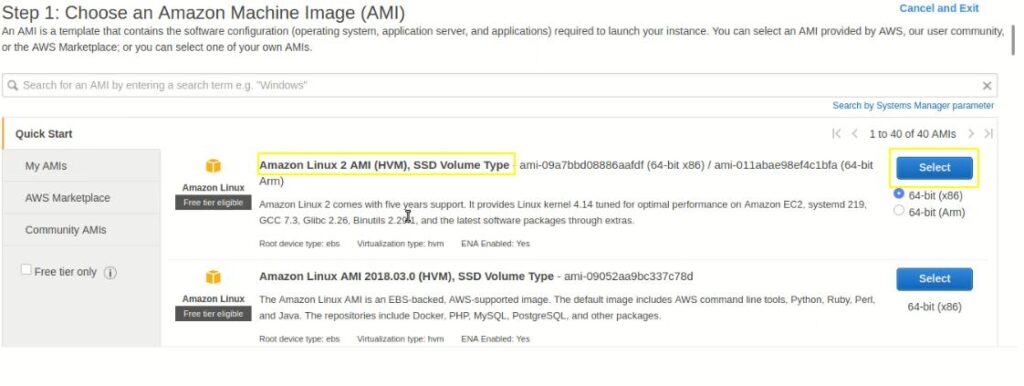
Step #3 – Choose AMI (Amazon machine image) for EC2 instance
I will select “Amazon Linux 2 AMI” as an example, you are free to choose as per your requirement. Make sure you select free tier eligible AMI only if you don’t want to pay money to AWS.
Step #4 – Choose an EC2 Instance type
Select your EC2 instance type. I will be selecting “t2.micro” as i am using free tier for AWS.
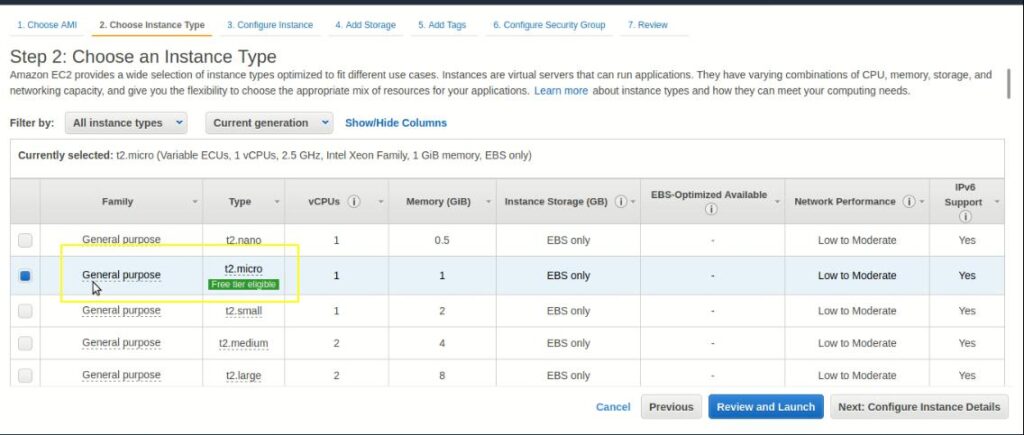
Now you can simply click on “Review and Launch” and then click on “Launch” to initialize EC2 instance. But this is not the motto of my tutorial. let’s move step by step to check out on other options also, So we will tap on “Next: Configure instance details” to move further.
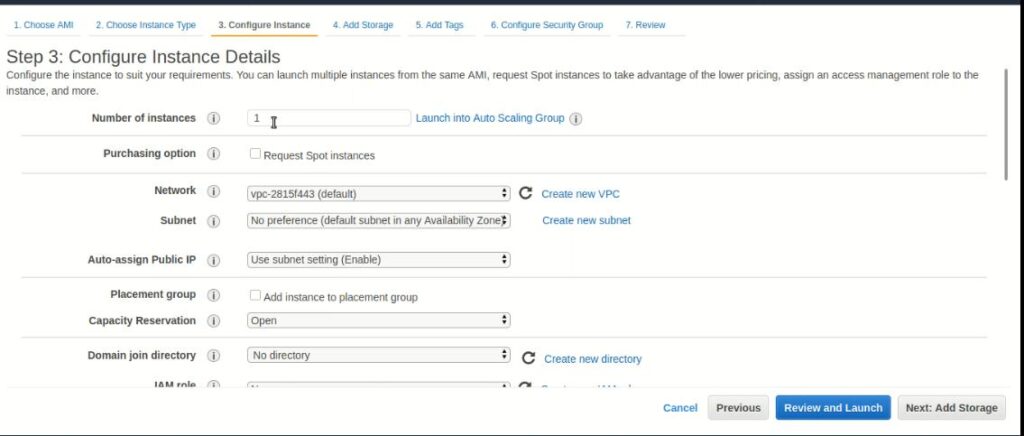
Step #5 – Configure EC2 instance in AWS
Let me explain on fields so that you can fill it in as per your requirement. For example, I will take the example of t2.micro, a single instance of Amazon Linux2 AMI.
- Number of Instances – Select the number of instances you want to launch or deploy. In this example, I will select 1.
- Purchasing option – If you want to request Spot instances (discounted instances with clauses), then this option will be important, otherwise, skip it. I will keep it unchecked.
- Network – Select VPC (Virtual Private Cloud) to choose your IP address range, subnets and network gateway. I will keep default VPC.
- Subnet – It contains a range of IP address limited to your selected AZ (Availability Zone). Subnet isolate EC2 instance resources. You can create new subnet or leave it to default with (No preference).
- Auto-assign public IP – This option will let public IP auto-assign to your EC2 instance. So, it will be available for you to access over the internet. You can enable or disable it.
- Placement group – If you want redundancy and high network throughput for your EC2 instance. Then you can enable this option and can select cluster, spread or partition according to your “placement group strategy“.
- Capacity reservation – Reserves capacity for your EC2 instance to specific AZ by default. Additionally, only normal charge applies for running instance with capacity reservation. I will keep it default as “open“
- Domain Join Directory – if you want to join your instance to a directory defined in AWS directory service.
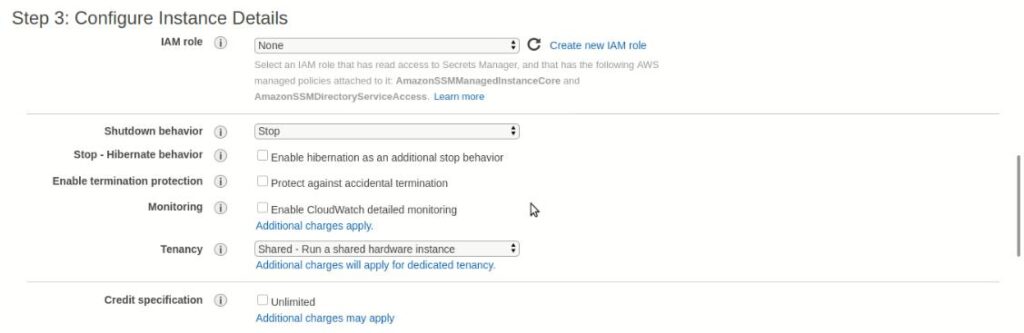
EC2 Instance Access and Behavior configuration
- IAM role – Identity and Access Management (IAM) are responsible for EC2 instance credentials. You can either choose existing or create a new IAM role for your instance.
- Shutdown behaviour – You can choose instance behaviour either stop or terminate (Deletion of instance) when you will shutdown OS.
- Stop-Hibernate behaviour – It’s a newly introduced feature in AWS. So, if you want to save the state of your instance and don’t want to stop your EC2 instance, This option can be used. In this behaviour, a dump of the current memory state of EC2 instance will save on Disk. When you will resume from hibernate mode, it will take less time compared to restart the machine. So it’s very helpful for the application or process, which takes a long time to start.
- Enable termination protection – Selecting this option will prevent you to accidentally deletion of your EC2 instance.
- Monitoring – Enable CloudWatch for your EC2 instance for detailed monitoring and alerts.
- Tenancy – Defines, how you want to run your EC2 instance. Because you have options to select Shared, dedicated and dedicated hosts to run your instance.
- Credit specification – In case of T1 or T2 instance, where the burst is allowed. Then, selecting “unlimited” will allow you to go beyond free buffer credits (unlimited) with T1 or T2 instance. Obviously, you will get charged for it.
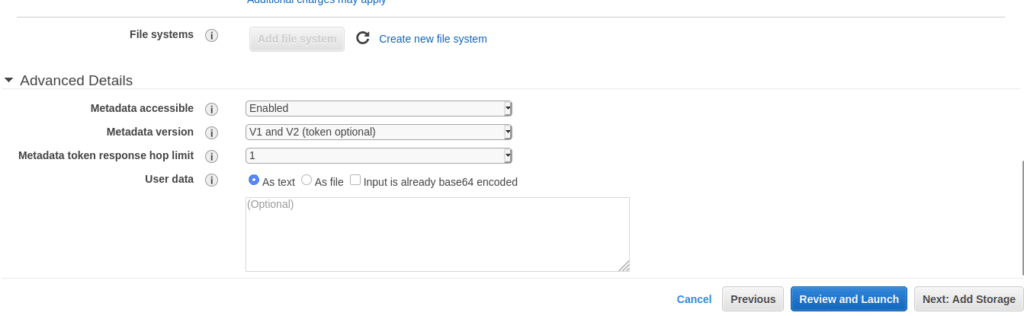
File system and Advance instance details
- File systems – Allow you to mount EFS (Elastic File System) on your instance. You can imagine it as NAS (Network Attached Storage) shares mounting on your instance.
- Metadata – Metadata accessible, Metadata version and Metadata token response hop limit are advance configuration options of the EC2 instance. you have the option to select v1 or v2 and disable enable metadata of your instance. you can leave all these options default.
- User data– This option can be useful if you want to run any script or program after the launch of your instance. For e.g. you can install Apache server on your EC2 instance. I will show you, how to do it in future posts.
Tap on “Next: Add storage“, once you are done with filling required details –
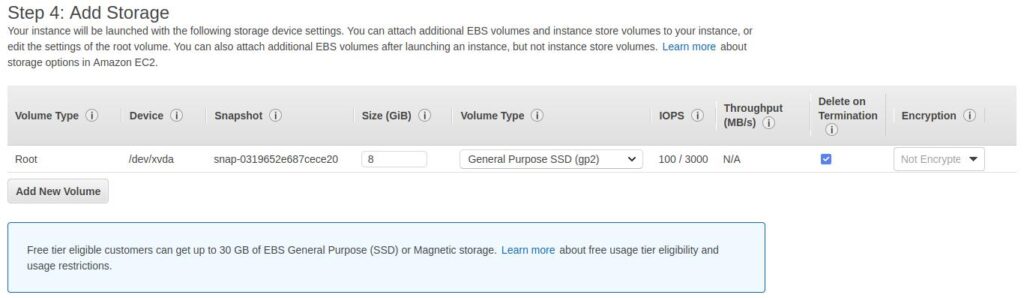
Step #6 – Add Storage for your EC2 instance
Here you can define OS (Root) and data disks for your instance. Also, you can encrypt your disks selecting AWS provided keys. Click on “Next: Add Tags” .
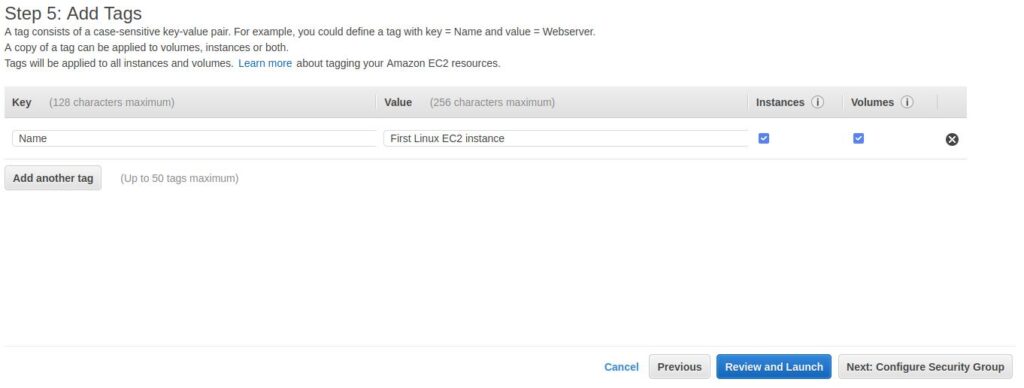
Step #6 – Add Tags
Tags are really important in my view and can be helpful for billing, resource identification and filtering. it can be applied on Volumes and instances both.
Click on “Next: Configure security group“.
Step #7 – Add Security groups
Security groups are like firewalls, that control inbound and outbound traffic of EC2 instance. By default, all outbound traffic is “allow” while inbound is “deny”. You can open ports mentioning protocol, port range and source of traffic. For example, the protocol can be HTTP, Port range 80 and Source can be “custom“, “My IP” or “Anywhere” for my webserver instance.

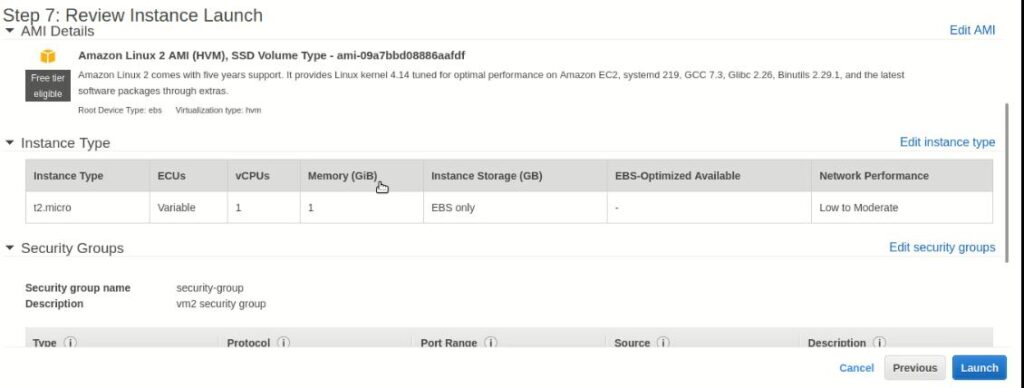
Step #8 – Launch your instance in AWS
After enabling inbound and outbound rules, click on Review and Launch. Review your EC2 instance configuration details and then click on Launch.
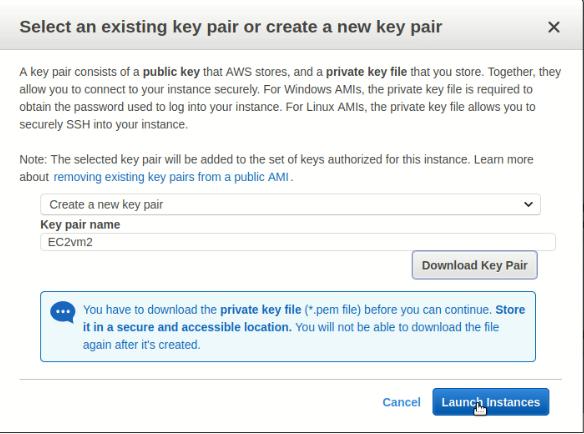
It will ask you to download your instance key pair (public + private). Download it and keep it in a secure place. Because this will be the key to access your instance remotely. Losing this key may result in inaccessibility of instance because it’s available for download only once.
Click on launch instances.
Click on instance name as “highlighted” to reach EC2 instance page.

Generally it takes time to change instance state from pending to running. You can connect to instance, once it’s in running state.
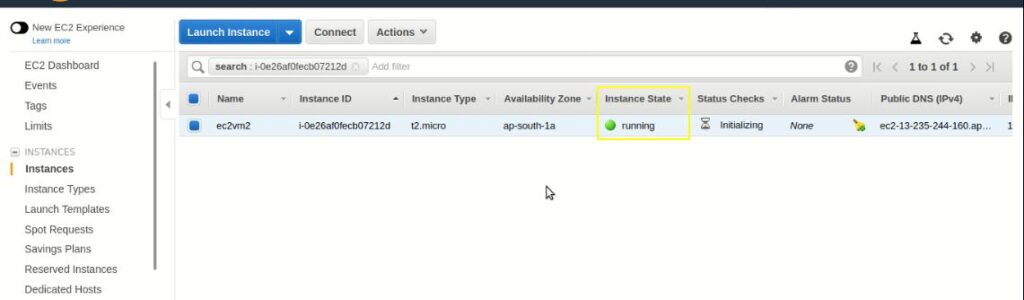
Now your instance is up and running and in Chapter three of this EC2 instance tutorial series, I will show you different ways to connect your EC2 instance.
How to delete EC2 instance
There is a famous saying, “To destroy is easier than to create” by IVAN Klima. This applies to AWS instance also. You have to follow many steps to create an EC2 instance, but for deletion follow these simple steps –
- Stop EC2 instance
- Terminate EC2 instance
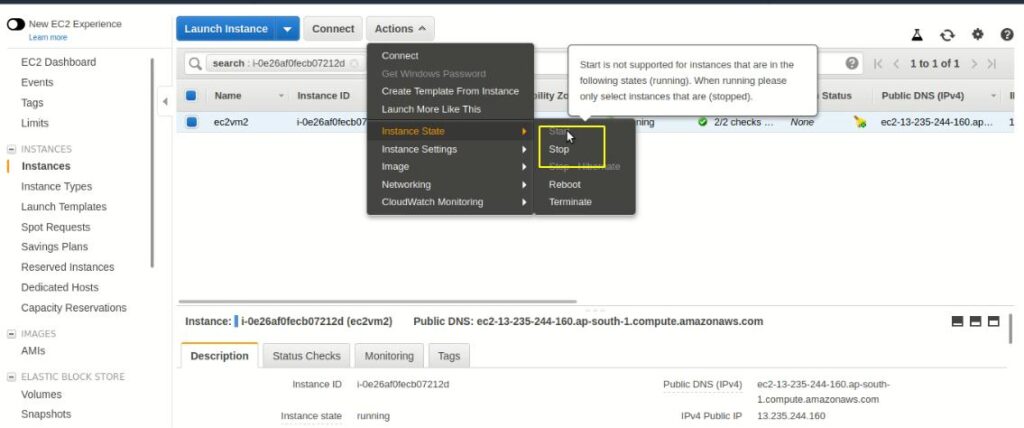
Stop EC2 instance
To stop EC2 instance, just select Actions -> choose instance state -> stop. Then on Warning page, Select Yes, Stop
Terminate EC2 instance
Once instance state shows “Stopped“. Then you can terminate EC2 instance, just select Actions -> choose instance state -> Terminate. It will alert you with the warning, select “Yes Terminate“. Clean up takes some time from EC2 dashboard, So don’t worry if it remains there for some time.

Video tutorial – How to Launch EC2 instance in AWS and terminate
Endnote
In this tutorial, I have explained around all fields, you will encounter during Launch of EC2 instance in AWS. Now you can create your first instance in Amazon, without any obstacles.
I hope you have enjoyed reading this article. So, if you found this article useful, please show your love by sharing it on social media and leave your comments and feedback.