
Rocky Linux has been released on 21st June 2021 and If you have not explored it yet. I will show you how to install Rocky Linux 8.4 in your system.
Installing Rocky Linux in the VMware workstation provides you to explore it without worrying about the dual boot. You don’t need to install it in your system parallel to your existing operating system.
Instead, you can install it on the top of your host operating system using a VMware workstation player.
Why Rocky Linux
RedHat recently announced the shift in the strategy of CentOS and gave a shock to the open community. After December 31st 2021, CentOS will not be supported anymore. So Gregory Kurtzer, who was the founder of the CentOS project decided to work on Rocky Linux. It is a downstream build, like CentOS. Rocky Linux has been made from Scratch instead of a fork-like AlmaLinux. So it took some time to release and came after the AlmaLinux Launch.
System requirements to install Rocky Linux
Make sure you have these pre-requisites in place before installing Rocky Linux –
- Vmware Workstation Player 15 or 16 (it’s free for personal use)
- At least 1 Virtual CPU and 1 GB RAM.
- At least 20GB of hard disk space
- Backup your important files (optional)
- Internet connection, as it requires to download some packages online during installation
In case, VMware workstation is not installed already. Select one of the below-mentioned buttons based on your Host OS for step by step installation instructions.
Download Rocky Linux 8.4 ISO 64-bit
- Visit https://rockylinux.org/download/ and select your preferred ISO. I will go ahead with minimal. For a quick alternative, Click on Download button.
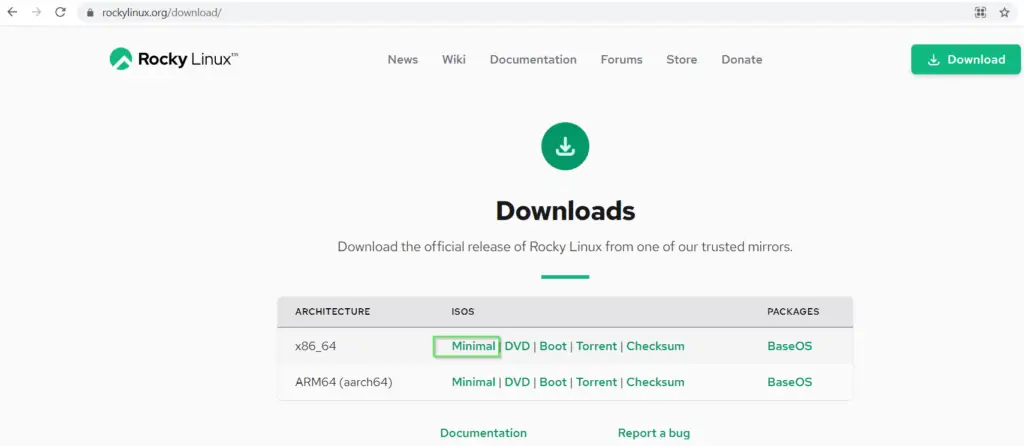
- Alternatively, you can also select Torrent file, in case you have internet issues in your country like mine.
- Just click on “Torrent” instead of minimal and save it. If you use chrome browser, it will get download automatically to your download directory.
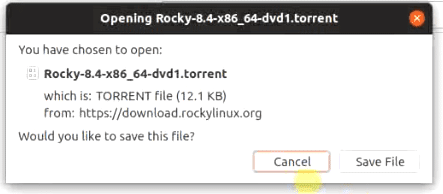
- Open it with Torrent client like transmission (ubuntu) or BitTorrent (Windows 10) in your system
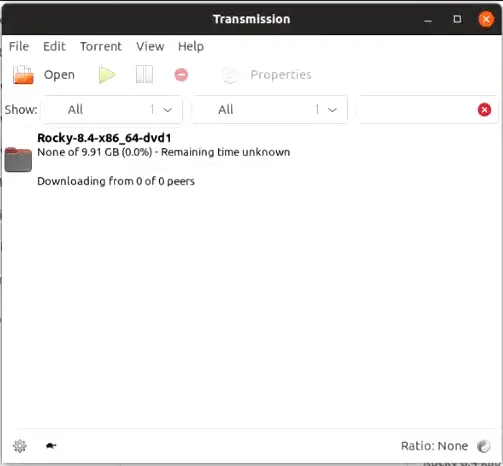
- Download Rocky Linux DVD iso image of 9.91 GB. By default torrent file downloads complete DVD Iso as shown in image. You don’t have risk of losing or resuming your download, if you use torrent file.
- If you own Ubuntu 21.04 like me and you don’t have transmission installed by default. Run these commands one by one to install transmission in Ubuntu.
$ sudo apt update
$ sudo apt install transmission
You are good to open the Torrent file now and ready to download Rocky Linux 8.4.
Validate your ISO CheckSum for security
CheckSum validation is really an important step if you are downloading any software from the internet. To make sure it’s legitimate.
- Open Terminal in Ubuntu by pressing <Ctrl + Alt + T>. Go to your download directory and run this command.
$ cd ~/Downloads
$ sha256sum Rocky-8.4-x86_64-minimal.iso
You will get a long key as shown in the image.

Just match it with the checksum key provided on the Rocky Linux website or download it from here.
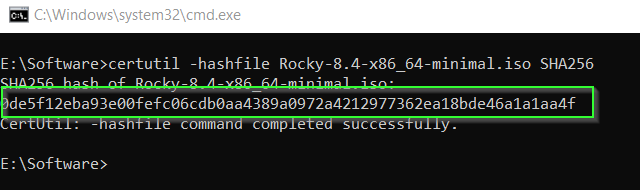
If you use Windows 10, Just open the command prompt (CMD) and type the following command to validate the checksum. Either change your directory to Rocky Linux image directory or give a path to the Rocky Linux iso file.
For example, I am in the software directory, where I have my Rocky Linux image iso. So I don’t have to give a path, only the file name is enough as shown in the image.
Run Certutil command to get the SHA256 key.
C:\ certutil -hashfile "path to Rocky Linux iso file" SHA256
Check out the video tutorial in this post, in case any issue matching the Checksum file.
How to install Rocky Linux in VMware Workstation Player 16
These are the two phases of Rocky Linux installation –
- Create a virtual machine for Rocky Linux
- Install Rocky Linux into the Virtual machine
Just follow along step by step to install Rocky Linux in the VMware workstation player.
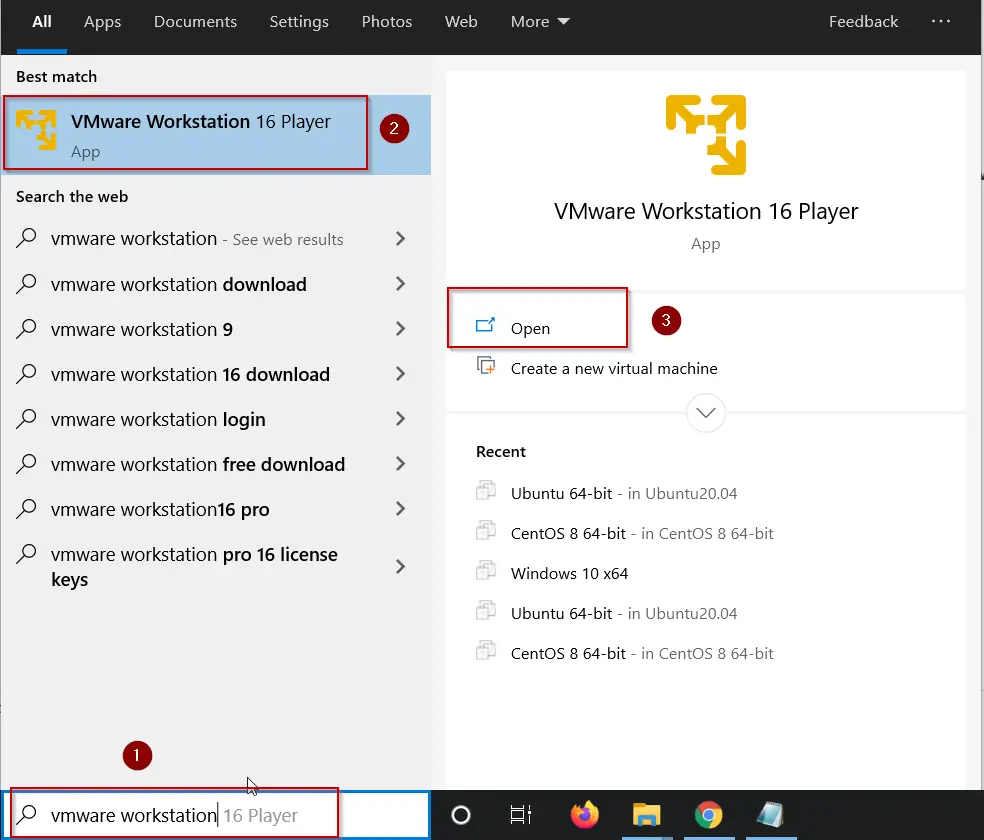
Step1 – First Launch VMware workstation player 16
The first step would be to create a virtual machine for Rocky Linux 8 in Vmware Workstation 16. So, open the VMware workstation player in your host operating system. For example, I am using Windows 10 as a host OS.
- Look for VMware workstation in Windows search bar and click Open as shown in image.
Step2 – Start “Create a New virtual machine” Wizard
Click on Create a new virtual machine, it will start a new Rocky Linux VM wizard.

Step3 – Select media option “I will Install operating system later“
On the Media selection page, you have three options.
- Installer Disc – if your laptop or PC has CD/DVD drive and you love to burn iso images to CD’s and Dvd’s (old school method). You can select this option. Your physical drive will be visible as /dev/sr0 and you just need to insert the installer disc, you prepared and click on Next.
- Installer disc image file (iso) – using this option, you can just browse for your downloaded ISO on your laptop or PC. we will do it in second phase by different route in this tutorial.
- I will install the operating system later – if you are not willing to install Operating system immediately or you are not ready with Rocky Linux iso CD or image, you can select this option. If you will continue using this option, it will create a new Virtual machine for you.
I will choose the “install the operating system later” option to showcase each and every step involved to install Rocky Linux in VMware Player -> Click Next.

Step4 – Select a Guest operating system
Select “Guest operating system” as Linux and Version as “Centos 8 64-bit” in wizard-> Click Next.
Note:- Rocky Linux not listed in dropdown currently. But it’s the replacement of CentOS 8. So you can select CentOS 8 64-bit as the version.

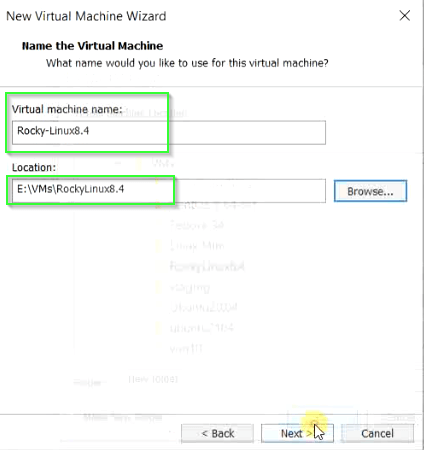
Step5 – Provide VM Name and Installation Location
Add the name and location of the Virtual machine. For example, I have provided the name as “Rocky-Linux8.4” and location as “E:\VMs\Rocky-Linux8.4” -> Click Next.
Step6 – Specify Disk capacity for Rocky Linux VM
Now it’s time to define your virtual disk size. Generally, 20GB is enough for Rocky Linux or even any other Linux installation. We will also go with the default 20GB disk size.
- Choose the “split virtual disk into multiple files” option-> Click Next.

A quick explanation of options –
- Store virtual disk as a single file – You can select this option, but I won’t recommend this. In case you want to copy or move this VM to other PC or laptop, Managing a single file of 20GB or more would be difficult.
- Split virtual disk into multiple files – Management of Virtual machine disk file is easy but may have some performance impact due to large files.
Step7 – Review and Customize hardware, if required
On the next screen, click on “Customize hardware” and increase RAM size from 1024 MB to 2048 MB, If you have enough memory in your PC. Otherwise, you can leave it 1024 MB only.
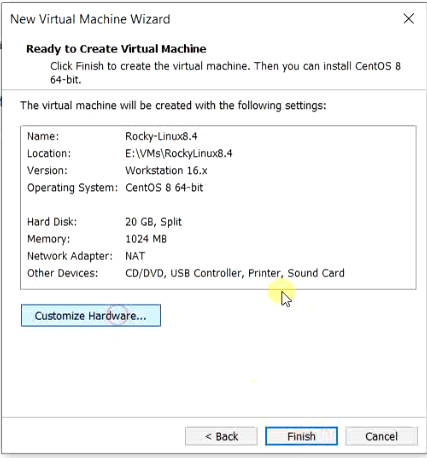
- I have enough resources, So I will change memory to 2GB to move installation faster.

Click Close and Finish the wizard.
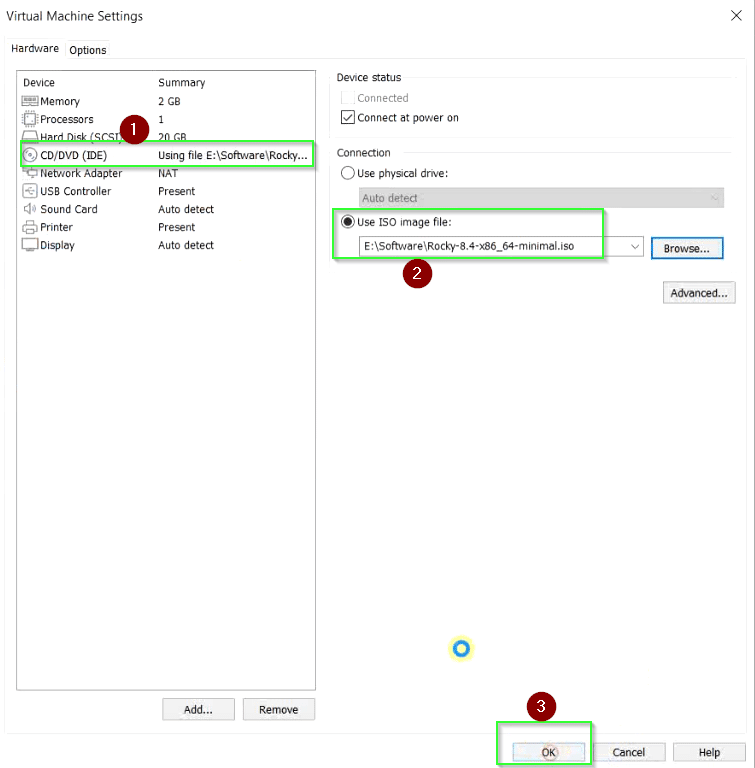
Step8 – Install Rocky Linux 8.4 from iso image on Virtual machine
Once your Virtual machine is ready, In phase 2 you need to provide the path of the Rocky Linux 8.4 image.
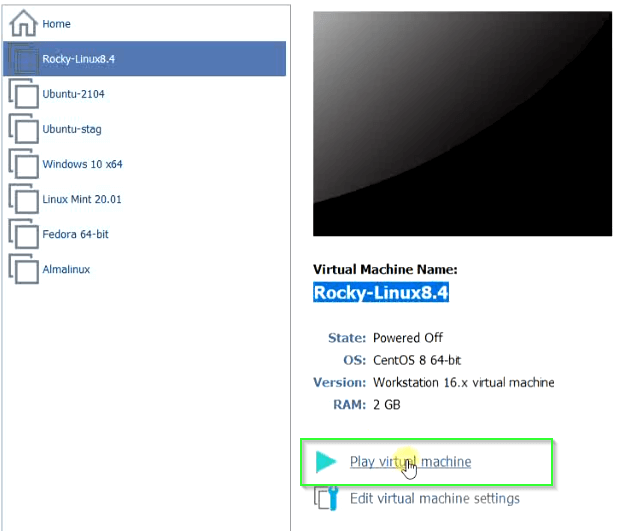
For that, you need to click “Edit virtual machine settings“

- Provide path to Rocky Linux 8.4 Iso image.
Step9 – Power on virtual machine
Click “Play Virtual Machine” to boot your virtual machine from the selected Rocky Linux iso image.
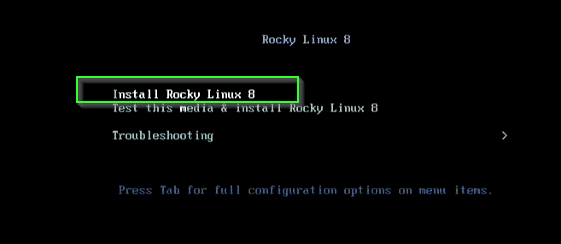
Step10 – Select “Install Rocky Linux 8″ option during boot
You will get three options during boot –
- Install Rocky Linux 8
- Test this media and install Rocky Linux 8
- Troubleshooting
Select first option {Install Rocky Linux 8} and press “Enter” on your keyboard to continue with installation.
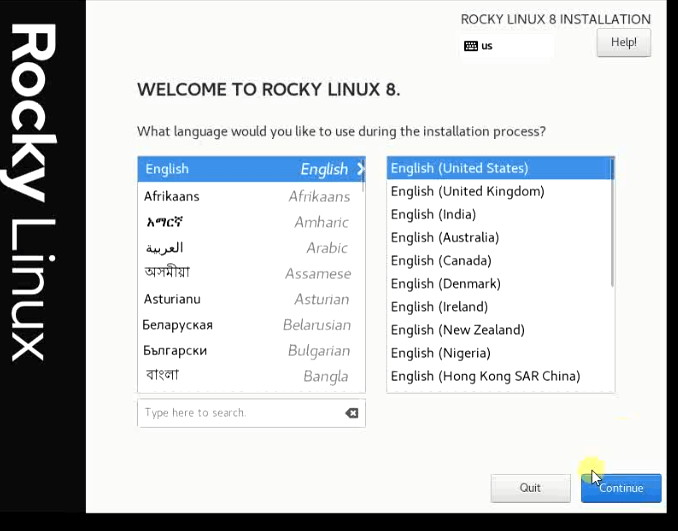
Step11 – Choose your preferred language
Select your preferred language on the first welcome wizard of Rocky Linux 8. I will select English (United States) and will hit “Continue“.
Step12 – Set up disk partitioning and Root password
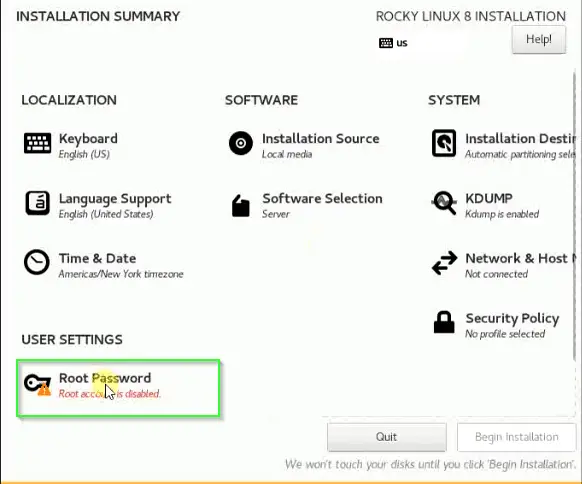
On the installation summary page, you have different options like Software, System, language support, Software selection, Kdump and user settings.
Currently “Begin installation” option is greyed out as shown in the image. To make it available, You need to remove warnings (Yellow patches) from the “Installation destination” and “Root password” options.
Follow these two actions –
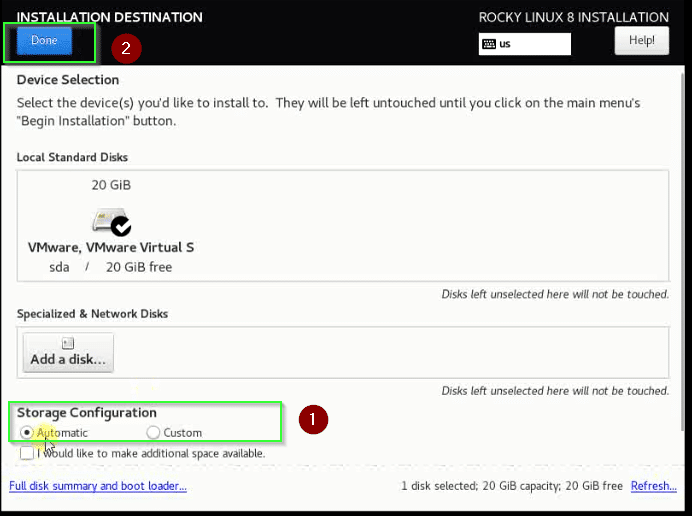
1.) To get the option of “Begin installation“, You need to click “Installation Destination” in the system section.

* Leave all options as default as shown in image> click “Done.
* Note – If you are a Linux pro, you can select custom instead of automatic and do partitioning as per your wish.
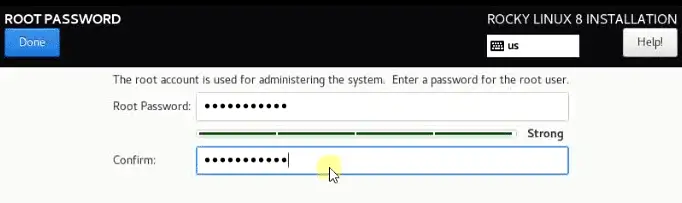
2.) Setup root password to enable the root account.
Go to user settings – Click the “Root password” option as shown in the image.
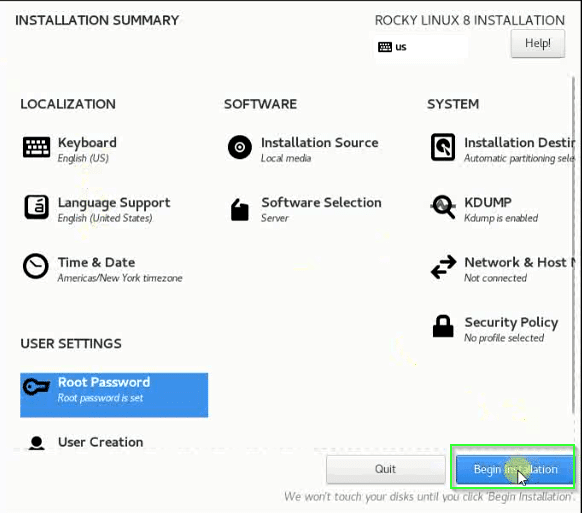
– Give complex root password and click Done.
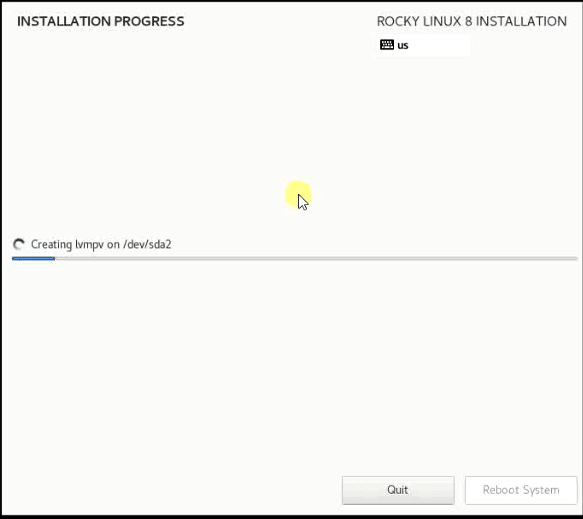
Now “Begin Installation” option will highlight. Click “Begin Installation” to move further.
Now, Rocky Linux installation will begin. Get a cup of coffee for yourself and let the installation complete. It will take around 20 minutes to complete in case of minimal install.
Step13 – Reboot your Rocky Linux Virtual machine
Reboot your VM, once installation completes.
How to Activate and configure Rocky Linux 8 network
Now Rocky Linux 8 installation has been completed and you have logged in with the root user. Let’s activate the network interface.
Most of us are new to Linux, skip this step and wonder later for these common issues or questions.
- Not able to see IP address in Rocky Linux
- Unable to connect to any website or ping any website
- Keep wondering how to activate the network in Rocky Linux 8.
So these steps are really important, to enable and activate the network interface in Rocky Linux 8 after installation
Step14 – Run “nmtui” utility to setup Rocky Linux Network
Run command “nmtui” from Rocky Linux prompt. Then, you will see the interactive “Network Manager TUI” console.
[root@localhost]# nmtui
# in case of sudo user
[root@localhost]$ sudo nmtui
- Click “activate a connection” using the down arrow key on your keyboard.

- Select your network interface (ens33 in my case). Then, click activate.
- Click back and then select Quit. You are done.

Further, You can also use the same wizard to provide the manual IP address or setting up the hostname for your Rocky Linux 8.
For example, you can click on “Edit a connection” and then select DHCP or manual in the provided field. You can also disable or enable IPV6 using this option.
- Select “automatically connect” and press OK to connect the network interface automatically on the next reboot. If you will not select this option, You need to activate interface again.
- Select Back and then Quit.

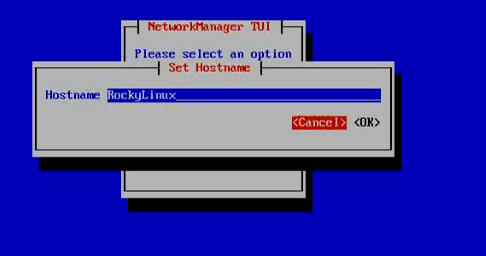
- As i said earlier, You can use this wizard to set up the hostname also. Select the “Set system hostname” option and provide the name of your Rocky Linux.
- Click “OK” and then “Quit” to get out from Wizard.
- Run ifconfig command to check the IP address.
Alternatively, you can also run the “ip addr” command, the same way used in Ubuntu Linux to know the IP address.
[root@localhost]# ifconfig -a
or
[root@localhost]$ sudo ifconfig -a

Till this point, we have Install Rocky Linux and we have configured the network. But it is a minimal installation. If you want “Graphical user interface“. You need to install groups.
Step15 – List and install groups in Rocky Linux 8
To list groups or environments available, run this command
[root@localhost]# yum group list
or
[root@localhost]$ sudo yum group list
Check out my post, if you are getting the yum command not found error.
Once it will sync up packages metadata, you will get a list of groups and environment groups available. For example,
- Server with GUI
- Minimal installation
- Workstation
- Virtualization Host
- Custom operating system
You can select your preferred environment group, I will select “Workstation” for this post.
Run this command to install the workstation group.
[root@localhost]# yum group install "Workstation"

Press “y” to download and install workstation packages. It will take a while to download all dependent packages from the internet and then install them to your system.
Once installation is done, you can run the “startx” command to start GNOME.
[root@localhost]# startx &
or
[root@localhost]$ sudo startx &
Follow the onscreen wizard to complete the “Gnome initial setup” wizard. Select your Language and click Next.

- Select keyboard layout (Typing) and click Next.
- Then switch on or switch off your location services in wizard and click next.
- As a final step, Connect your online account, if you want.

Step16 – Boot Rocky Linux in GUI Mode default.
Run this command to set up Rocky Linux to boot in GUI always.
$ sudo systemctl set-default graphical.target
Congratulations!! you are done with Rocky Linux 8 installation. Explore it and If you find any bug, First, create an account using Rocky Linux Account Services, then head over to our Bugzilla server to report any bugs.
How to install VMware Tools on Rocky Linux 8.4
What are VMware tools?
These tools are really important for the guest OS (Rocky Linux here). Because it helps to improve the functionality and management of Virtual machines.
It helps to reduce problems like –
- Display related (low resolution, colour depth etc.)
- Restricted mouse movement and abrupt clicks
- Sound issues
- Copy-paste issues
- Network related issues and many more.
Let me show you how to check the version of VMware Tools.
Step17 – How to check VMware tools version
To check any existing version of the VMware tool installed. Run this command.
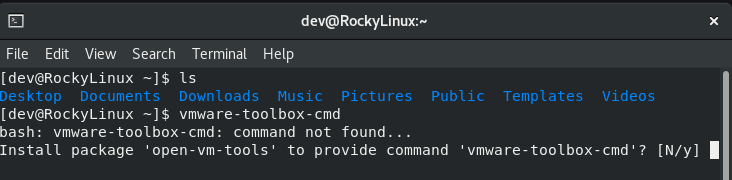
$ vmware-toolbox-cmd -v
If you get the “bash: VMware-toolbox-cmd: command not found” error. It means you don’t have VMware tools installed in your Rocky Linux.
In case you don’t have VMware tools installed or want to install from scratch. Follow these steps-
Step18 – Install VMware tools in Rocky Linux 8
- Login to the virtual machine using root or sudo account
- Run dnf command to install VMware tools
$ sudo dnf install open-vm-tools

- Once installation completes successfully. Then, Restart your Virtual machine.
- Check VMtools version as shown in step 17
Video Tutorial
Those who don’t like reading, Enjoy this video on “How to install Rocky Linux 8 in VMware Workstation Player 16“.
End notes
I hope, Gregory Kurtzer will not hand over Rocky Linux to any commercial giant (like he did to CentOS). And this 1:1 RHEL binary compatible distro will soon replace CentOS 8 before its support ends.
Finally, Community is happy and the best thing is, we have now two alternatives to dead CentOS i.e. AlmaLinux and Rocky Linux. Just go ahead and install Rocky Linux, What else you want ;-)?

![Guide with Screenshots – How to Install Zabbix on Rocky Linux/AlmaLinux 8.5 [Update 2023]](https://cloudlinuxtech.com/wp-content/uploads/2021/11/How-to-install-Zabbix-5.4-on-Rocky-Linux-or-AlmaLinux-270x161.png)
![How to fix the “Yum command not found” error in Linux [Update 2023]](https://cloudlinuxtech.com/wp-content/uploads/2022/04/How-to-Fix-Yum-command-not-found-error-270x161.png)