If you are a developer and looking for an amazing Python IDE. This guide will give you step by step process to install PyCharm on Windows 10 easily and quickly. You will also learn about, Pycharm updates, Importing packages like NumPy and run your first Python code. Lastly, we learn how to uninstall Pycharm.
All the steps mentioned in this guide also applies, in case you want to perform
- Installation of PyCharm professional edition
- Installation of PyCharm Edu edition
If you are a Linux user, then visit the “3 Ways to install Pycharm in Ubuntu” guide.
PyCharm Overview
PyCharm is a cross-platform IDE available for Windows, Linux and macOS. It comes with amazing features like –
- Built-in intelligent code assistance
- Developer and scientific tools are built-in
- Python debugger
- Python web development frameworks support
It is pretty famous for Python development and comes in three different editions.
- PyCharm professional edition – A complete commercial stack with useful tools and features. it’s paid and 30 days trial version is available.
- PyCharm community edition – It’s free and open-source, Comes with limited features but enough to develop Python applications.
- PyCharm Edu edition – Free version for students, which provides courses and helps you to learn Python.
You can check out this comparison matrix for further reference.
System requirements to install PyCharm
Following are the system requirements to install Pycharm in Windows 10
- Windows 10 64-bit version
- Minimum of 2GB memory (RAM). Although 8GB is recommended.
- At least 2.5GB of space. SSD is recommended for better performance. Requirement of space increases depending upon the modules or plugins need to install.
- The screen resolution must be at least 1024×768.
- Python 2.7, 3.5 or newer version. You can install Python on Windows easily, in case you don’t have installed it already.
- Internet connection
Download PyCharm
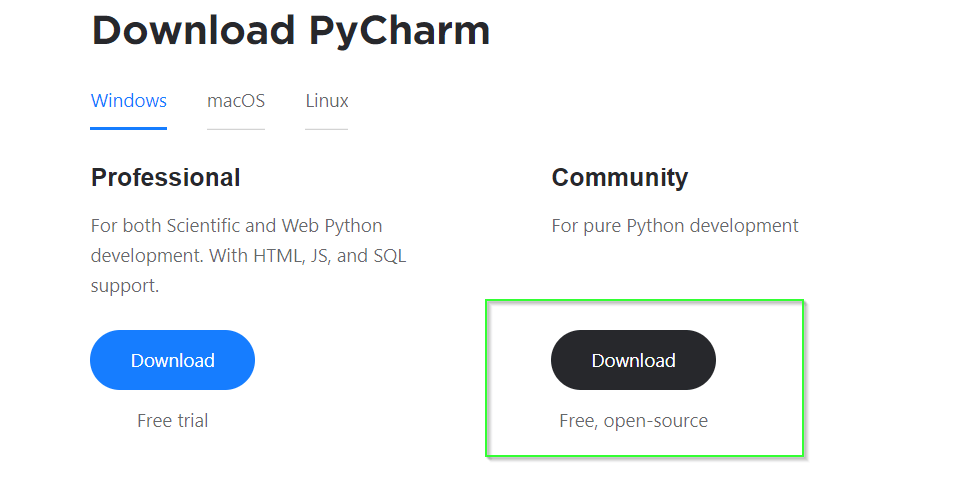
To download the Pycharm community edition for Windows 10, follow these simple steps. Alternatively, just click on the Download button to get it without effort.
Step 0.1 – Visit jetbrains.com and download the Pycharm community edition
In this guide, I will talk about the Pycharm community edition only. But in case you want to try features and stack of Pycharm Professional. You can download it and can try it for the next 30 days free.
How to install PyCharm on Windows 10
There are two ways to install Pycharm on Windows 10. Both are really simple and easy. You can select any one option based on your preference.
- Automatically install Pycharm using ToolBox app
- Install Pycharm on Windows manually
Method 1 – How to install Pycharm on Windows using Toolbox App
The major advantage of using this method is, Pycharm installation is automatic with a single click. There are many other Pycharm versions and products are available in a single pane offered by JetBrains. You can install any one of them easily. Also, you can use the Toolbox app to update or patch your existing Pycharm without much hassle.
Let’s deep dive into steps.
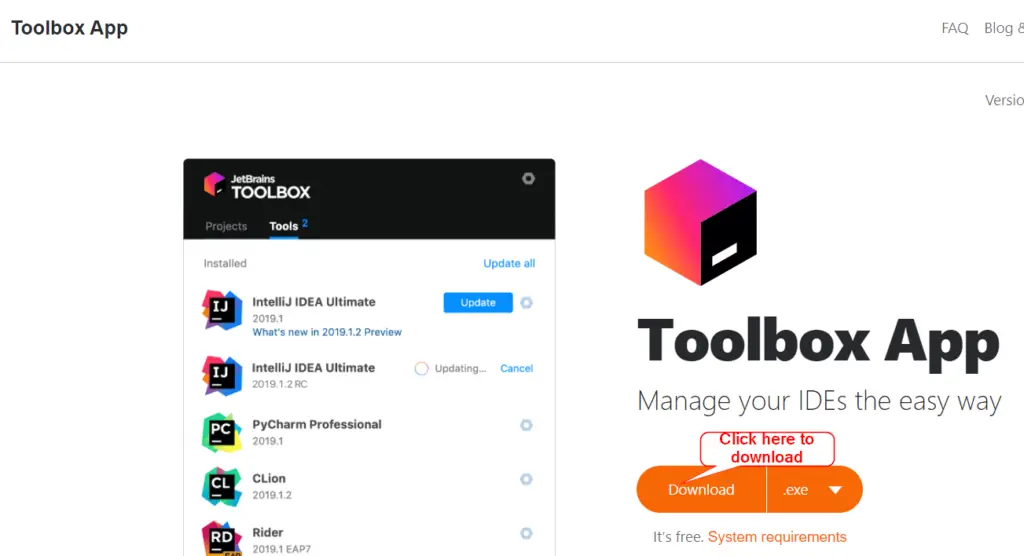
Step 1.1 – Visit Jetbrains.com site and download Toolbox
Visit Jetbrains.com to get this Toolbox app as shown in the image. Otherwise, you can just click on the below-mentioned download button.
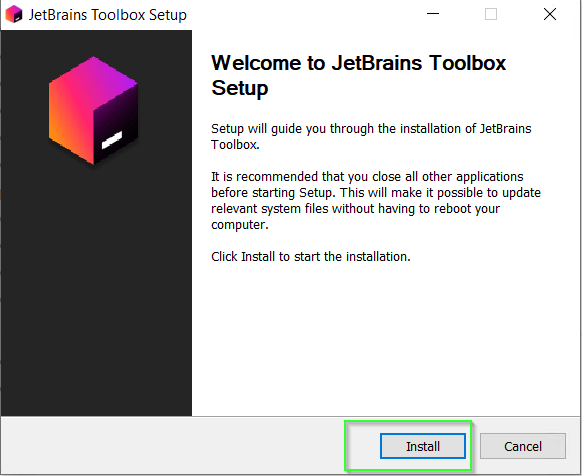
Step 1.2 – Install Toolbox app on Windows
- Visit your download folder. Double click on “jetbrains-toolbox-1.21.9547.exe“.

- Select “install” on Welcome page.
- Installation will take approx 3-4 minutes to complete.
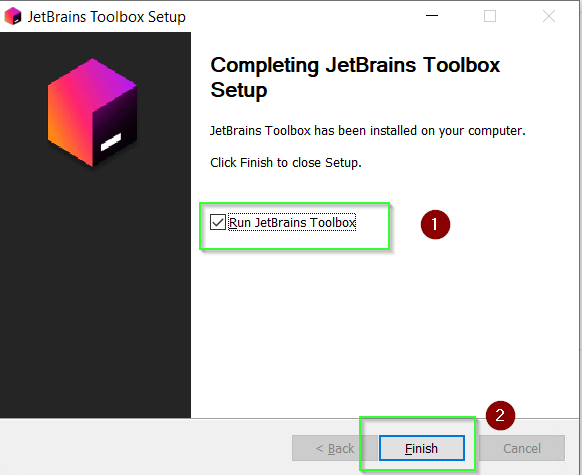
- Click Finish to run “JetBrains Toolbox app“. Make sure “Run JetBrains Toolbox” checkbox is selected as shown in image.
- Accept Pycharm End user license agreement

Step 1.3 – Run Pycharm community edition using Toolbox
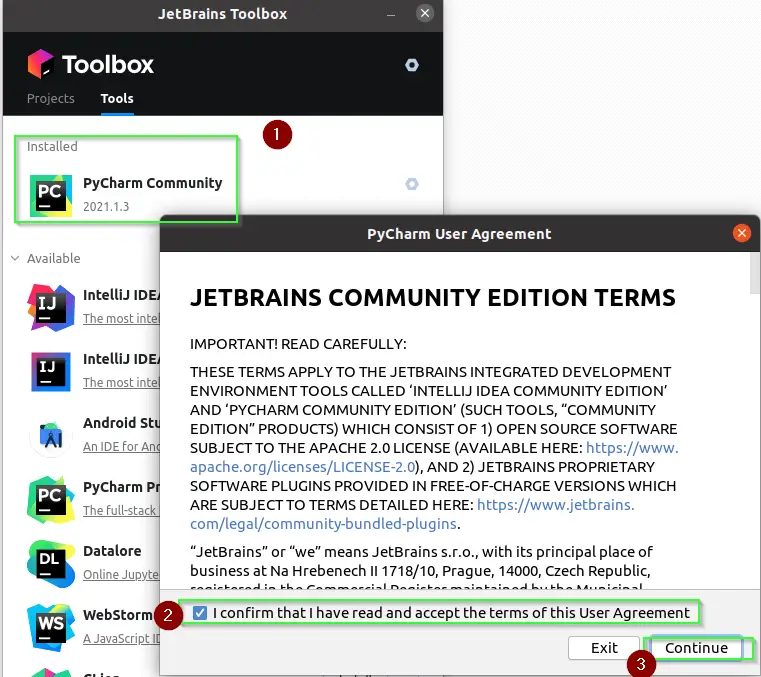
- Select your PyCharm edition and version from the drop-down. It will start to install automatically as shown in the image.
- You can also install the EAP (Early Access Program) version using the Toolbox app.
Want to install a free PyCharm Edu community for students? Just scroll down a bit in the Toolbox app and you will find it.

I will select the PyCharm community edition to install.
- Once installation is complete, Double click on the “PyCharm community” icon to launch PyCharm IDE.
- Accept “End-user license agreement” and click continue.
You will be happy to know that you are done with Pycharm installation on Windows within few minutes. Simple isn’t it?
If you don’t want any extra software, just to install Pycharm. Follow method-2.
Method 2 – How to install Pycharm on Windows manually
I am assuming, you have already downloaded Pycharm community edition software by following step 0.1.
Step 2.1 – Run “Pycharm community” exe
- Visit to your download folder and run “pycharm-community-2021.1.3” exe file.

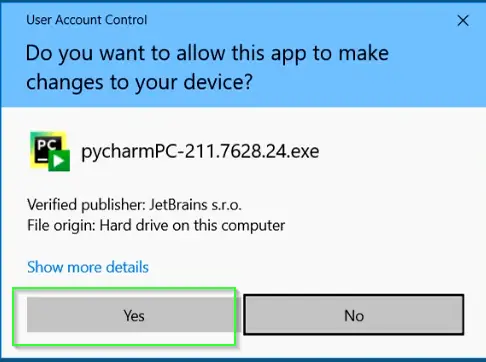
- Permit User access control by selecting “Yes“
- Click “Next” on Welcome page.
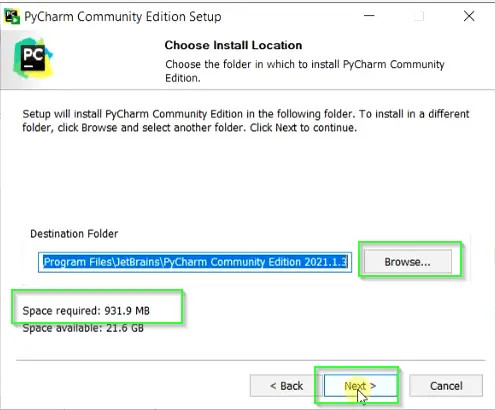
Step 2.2 – Choose “Installation location” for PyCharm
On this screen, You need to choose the install location for PyCharm. Setup will install PyCharm by default in “C:\Program file \JetBrains\PyCharm Community Edition 2021.1.3“.
Click Browse > Select your preferred drive and folder > click Next if you want to change the default location.
Pycharm will take around 931MB of space during installation as shown in the image.
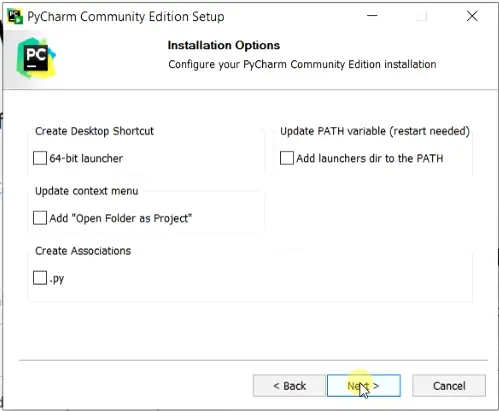
Step 2.3 – Choose “Installation option” to configure PyCharm Installation
These are the options available on the Installation screen of Pycharm installation –
- Create desktop shortcut – If you will select this option, it will create a Desktop shortcut for PyCharm launcher
- Update context menu – If you want to see option of “Open folder as Project” in PyCharm’s Menu. Select this checkbox.
- Create Associations – Selecting this option will allow PyCharm to open any file as python “.py” file. Even if it doesn’t have any extension.
- Update PATH variable – It will add PyCharm PATH variable. But you need to restart your system after selecting this option.
I will select all these options and click Next.
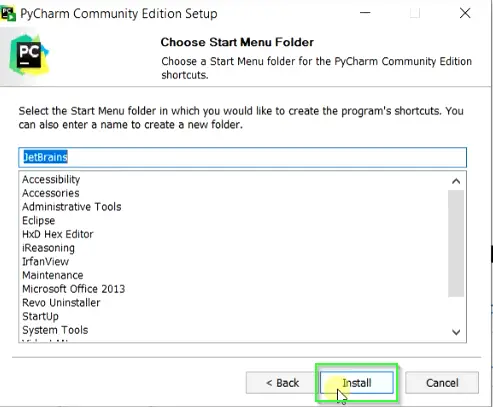
Step 2.4 – Choose Start menu folder and Install
Select Start menu shortcuts of Pycharm and click Install.
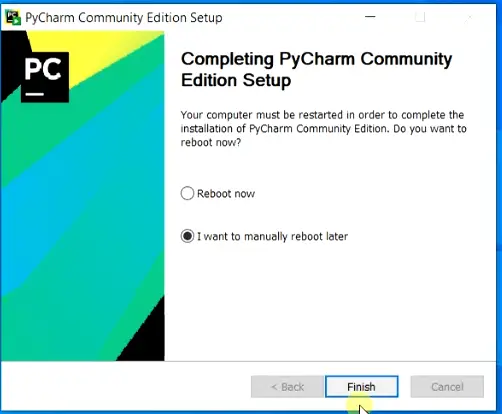
Step 2.5 – Finish and Reboot your system
Installation of Pycharm will take 3-4 minutes. Once setup completes, click Finish and reboot your system.
Although you have options to reboot immediately or later as per your preference.
Congrats! Now you know two methods to install PyCharm on Windows 10.
How to Install Modules in PyCharm
You can install modules or packages in PyCharm using the following steps.
- Launch PyCharm > Go to File > Settings or Press <Ctrl + Alt + S> on your keyboard.
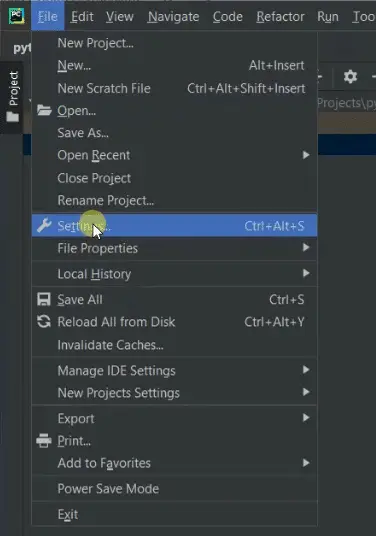
- Select Project:pythonProject option > Python Interpreter > On right pane Click “+” symbol to add Modules to PyCharm.
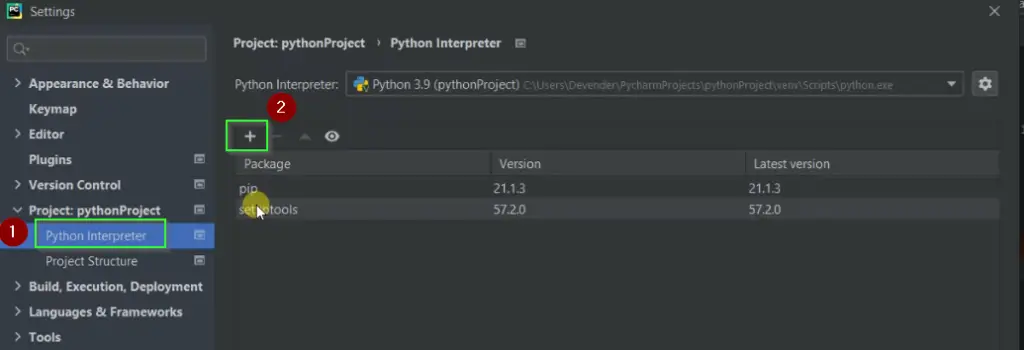
- Search for your package from the list and install it. Let me show you an example of NumPy Package in Next section.
How to import numpy in PyCharm
In the last section, we learned how to install Modules or packages in PyCharm. Let me show you the process of importing NumPy in PyCharm as an example.
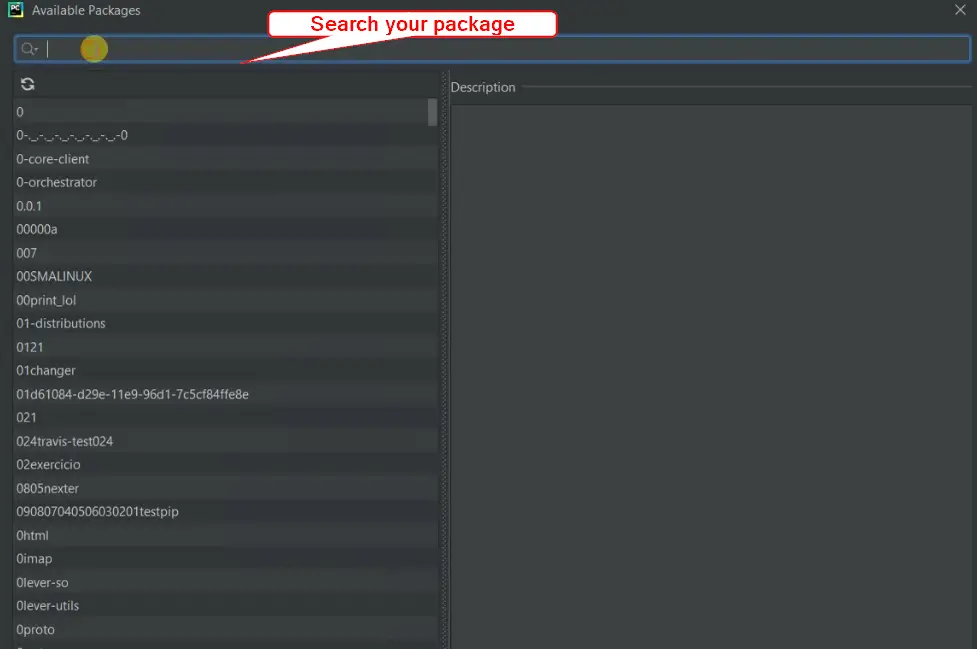
- Type “numpy” in the search bar
- Select numpy from the left pane
- In Right pane > You have options to specify version from drop down list and you can also give custom options, during NumPy package installation.
- Now you can Select “Install package” button in the lower section of the Available packages window.
- In case you don’t found package, You may need to add link of that third party repository. Click on Manage repository and add link. Do refresh and try installing package again. In case any issue, check out this link.

How to update PyCharm
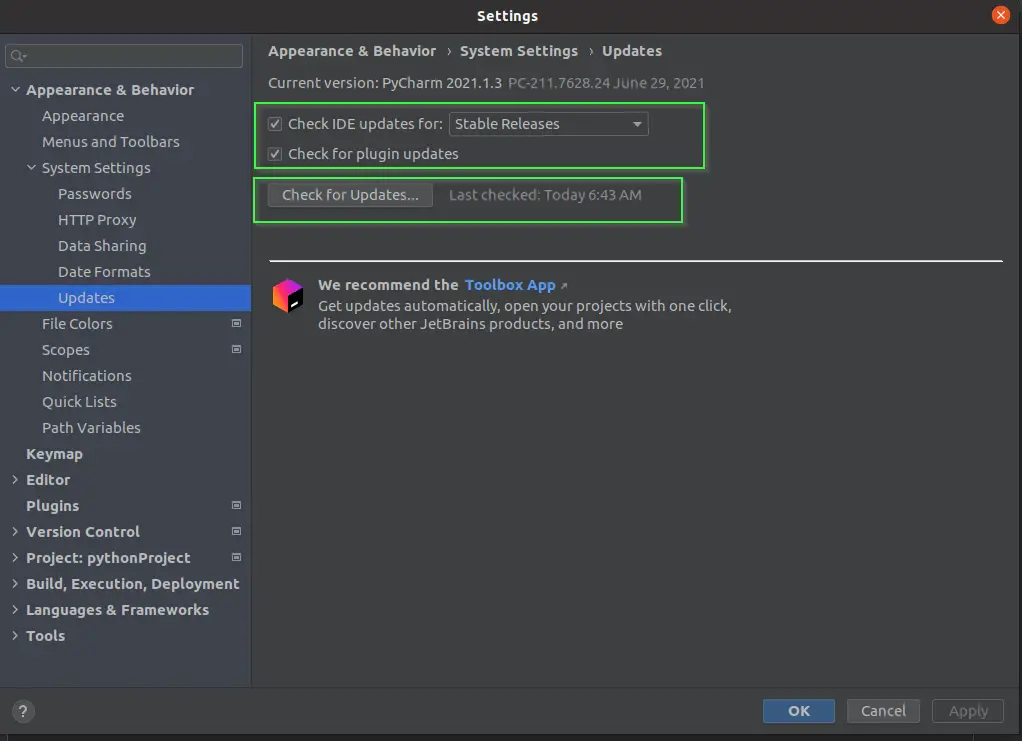
PyCharm keeps checking for updates automatically and informs us about the new version. Updates for your existing versions are generally patch-based. It requires restarting IDE only.
If you want to update Pycharm, Just –
Go to File > Settings > Appearance & Behavior > System Settings > Updates
Create project and run code in PyCharm
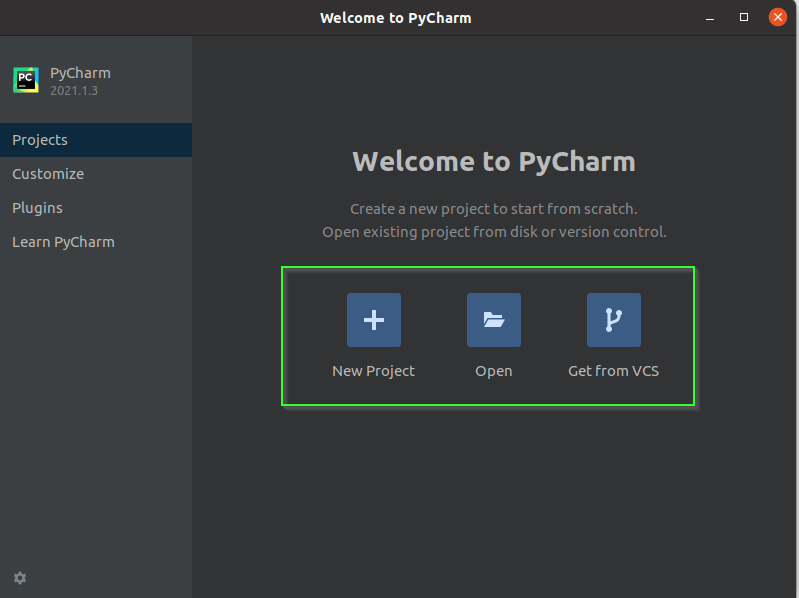
- Once you will launch PyCharm, the Welcome wizard will have three options –
- New Project – Select this option, if you are installing PyCharm first time and it will be your first project.
- Open – If you already have projects available. Then you can open it.
- Get from VCS (Version Control System) – To download it from the Git repository.
I will select “New Project“.
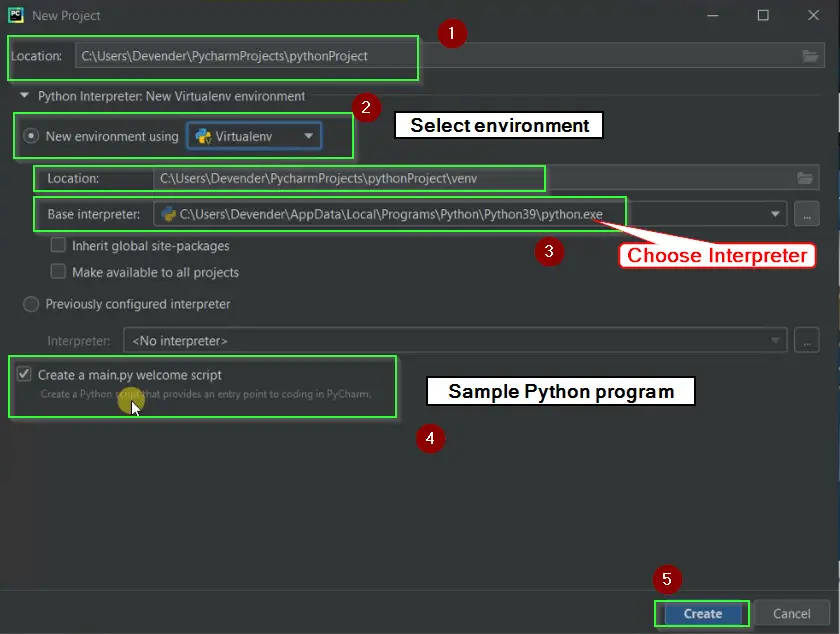
- On the next screen, you will find these options for “New project” as shown in image. You can keep the default or can customize it as per your wish.
- Location to keep your project files
- Select virtual env from the drop-down based on your requirements. Available options are :
- Virtualenv
- Pipenv
- Conda
- Select a location of your Python virtual environment
- Select Python Version in “Base interpreter“. Although PyCharm picks the installed Python version automatically. You can either select it from the Drop-down or provide the path to Python manually. Just select “…” and choose a location.
- Previously configured interpreter, if any
- Create a main.py welcome script.
Once you complete all the options, select “Create” as shown in the image.
To Run Your first code
Let Indexing complete after you launch PyCharm. It takes few minutes to complete. Otherwise, you will get a blank message window while creating a new file.
- Click on File in Menu > New File > Provide “File Name“. For example, I will give “HelloWorld.py” as the file name.
- Type print(“HelloWorld!”) in the editor
print("HelloWorld!")
- Select Run from menu > Select “HelloWorld.py” file > Run. Alternatively, press <Shift + F10> on your keyboard.
- You will see the “Hello World!” text as output
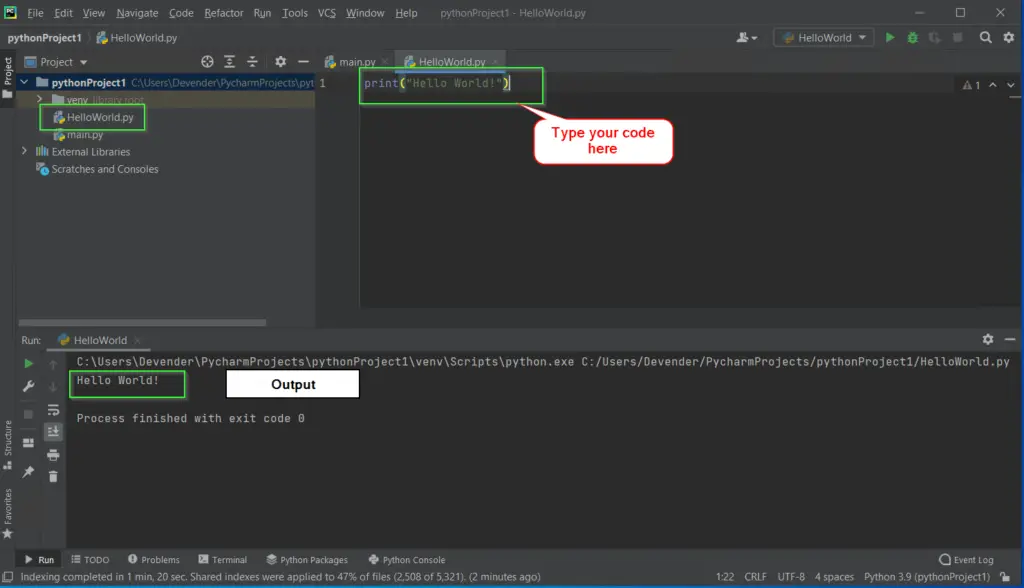
Hurray!! you have successfully run your first project code of Python in PyCharm IDE.
How to uninstall PyCharm
To uninstall PyCharm from Windows 10 system. Follow these simple steps, you generally follow for any other software to remove from your system.
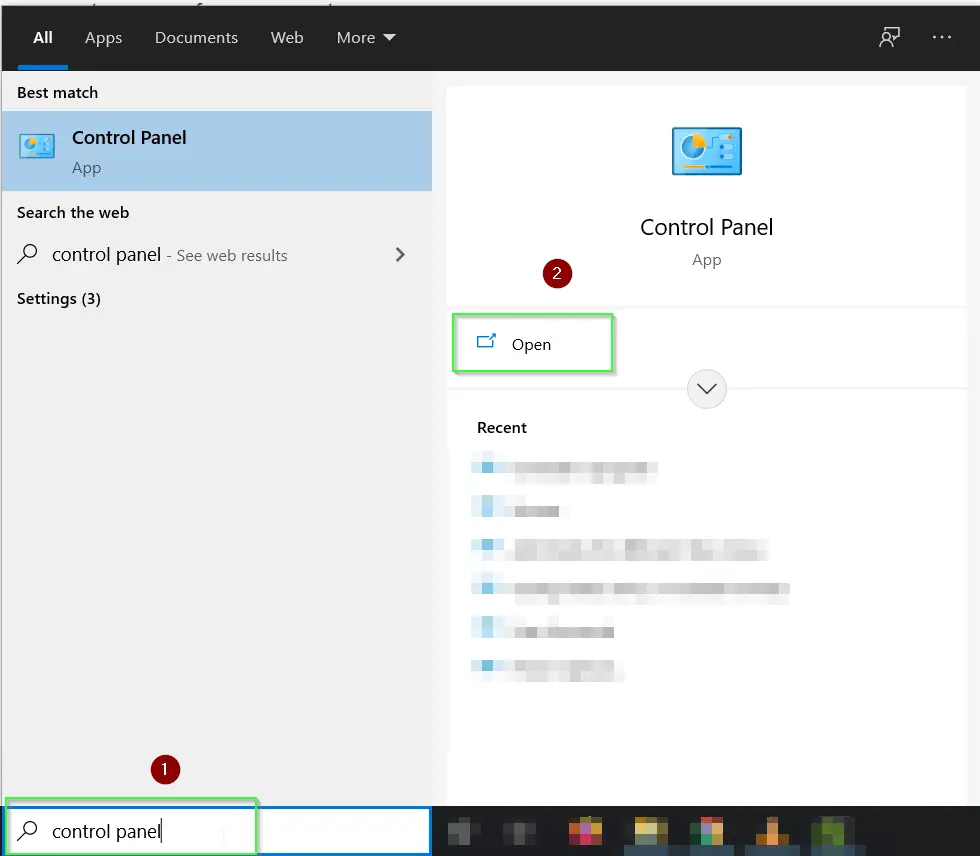
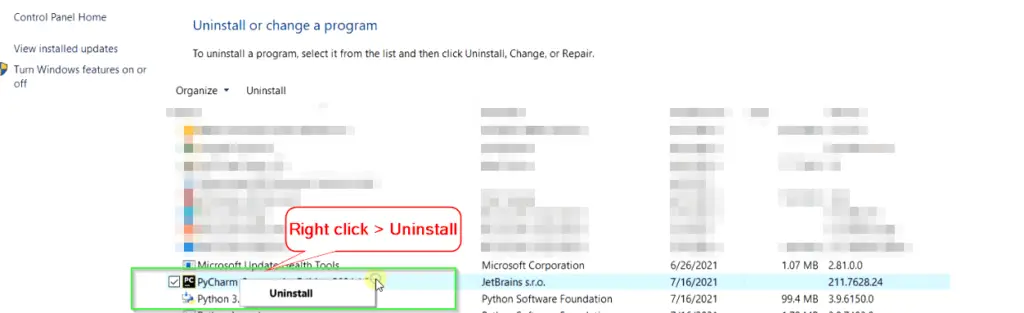
- Visit Control panel in your Windows system. My favourite method is to just type “Control panel” in search bar and Open it.
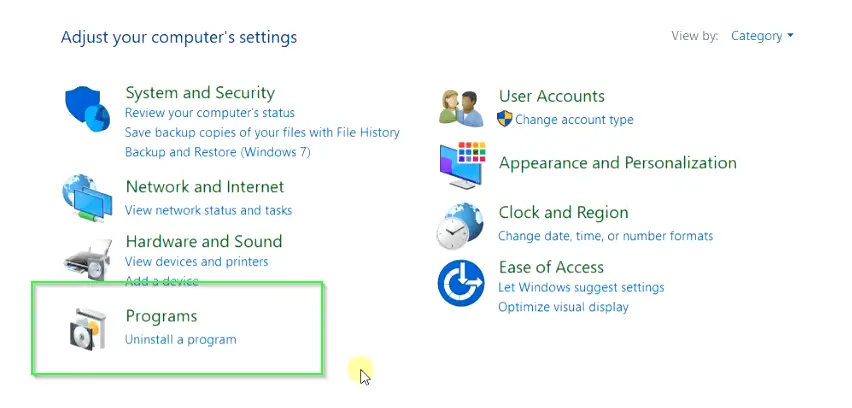
- Select “Uninstall a program” option
- Select Pycharm community edition software from the installed sofware list.
- Select Uninstall. You can also Right-click on the sofware and then click Uninstall.
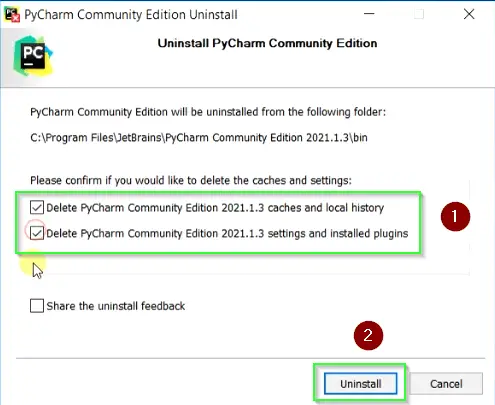
- Accept User Access control permission as “Yes”
- Please select both the available options and choose “uninstall” as shown in the image.
- Delete Pycharm community edition 2021.1.3 caches and local history.
- Delete Pycharm community edition 2021.1.3 settings and installed plugins.
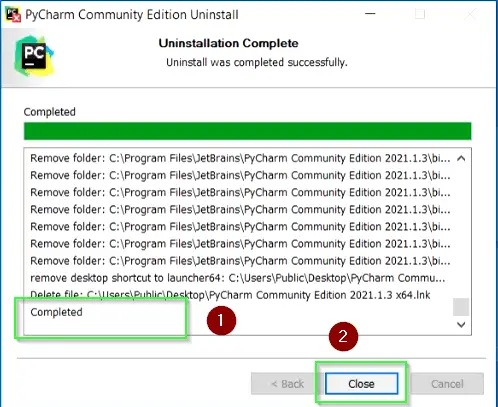
- It will take few minutes to complete uninstall of Pycharm from your Windows sysytem.
- click Close, once you see Uninstall complete message.
Video tutorial
If you find grasping a text guide difficult, Watch out for this helpful video on How to install Pycharm on Windows.
Further reading
I hope you liked this article on how to install Pycharm on Windows 10. You can refer to mentioned links for further reading on PyCharm.
You can share your thoughts or feedback via your comments.