
This spyder python tutorial will teach you “How to install Spyder Python in Windows without Anaconda. As a matter of fact, Spyder is already part of Anaconda packages. So, if you have installed Anaconda in your system, then you will have Spyder also. But what if, you want to install Spyder independently? Because You know installing Anaconda may conflict with your other already installed software or packages. So no worries on this part anymore. Spyder provides standalone installers to achieve that.
I will use Spyder and Spyder Python terms. Please don’t get confused with the interchanging of these terms. Spyder comes with Python by default. So sometimes, people refer to it as Spyder Python. Always remember, Spyder made in Python and made for Python (Scientific) programming.
Let’s checkout some quick details about Spyder Python first.
What is Spyder Python?
The Spyder stands for “Scientific PYthon Development EnviRonment“. Spyder is an open-source python-based Integrated development environment (IDE) for scientific programming. Pierre Raybaut developed Spyder in 2009 and later community and scientific developer team maintained and improved it. Spyder uses cute (QT) for it’s GUI and designed to use either of the PyQt or PySide Python bindings. It provides enhanced editing, debugging, awesome visualization and interactive testing to developers.
Features of Spyder Python –
- Advance editor for code completion, syntax highlighting and introspection
- Edit variables from GUI also
- Code benchmarking can be done using a run-time profiler
- Inbuilt file explorer to manage the filesystem
- Regular expression search
- Audit user commands with the help of History logs
- Pylint’s static code analyser for debugging and many more features.
Try Spyder Online
If you want to take a feel before installing Spyder 4.2.3. Click on the Try Spyder 4 online button.
it will take a couple of seconds to Launch with the help of Binder. You will reach on Ubuntu 18.04 with Xfce desktop.
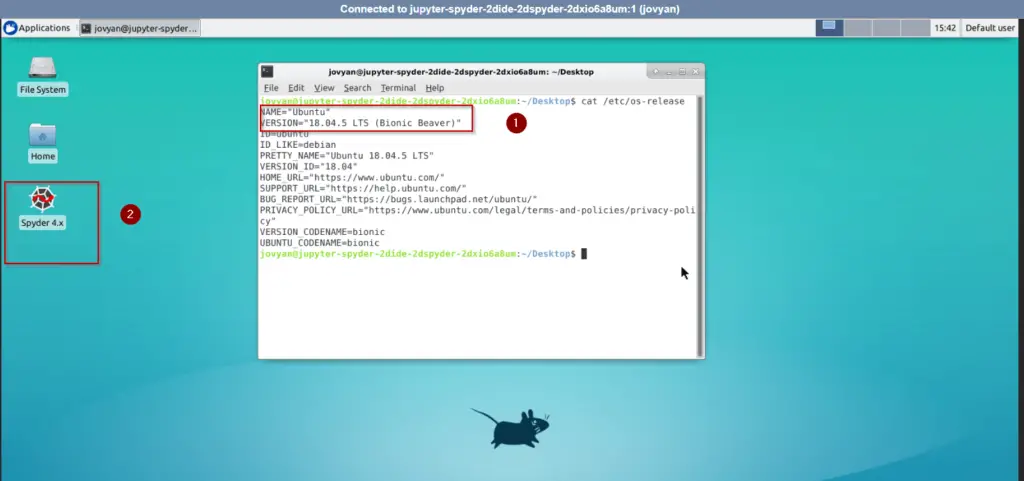
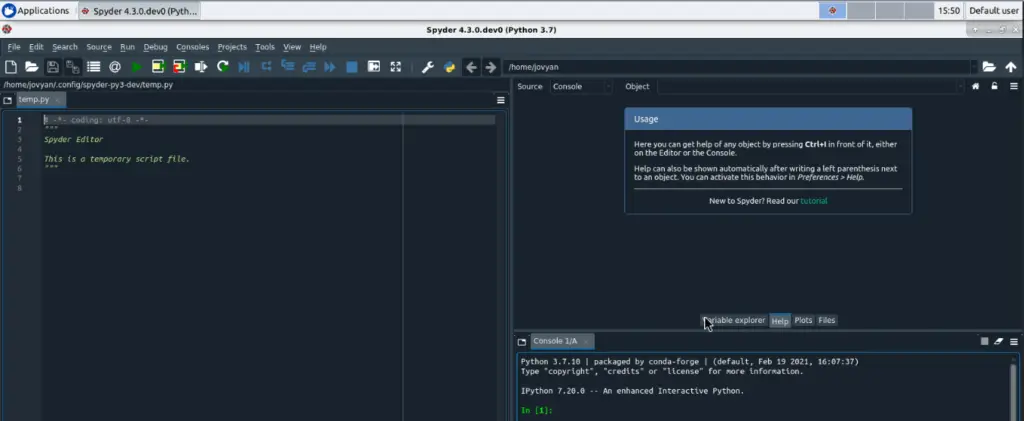
There you can <double click> on Spyder 4.x icon and try/test Spyder before installing it on your PC. Here Spyder version shows 4.3.0 and Python 3.7.
Download Spyder Python
Follow these steps to download Spyder Python for Windows 10.
Step1.1 – Visit the Spyder-ide.org website to download Spyder 4
Visit https://docs.spyder-ide.org/ and scroll down a bit for the Spyder Python download section. Select your Operating system either Windows or Mac.
Or Alternatively, Just click on Download button for Spyder_64bit_full installer for Windows 10.
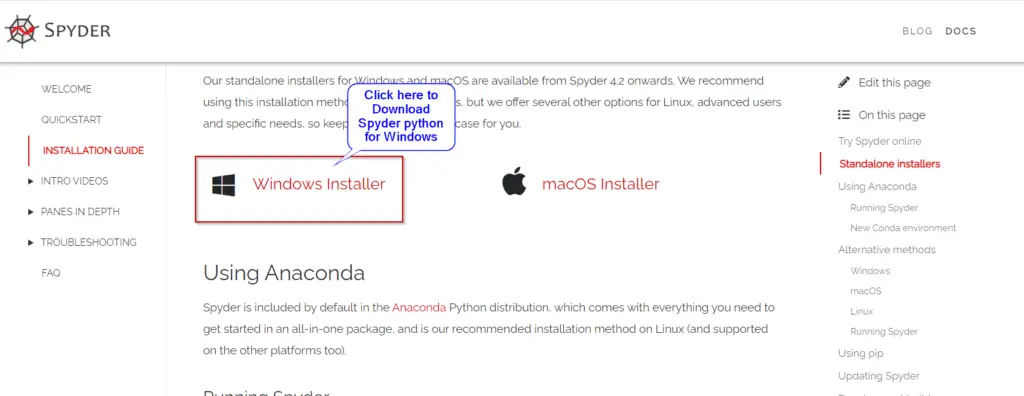
The size will be approx. 173MB. So it may take few seconds depending upon your internet speed.
The requirement to install Spyder 4
- Installation of Python program – It will install default python 3.7.9 while installation.
- Internet connection
- ~ 650MB of disk space
How to install Spyder Python in Windows 10
Checkout these simple steps to install Spyder 4 Python –
Step2.1 – Visit your Download directory and run Spyder installer
Go to your Download directory. Double click and Run Spyder_64bit_full installer. It will start Spyder setup wizard.

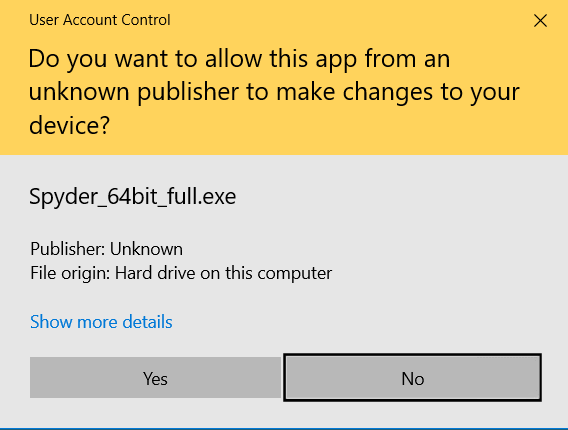
Step2.2 – Permit user access control
Like all software in Windows 10. Press “Yes” to allow Spyder app to make changes to your device.
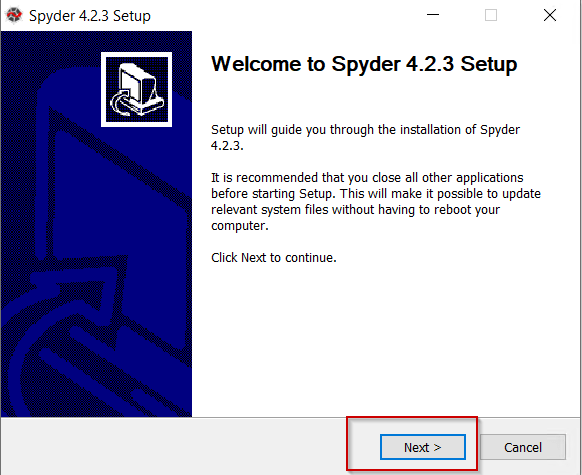
Step2.3 – Click “Next” on Spyder 4.2.3 Setup welcome page
On Spyder 4.2.3 welcome page, Select Next. It’s always recommended to close all other applications, while installation of Spyder 4 in Windows 10.
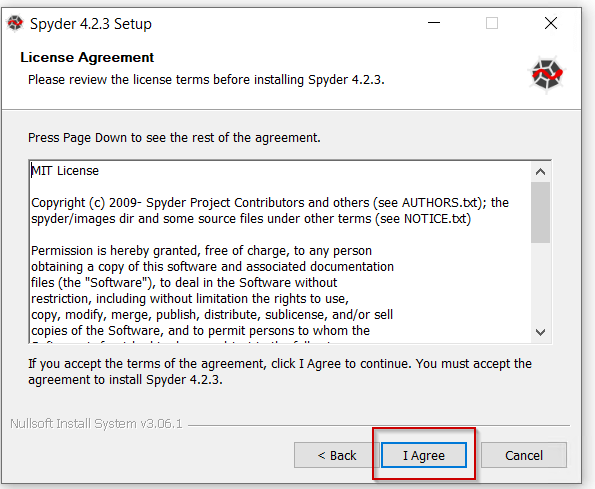
Step2.4 – Accept License agreement of Spyder 4.2.3
Please review and Click on “I Agree” button to move further in Spyder installation. By the way, Not sure who read all these License agreements before accepting 😉
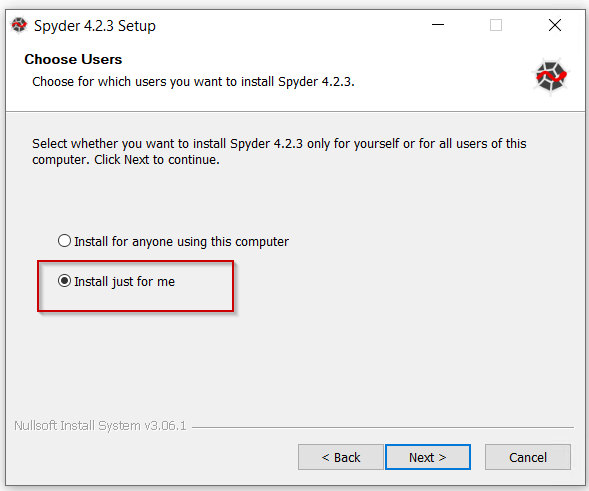
Step2.5 – Choose Users preference
Here you need to choose for which user you want to install Spyder 4.2.3. I am the only one who is using my system. So I will go with the “Install just for me” option. If you have multiple users using your system, you can select “Install for anyone using this computer“.
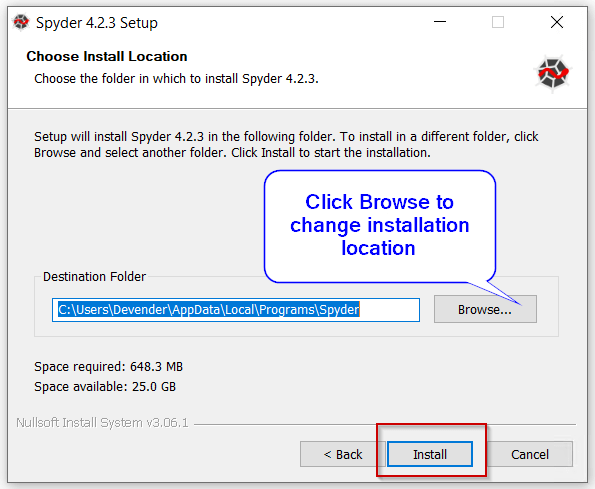
Step2.6 – Choose Spyder 4 installation location
Spyder requires around 650 MB of space to install all software like Python, QT and Spyder itself. The default installation directory would be C:\Users\”username”\App\DAta\Local\Programs\Spyder. But if you want to customize the installation folder. Click on Browse and select your preferred directory or drive to install Spyder 4.2.3.
Select <Install>.
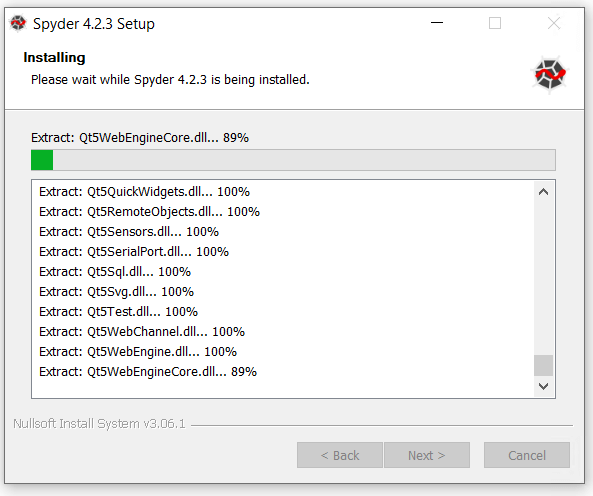
Step2.7 – Wait for Spyder installation to complete
Generally Spyder installation take 5-10 minutes to complete. If you computer is slow, then it may few take few more minutes.
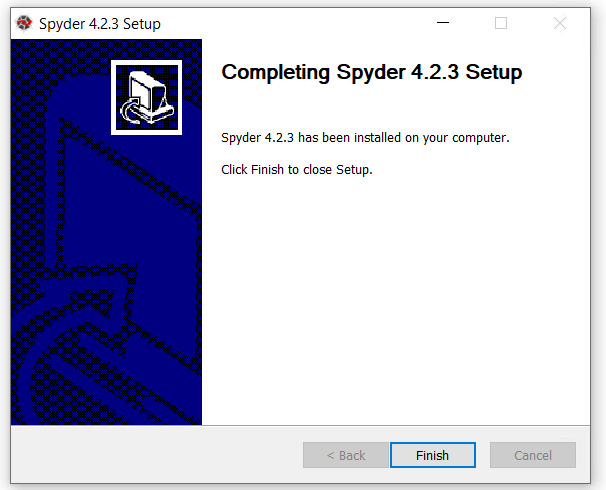
Step2.8 – Click Finish
Click Finish to complete installation wizard.
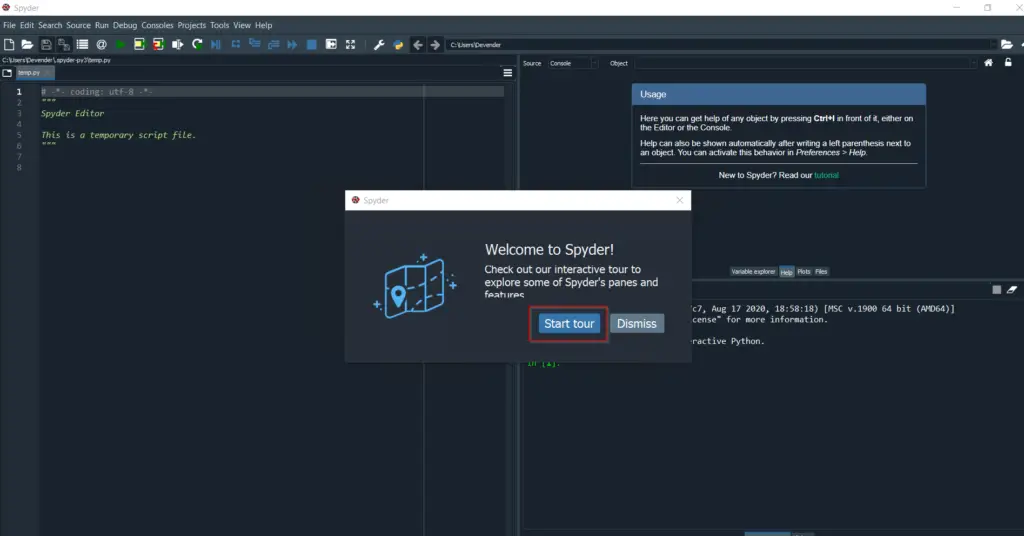
Step2.9 – Launch Spyder IDE
- Type “Spyder” in the <Windows search> bar and click “open“
It will take a couple of seconds to Launch, so be patient. Once Spyder will Launch, you can click on the <Start tour> button to explore pane and features of Spyder IDE. It will be helpful if you are using Spyder 4 console first time.
How to check the Spyder Python version?
Checking the Spyder version is fairly simple. Once you will Launch Spyder GUI, follow these steps –
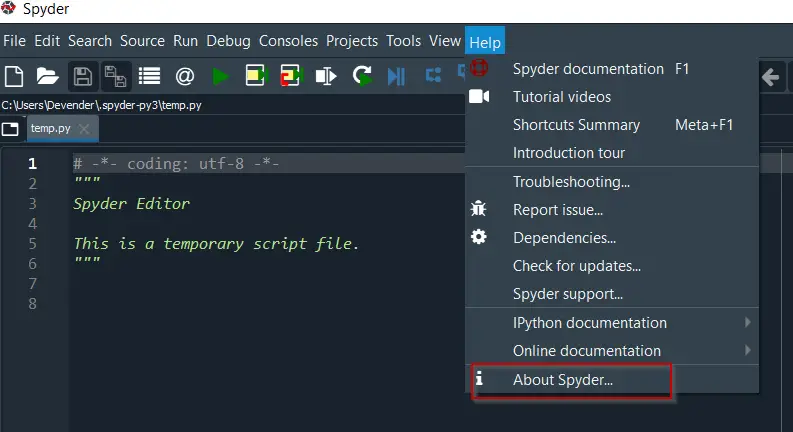
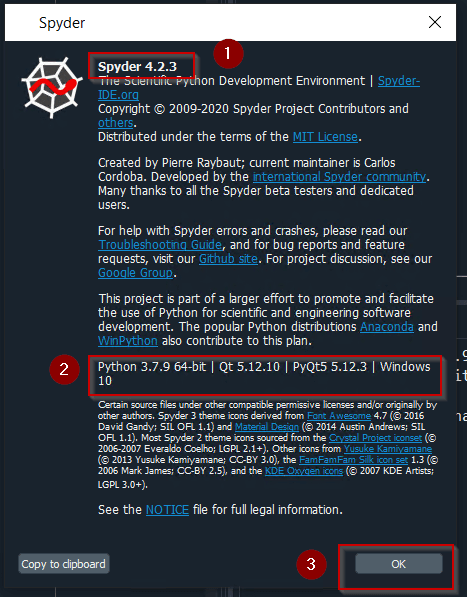
Step2.10 – Choose “About Spyder” in “Help” menu
- Select “Help” in the menu
- Click “About Spyder“
Step2.10 – Check Spyder and Python version
If you will see Spyder version is 4.2.3. Python version is 3.7.9, Qt 5.12.10 an d PyQt version is 5.12.3 installed as bundle with spyder 4.2.3.
Click “OK” to close it.
How to use Spyder Python
Let me show you “How to use Spyder” by running a sample program. After this, you need to move further on your own.
Step2.11 – Create a new “file” and save it
- Select File > New file or Press <Ctrl + N> on your keyboard
- Click on File > “Save As” or Press <Ctrl + Shift + S>. Provide a user-friendly file name and save. I will give the name “hello-world”.
Step2.12 – Write your first “Hello World” program in Spyder
If you are a Python programmer or developer. You can write any code you want. But if you are a novice, then you can paste this code as your first program.
# Test Spyder Program
def hello():
    """Print "Hello World" and return None."""
    print("Hello World")

# Main program begins here
hello()
- Press <Ctrl + S> to save file again. Now press F5 on your keyboard else click “Run” in the menu and then “Run” again in the drop-down to execute the program.
- You can change or Leave <Run settings> default.
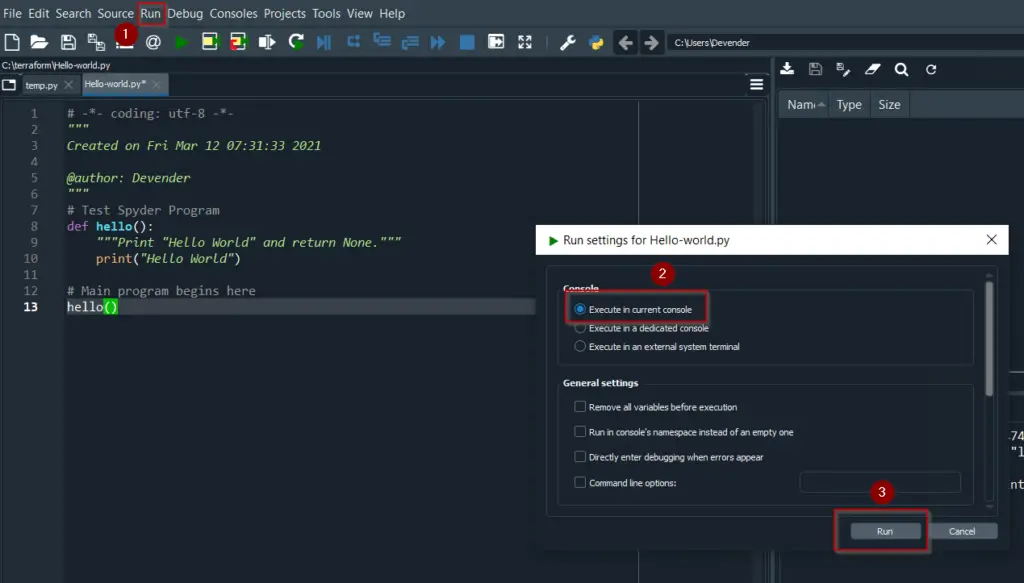
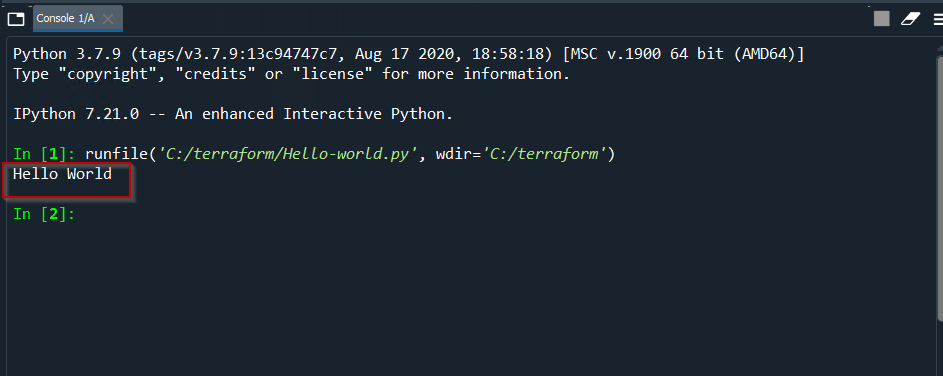
Once you will click on “Run“. It will print “Hello World” in output as shown in image.
Python 3.7.9 (tags/v3.7.9:13c94747c7, Aug 17 2020, 18:58:18) [MSC v.1900 64 bit (AMD64)]
Type “copyright”, “credits” or “license” for more information.IPython 7.21.0 — An enhanced Interactive Python.
runfile(‘C:/terraform/Hello-world.py’, wdir=’C:/terraform’)
Hello World
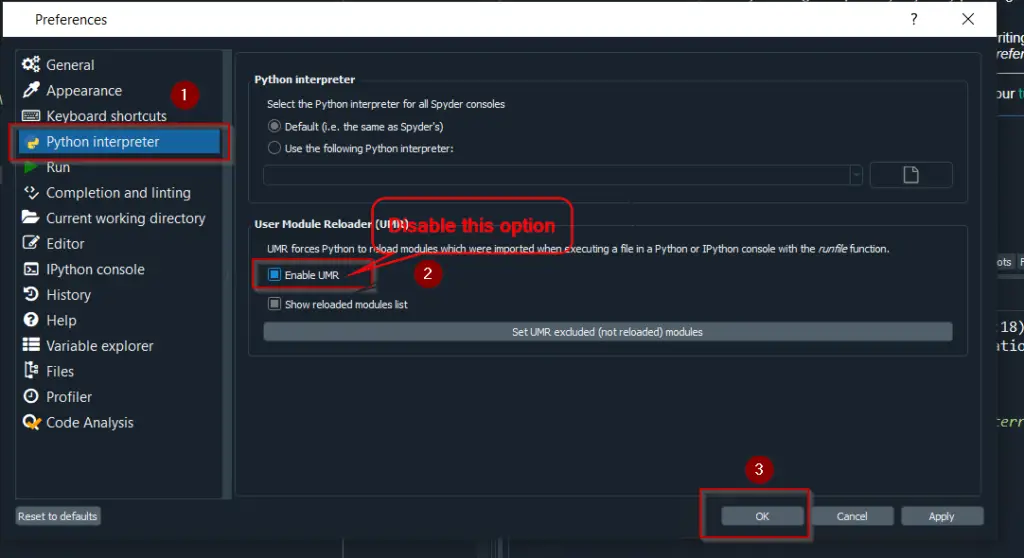
How to Disable “Reloaded modules” (UMR) messages in Spyder
If you are getting messy “Reloaded module <Module name> message. I will get this solved for you. Actually, it occurs due to UMR <user module reloader>. UMR forces python to reload deeply modules during import while running a python script using an inbuilt runfile.
To avoid this “Reloaded Module> extra information in output follow these steps –
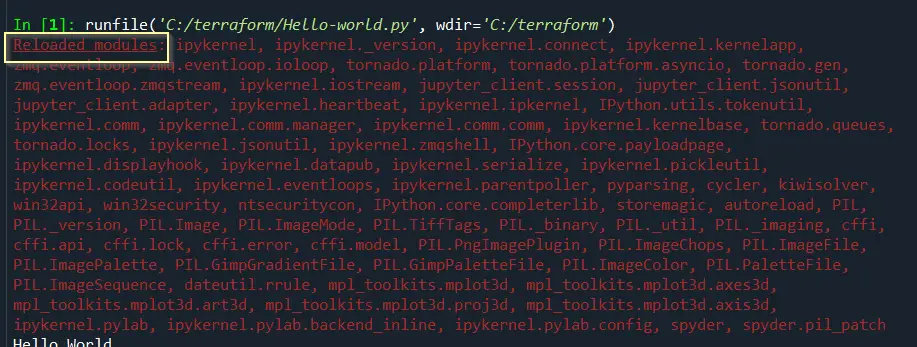
- Go to Tools -> Preferences -> Python Interpreter > User Module Reloader.
- Here, Deselect the checkbox with text as “Enable UMR” to completely disable it. Alternatively, you can only deselect “Show reloaded module list“. The choice is yours. I keep UMR disabled.
- Close and launch Spyder again to make changes effective.
You will not get any Reloaded_modules issue now. 🙂
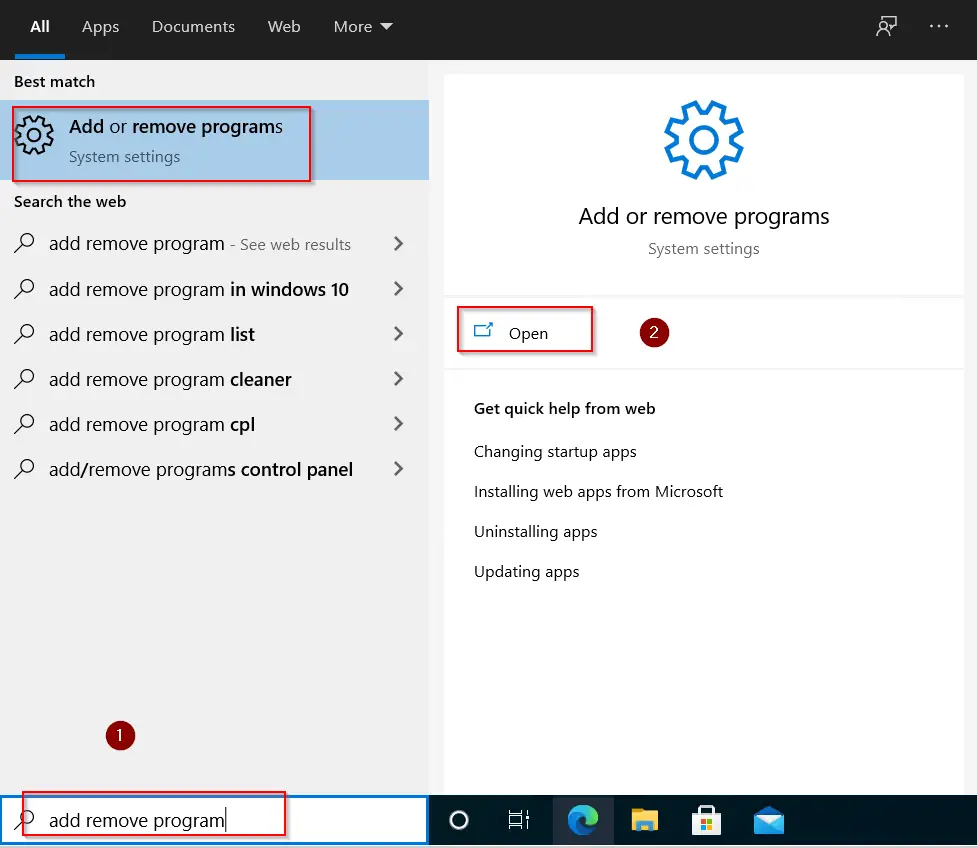
How to Uninstall Spyder 4 in Windows 10
If you want to uninstall Spyder 4 python from Windows 10 due to any reason. You can follow this process to easily clean it from your system.
Step3.1 – Open “Add remove programs”
Type “Add remove programs” in <Windows search> bar.
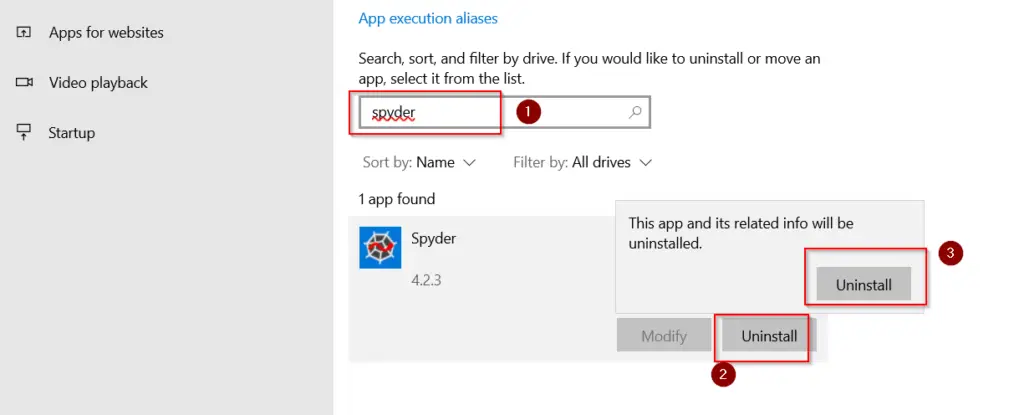
Step3.2 – Uninstall Spyder python
- Type and search for “Spyder” in App list
- Select uninstall and Again click on Uninstall.
- Select “Yes” in the User access control dialogue box.
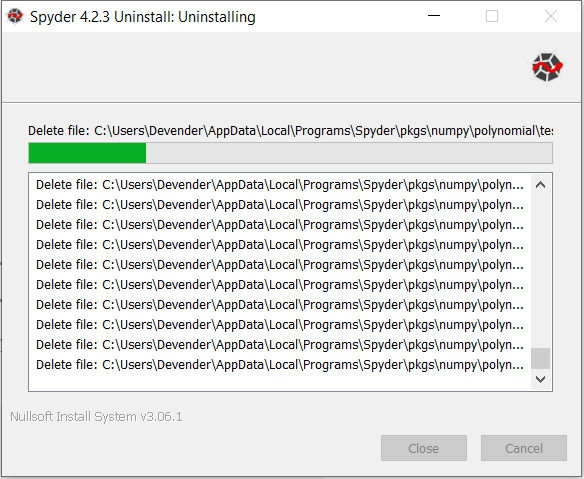
- It will take some time to uninstall Spyder 4.2.3. Then Click Close.
Fix: Assertion failed: Protocol wrong type for socket [10041], python stopped working
If your Spyder doesn’t launch and getting an “Error : Assertion failed: Protocol wrong type for socket [10041] (Cci\zeromq 154902559 4292\work\src\ip.cpp:417) in spyder” . There may be n number of reason behind this error. I have jotted down a few for you. To fix this issue, try the below-mentioned methods. I hope it will help –
Method 1- Try disabling your Antivirus and Windows Firewall
First and foremost, Disable your Antivirus and Windows firewall. Then try to launch Spyder. Because sometimes, the firewall or Antivirus doesn’t allow it to launch.
Method 2 – Check for Anaconda and Python compatibility
If you have installed Anaconda and Python in your system. Check for the compatibility of these two. Visit this link and check for the Python package included in Anaconda.
For example – Packages included in Anaconda 4.4.0 for Python version 3.6. Make sure you have these versions are same, otherwise you may encounter an Assertion failed error. If your Python version is different then Anaconda. Install the Correct version. For legacy or old versions.
Method 3- Install Spyder without Anaconda
You can install Spyder without anaconda by following steps 2.1 to 2.10 as mentioned in this post. Also Python will get installed automatically with spyder. You don’t need to worry on version compatibility.
Video Tutorial
If you still have any doubts. Checkout this amazing Video on How to install Spyder 4 with Python in Windows 10.
Conclusion
If you are new to Spyder IDE. I hope you will be able to install and run your first code in Spyder Python. If you run into an issue. You can just leave your comment. I will try to help you to the best of my knowledge.
![How to fix “ng command not found” error for node.js @angular/cli [7 solutions]](https://cloudlinuxtech.com/wp-content/uploads/2022/03/How-to-Fix-ng-command-not-found-error-angular-cli-270x161.png)
![How to fix “nodemon command not found” error – [5 Solutions]](https://cloudlinuxtech.com/wp-content/uploads/2021/12/How-to-fix-nodemon-command-not-found-error-270x161.png)
![Nodemon app crashed – Waiting for file changes before starting [5 Solutions]](https://cloudlinuxtech.com/wp-content/uploads/2022/03/Nodemon-app-crashed-Waiting-for-file-changes-before-starting-270x161.png)
Thanks for this instruction. However, could you please add how to install modules and set up virtual environments when installing Spyder without Anaconda? What’s the preferred way in a standalone Windows installation?
Thanks for the input Chris. I will add these instructions soon.