
If you are a developer and want to customize your zsh shell, I will teach you how to install the zsh-syntax-highlighting package in Linux and macOS. This package enables the highlighting of commands, while you type that on your terminal. It helps you to catch syntax errors and helps you to review the command.
In addition to the zsh syntax highlighting, I will also teach you, how to install the zsh-autosuggestion package, which suggests commands as you type, based on history or completions.
This process differs a little if you have the oh-my-zsh theme installed. But you don’t have to worry, I will let you know how to install plugins Auto-suggestion and syntax-highlighting in the oh-my-zsh theme.
If you don’t know the difference between zsh and oh-my-zsh, let me give you a quick note –
Zsh vs oh-my-zsh
| Zsh | oh my zsh |
|---|---|
| The z shell (zsh) is an extended Bourne shell with improvements with some features of bash, tcsh and ksh. | The oh my zsh is a community-driven framework to manage your zsh configurations |
| zsh is the default shell in macOS. It is used as an interactive login shell and command interpreter for shell scripting | It comes bundled with thousands of helpful functions, helpers, plugins, themes and many features to customize Z shell |
How to install the” zsh-syntax-highlighting” package in Linux
To install the zsh syntax highlighting package and customize your zsh, follow these simple steps –
Method-1 Install the “zsh-syntax-highlighting” package using the Ubuntu repository
If you are using Ubuntu or Debian based Linux, You can just open a terminal and can install zsh-syntax-highlighting in a single command.
Step1.1 Refresh or update Ubuntu repository
It is always recommended to update your package repository information before installing any package in Linux. Otherwise, you may get an “unable to locate package” error.
% sudo apt update
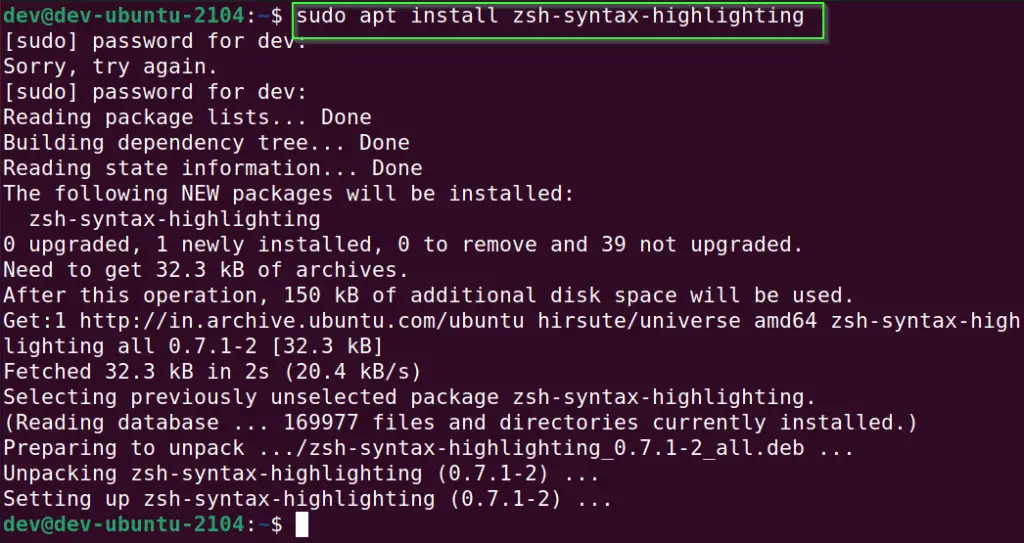
Step1.2 Install zsh-syntax-highlighting package
Run the following command to install the package.
% sudo apt install zsh-syntax-highlighting
Method-2 Install the “zsh-syntax-highlighting” using git repository
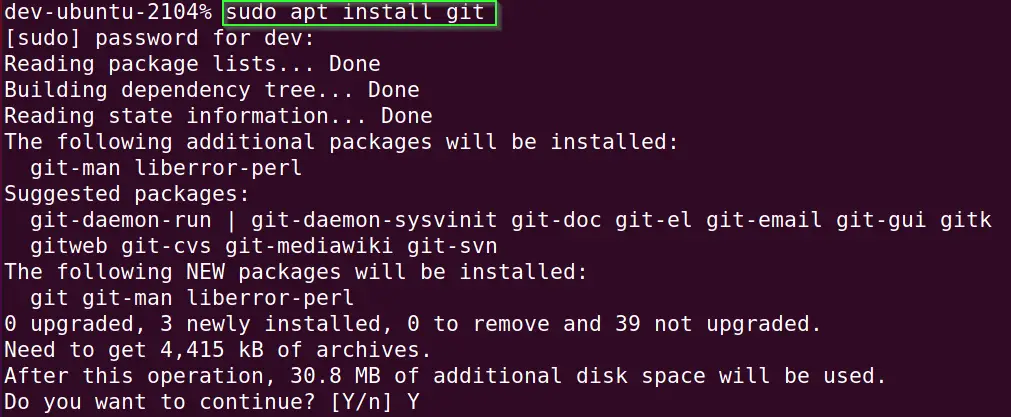
Step-2.1 Install git on your system
By default, the git package is not installed, run the following command to install “git”.
% sudo apt-get install git
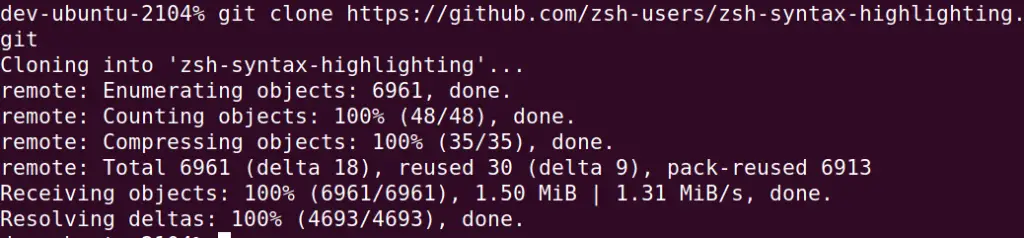
Step-2.2 Clone the zsh-syntax-highlighting repository from git
You need to download or clone the zsh-syntax-highlighting repository to your local system. It applies to any Linux distribution and macOS.
git clone https://github.com/zsh-users/zsh-syntax-highlighting.git
Step2.3- Add the zsh-syntax-highlighting extension to the .zshrc
Once you have downloaded the git repository, you need to add the line “source /path to zsh-syntax-highlighting.zsh” in the .zshrc file.
Simply run the below-mentioned command –
echo "source ${(q-)PWD}/zsh-syntax-highlighting/zsh-syntax-highlighting.zsh" >> ${ZDOTDIR:-$HOME}/.zshrc

Step2.4- Run “Source” command to enable zsh syntax highlighting
You can run the source command either on the .zshrc file or can provide the path to syntax highlight script. it will enable syntax highlighting in your zsh.
source ./zsh-syntax-highlighting/zsh-syntax-highlighting.zsh
- Check out these before and after images of installing zsh syntax highlighting. Commands and syntax are getting highlighted with different colours after installing package.


How to install the” zsh-syntax-highlighting” plugin for “oh my zsh” framework
Step3.1 Install “oh my zsh” framework using curl, if not installed already
Run the following command to install the “oh my zsh” framework from Github. It will execute the “install.sh” script to install the “oh my zsh” framework automatically.
sh -c "$(curl -fsSL https://raw.githubusercontent.com/robbyrussell/oh-my-zsh/master/tools/install.sh)"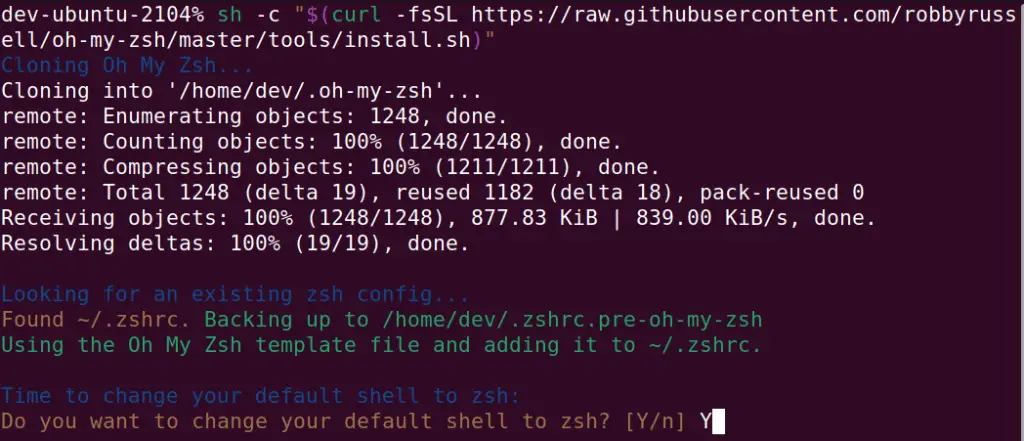
In case you get zsh: command not found: curl error, it means you need to install curl package using the following command
% sudo apt install curl
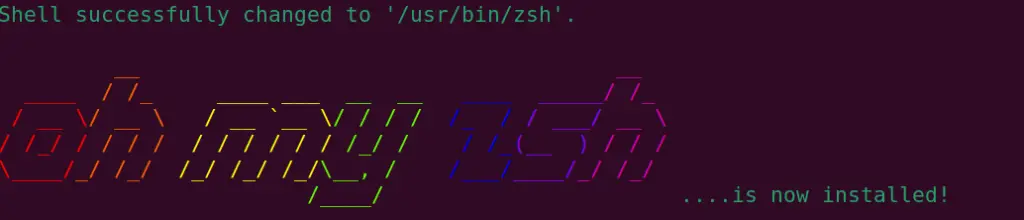
Once you will install the “Oh my zsh” framework and change your default shell to zsh successfully. You will get the following screen as shown in the image.
Step-3.2 Install git, if it’s not there already
% sudo apt-get install git
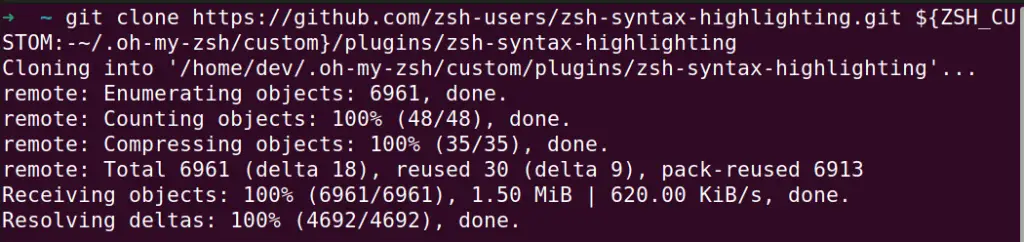
Step3.3 Download zsh-syntax-highlighting from the git repository
Clone the “zsh-syntax-highlighting” repository from github.com onto your local system.
git clone https://github.com/zsh-users/zsh-syntax-highlighting.git ${ZSH_CUSTOM:-~/.oh-my-zsh/custom}/plugins/zsh-syntax-highlighting
Step3.4- Append “.zshrc” file with zsh-syntax-highlighting plugin
- Append zsh-syntax-highlighting to
plugins()section in the .zshrc file using your favourite editor.
I will use vim editor to open the .zshrc file and add it as shown in the image.
plugins=(git zsh-syntax-highlighting)
save and exit vim editor by pressing the “ESC” key and typing the “:wq!” command on your keyboard.
How to install the” zsh-autosuggetions” plugin for “oh my zsh” framework
The zsh-autosuggestions plugin suggests commands as you type based on history and completions.
Step3.5 Download zsh-autosuggestions plugin from the git repository
git clone https://github.com/zsh-users/zsh-autosuggestions.git $ZSH_CUSTOM/plugins/zsh-autosuggestions
Step3.6- Append “.zshrc” file with zsh-autosuggestions plugin
- Append zsh-autosuggestions to
plugins()section in the .zshrc file using your favourite editor.
I will use vim editor to open the .zshrc file and add zsh-autosuggestions. Also, keep all other plugins as is. Don’t remove them.
For example, I have the zsh-syntax-highlighting plugin installed already. I will just append “zsh-autosuggestions” in the last.
plugins=(git zsh-syntax-highlighting zsh-autosuggestions)
save and exit vim editor by pressing the “ESC” key and typing the “:wq!” command on your keyboard.
Step3.7- Restart terminal
- Reopen terminal and you will see zsh syntax highlighting and autosuggetions in action as shown in image.

How to tweak zsh syntax highlighter
Tweak1 – Prevent command lines longer than a fixed number of characters from being highlighted
- Set variable
${ZSH_HIGHLIGHT_MAXLENGTH}to the maximum length as per your requirements.
ZSH_HIGHLIGHT_MAXLENGTH=512
Tweak2 – To activate a highlighter, add it to the ZSH_HIGHLIGHT_HIGHLIGHTERS array in ~/.zshrc,
For example:
ZSH_HIGHLIGHT_HIGHLIGHTERS=(main brackets pattern cursor)
By default, $ZSH_HIGHLIGHT_HIGHLIGHTERS is unset and only the main highlighter is active.
Visit this link, if you want to implement a new highlighter in zsh
Frequently asked questions
Does Mac use Bash or zsh?
zsh is the default shell in macOS “Catalina” or later. But you can always switch to “BASH” as per your requirements. Apple already announced that zsh will be their default shell.
What is zsh written in?
zsh is written in the c programming language. zsh is full of features and is frequently used to run scripts.
What shell does Ubuntu use?
Ubuntu’s default shell is bash but you can always install zsh and switch it to zsh by typing the “zsh” command on the terminal.
Does manjaro use bash or zsh?
It depends on the Graphical environment you are using in manjaro Linux. For example, if you are using GNOME edition uses zsh by default and Plasma or XFCE uses bash.
Conclusion
Adding syntax highlighting and autosuggestion to your zsh is always fun. You can customize and manage your favourite shell in your own way.
Let me know, What is your favourite shell? Do you use the oh-my-zsh framework? What all plugins have you installed in your system. You can leave a comment if you like this post and help others by sharing it.

![How to fix “ng command not found” error for node.js @angular/cli [7 solutions]](https://cloudlinuxtech.com/wp-content/uploads/2022/03/How-to-Fix-ng-command-not-found-error-angular-cli-270x161.png)
