Today, we will discuss “How to deploy a virtual machine in Azure“, There are many ways to do this, but I will showcase an easy way to get a VM deployed in Azure. You don’t need to be a techie to install a virtual machine in Azure.
Share this Image On Your Site
For the last couple of years, cloud computing is growing and customers are attracted to it. The client wants to reduce cost and infrastructure on-premise and looking at cloud vendors to fulfil their need.
Microsoft Azure is one of the major players and competing with AWS and Google Cloud in the Cloud computing era and it’s really growing very fast. If you have started your cloud journey and as a beginner, you want to deploy your first virtual machine in Azure or cloud, this tutorial is for you.
Introduction
In Azure, you don’t need to own any hardware, you have the flexibility to create a virtual machine and get this deployed without owning any infrastructure on-premise. Still, you need to manage your VM from the perspective of the operating system, software installation and patching etc.
Azure offers it as IAAS (infrastructure as a service) and you can choose your VM as per your computing requirement.
Use cases of Virtual machine in Azure cloud
There are many use cases of the requirement of a virtual machine, a few of them are –
# 1 Production environment
You can quickly deploy VM’s and can install your business applications to run your production environment and can scale up or down VMs as per your business need.
# 2 Test and Development environment
If you are not willing to host the production environment in the cloud and want to keep it on-premise Azure gives you the option to run your test and dev environment in the cloud. You have the flexibility to quickly deploy VM’s, test and develop your code and get this replicated to your Production.
# 3 Hosting Applications in the cloud
In business, the demand for the application can fluctuate and it’s wise to keep your Infrastructure in Cloud (debatable topic) to meet that scale up requirement in few clicks or by automating. You don’t need to think twice economically also, as you have to pay only when you use them.
# 4 Extend your datacenter
You can easily connect your on-premises VM’s or infrastructure to the Azure cloud and can extend or set up Disaster recovery for your critical business applications.
There are many ways to install VM (Virtual machine) in Azure like using Azure portal, PowerShell, Azure CLI and Arm templates. Deploying VM in Azure using Azure portal is the quickest way because it’s browser-based and even a novice can implement it easily. This tutorial focuses more on an easy way to deploy for VM in Azure for beginners, who want to learn more on the cloud.
Let’s quickly deep dive into it.
Pre-requisite to deploy a virtual machine in Azure
To deploy a Virtual machine in Azure you need two things –
- PC with Internet connectivity – It’s an obvious requirement, if you are going to create a virtual machine in Azure cloud, to access the Microsoft Azure portal you need a desktop or laptop with the browser installed and good internet connectivity.
- Azure subscription – is an Azure account you would need to create a Virtual machine in Azure and Microsoft offers 12 months of selected free services, you will also get 1 month 200$ (INR 13300) credit to explore its popular services.
You can create a free Azure account and you just need an email ID and credit card to achieve this. A few cents (INR 2) transaction will be done to your credit card for verification and it will be reimbursed by Microsoft after 30days, once your trial period expires. You won’t be charged until you choose to upgrade your plan after the trial period completes.
Free Trial Subscription Video
Azure signup free trial subscription
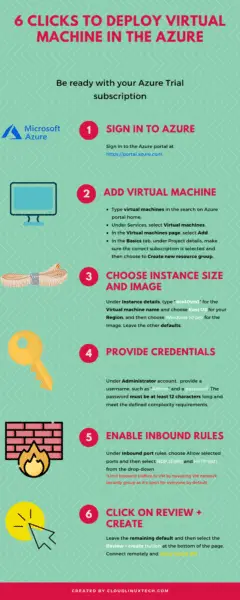
Steps to deploy Virtual machine in Azure
Below mentioned are the steps to deploy virtual machine quickly, I will show you with an example of “windows 10 VM” deployment
Step #1
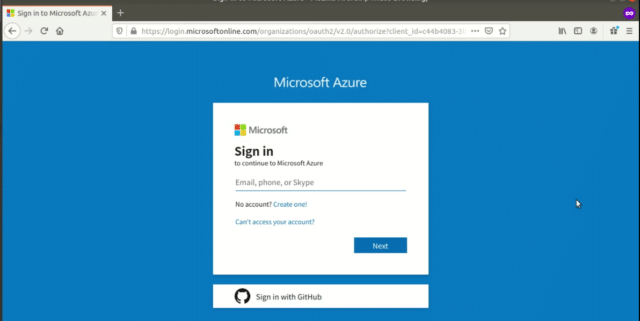
login to Azure portal “https://portal.azure.com“ and sign in with your ID, created in the pre-requisite section.
Step #2
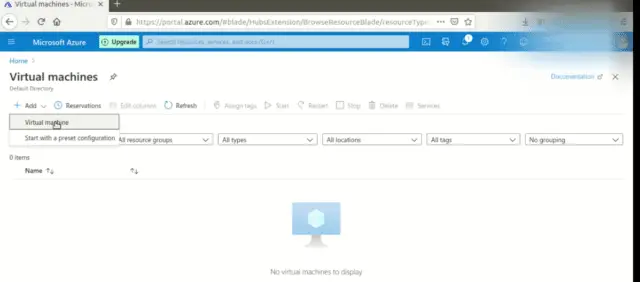
Click on Virtual machines on the Azure portal home page.
![]()
Step #3
Tap on Add and then the virtual machine
Step #4
On the “Create virtual machine” page, the Subscription will be “Free Trial” by-default, if you don’t have paid subscription.
In the Resource group section, You can “Create new” resource group or you can leave it as is, it will automatically create one for you depending upon the VM name.
Resource group act as a container for all your resources like VM, Network and disks etc. which shares the same permission, policies and lifecycle.

Step #5
In instance details, provide your “virtual machine name” and you will see Resource group name changes automatically as “win10vm1_group“.
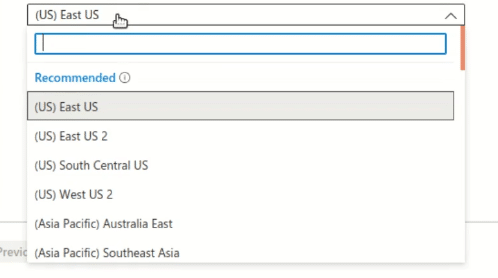
Keep Region as default as “East US“.

if you want to change it, select as per your preference from the drop-down menu, keep in mind, not all VM sizes are available in all regions.
Step #6
Keep availability option as “No infrastructure redundancy required“. There are more options to select like “Availability zone” or “Availability set” as per the criticality of your VM to prevent outages.

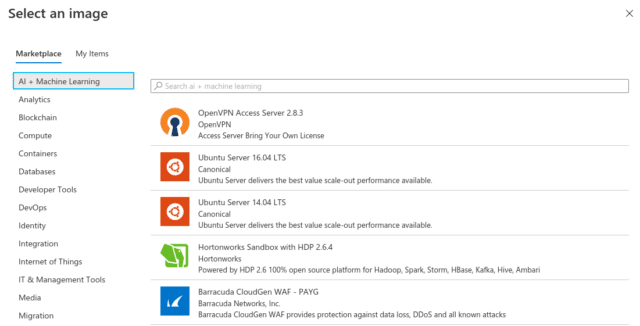
In image select “Your preferred VM image“, I am using Windows 10 Pro, you can “Browse all public and private images” from the marketplace if your image is not available by default in the drop-down list.
Step #7
Select No in “Azure Spot Instance“. Azure spot offers instances or unused capacity on discounted rates and can be used for non-critical VM’s because Azure can recall this capacity for “pay as you go workloads” any time.
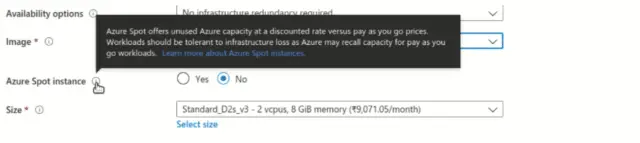
VM size will be selected by default as you can see for windows 10, it has selected “standard_D2s_v3 – 2 vcpus, 8GiB memory“. But you can click on the “select size’ and look for the appropriate size for your VM in terms of resources.

Step #8
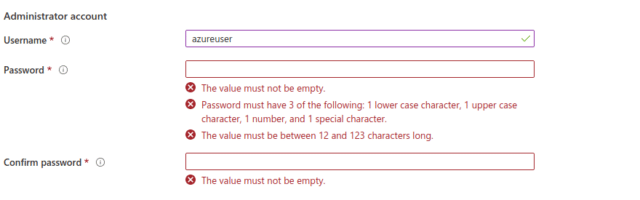
Give your Virtual machine administrator account credentials, admin username and password, keep in mind password must be complex and must meet these conditions –
- Must have 1 lowercase,1 upper case character, 1 number and 1 special character.
- password value must be between 12 to 123 characters long
Step #9
The “Allow inbound ports rules,” section allows you to open Inbound rules for specific ports, like 3389 for RDP (Remote desktop) or 80 for HTTP.
Every application needs some ports to be open for communication, in this section, you can allow those ports to communicate your application with the respective DB or their dependent applications.
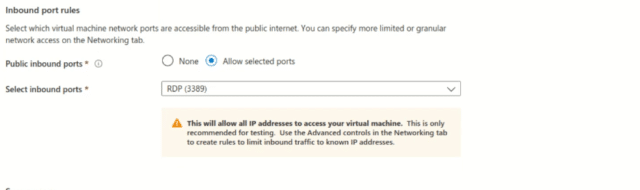
If you look closely, there is one warning flashing on, that says enabling this port will allow everyone to remote connect this Virtual machine, you need to fine-tune this inbound rule from network security group after VM deployment to limit traffic.
Step #10
If you have an Enterprise license already purchased for windows 10 or “VM” you are planning to deploy, You can save some money. Select “Yes” in the “Save Money” section and if you don’t have your license, select “No“. Microsoft will assign one to your Virtual machine.

At this point, you can click “Review + Create” and your virtual machine will get deployed, this is the quickest way to deploy a virtual machine in Microsoft Azure.
But if you want to know about other sections of Virtual machine deployment keep reading.
Step #11
Click on “Next Disk”, it will take you to the disk selection page,
You will have three Disk options – Standard HDD, Standard SSD and Premium SSD. We will keep Premium SSD disks as default for OS disk, which is fastest in terms of IOPS and latency. “Ultra Disk compatibility” option is also disabled as these ultra-high-performance disks are available for limited VM sizes and regions.

In “Encryption type“, Two options are available “Default Encryption at rest with a platform managed key” and “Encryption at rest with a Customer-managed key“. We don’t have any key management platform with us, so will select the default option.
Step #12
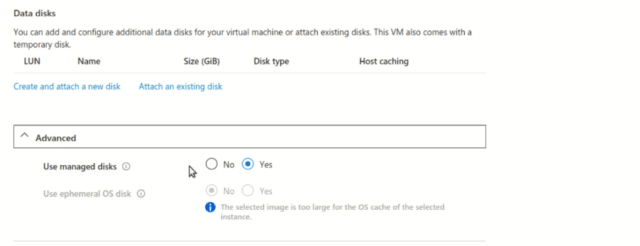
You have already selected OS disk as premium disk and if you want to add one more disk for data or application, you can click on Create and attach a new disk.
It’s going to be a “managed disk“, so keep that option as “Yes“. Ephemeral OS disk (Kind of free temporary, Low-performance OS disks) option is not applicable to the selected image (Windows 10) in our case.
Click “Next: Networking” to move ahead
Step #13
On the Networking page, you have options like Virtual network, Subnet, public IP, NIC network security Group, Public inbound ports (RDP 3389). We will keep all options default, in further posts, I will explain more on Azure Networking in coming posts, but if you are still curious to know about these options, read here.
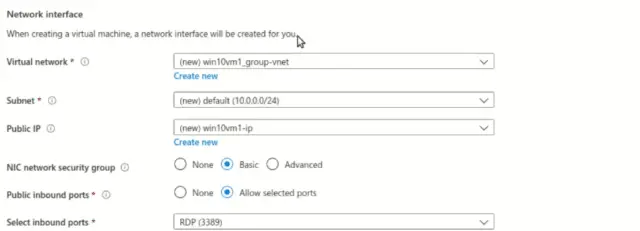
Keep “accelerated networking” ( enables low latency and high throughput) off as our Windows 10 image doesn’t support this option, you can select it as per your requirement.
“Load balancing” is generally required when you have an application which need to be load balanced behind the load balancer to handle either internet or intranet traffic or requests.
We will keep it as “No” as we don’t need it.
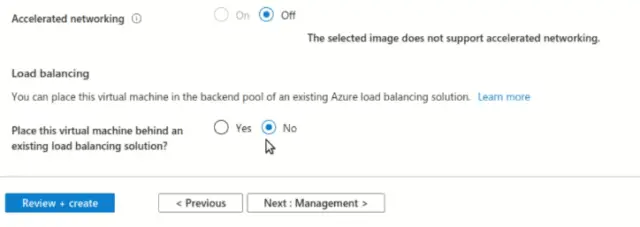
Tap on the “Next: Management” tab to move forward in the wizard.
Step #13
In the management and monitoring section, you can secure options related to monitoring and security of your Azure Virtual machine.
Keep “Boot diagnostic” on if you want to capture booting issues of VM. If you want to capture any diagnostic logs related to VM you will need a Storage account.
It will automatically create a storage account for diagnostic with the name “win10vm1groupdiag877”
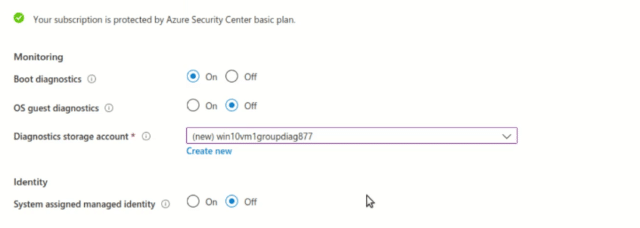
If you have any identity management solution in your infrastructure, you can integrate it here, otherwise select “Off“. I will keep it off.
The “Auto-shutdown” option may attract your attention if your Virtual machine need not run for 24*7. And can be shut down after production hours.
Enabling this option will save you a lot of money, as Azure doesn’t charge if your VM is not running. You can specify Shutdown time as per your timezone, and also can enable notification on your email before shutdown.
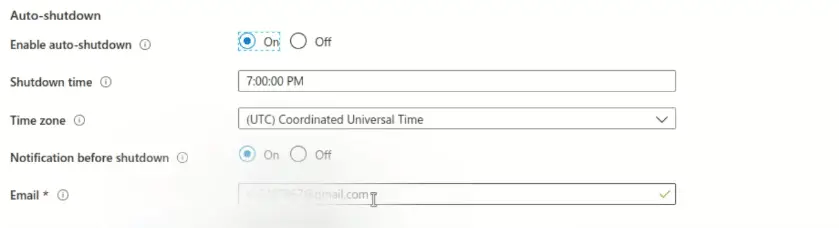
Once you are done, click on the “Next: Advance tab“.
Step #14
In the Advanced tab, you can specify Scripts, Agents or can supply data to add during deployment of Virtual machine.
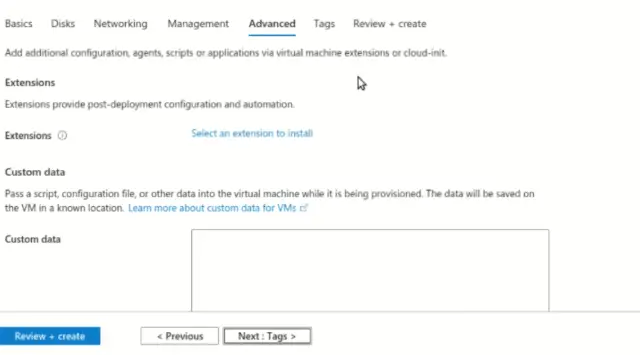
Click on “Next: Tags >”
Step #15
Tags are basically are the names or value pair, which enables you to filter out resources in Azure. You can also apply these tags to see the consolidated billing of multiple resources.
So I will suggest you, use Tag as a mandatory option in Azure for all your resources.
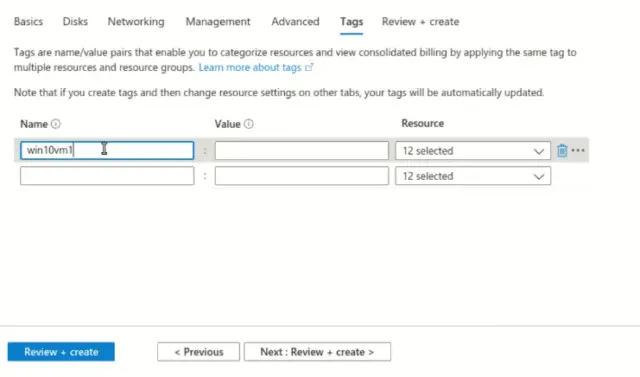
Click on “Next : Review + Create”
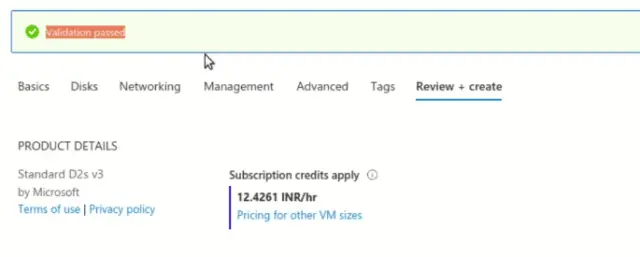
Step #16
This is the last stage of the deployment wizard, just check “validation must be passed“, if it fails, go back and do the necessary changes.
It will also show VM charges per hour. Have a look at your parameters summary and hit “Create”
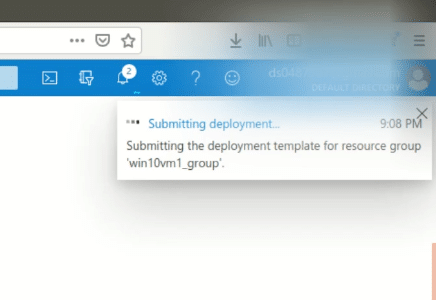
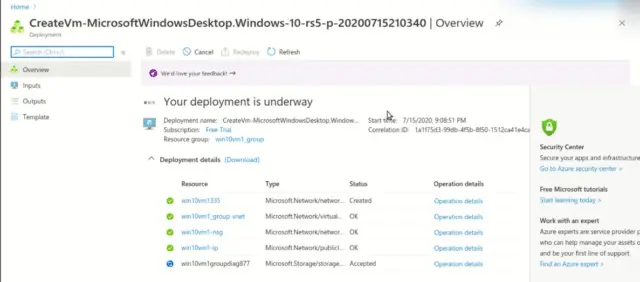
Step #17
Deployment of VM will take around 3-4 minutes and you can check the progress by clicking on Deployment notification (Bell icon) on the top right corner.
Step #18
Ways to Connect to Azure Virtual machine using RDP
Check your VM by clicking on Home – Virtual machine. Copy public IP address from your panel and access it remotely.
I have connected my Windows 10 VM using Remmina remote client software. Check out my step by step tutorial to know more about “How to connect Remote clients using Remmina” in Linux.

Watch Video
“How To Deploy a Virtual Machine in Azure – Quickstart”
Conclusion
Deploying a Virtual machine is pretty straightforward and no rocket science involved in it. I hope if you are a beginner and started exploring the cloud. This step by step tutorial on “How to Deploy Virtual machine in Azure cloud” will help you.
See you in the next post till that time keep learning… 💡