This post is all about building a web scraping tool using Azure data factory. Everyone nowadays maintains digital data and publishes it over the web either Privately or Publicly. If you are in a business or Job profile, where you need to extract the data from different websites or different sources. Then you need a tool for data or web scraping automatically from large dataset sources.
I will cover each step in detail with artefacts, which will help you to build a web scraping tool. I am sure, after reading this article you will be able to create a scheduled batch job to scrape data from different web sources automatically.
2 cents about Web scraping and Azure data factory –
Web scraping, also known as web harvesting or web data extraction technique, helps extract data from websites in different formats (JSON, Tables, CSV, plain text etc.). Web scraping can be done manually and automatically both depending on the size of the data. Manually can include copying and pasting data from different websites, while automation includes building batch jobs and pipelines around it. This process includes crawling or extracting data and storing it in central databases or data stores to retrieve it later.
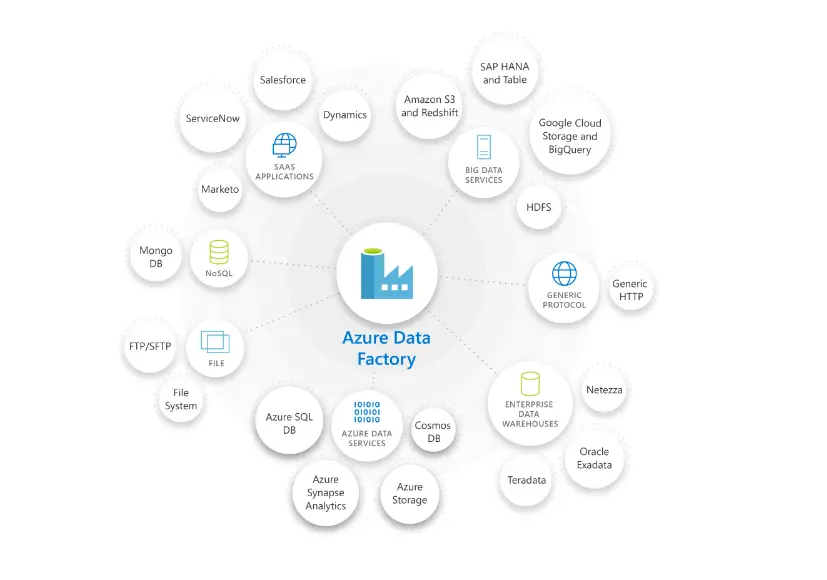
Azure data factory is one of the cloud services provided by Microsoft Azure available in more than 25 regions currently. Azure data factory helps you to build ETL (Extract, Transform and Load) processes by integrating more than 90 built-in connectors. It also helps you to orchestrate and monitor pipelines, which I will show in this article also. Azure data factory is based on IR (Integration runtime) infrastructure, which provides the following data integration capabilities
- Data flow in Azure compute environment
- Data movement to copy data in data stores using public or private networks
- Activity dispatch and monitor activities running on other compute services or database services like Azure data bricks, SQL databases and more.
- SSIS (SQL Server Integration Services) package execution in Azure compute environment
Azure data factory supports multiple connectors to ingest data and perform the ETL processes as shown in the image.
Pre-requisite to build web scraping tool
Below mentioned are the minimal pre-requisite to building a web data harvesting tool –
- Basic or little knowledge of Azure cloud e.g creating VM, storage accounts, PaaS services etc.
- Azure subscription
- Resource group
- Storage account
- Azure data factory cloud service access
- Laptop or desktop to install IR (Integration Runtime) and integrate with Azure data factory
Pro Tip
If you don’t have Azure subscription, you can create a free account which will give you access to $200 credit for 30 days to try Azure cloud services. You just need an email ID and a credit card . A few cents (INR 2) transaction will be done to your credit card for verification and it will be reimbursed by Microsoft after 30days, once your trial period expires. You won’t be charged until you choose to upgrade your plan after the trial period completes.
Enough overview and knowledge to start building a web harvesting tool Right? Let’s start building it.
Build a Web scraping tool – Step by Step
Building a web scraping tool will not be difficult for you if you will follow each step in this guide sequentially. I will use Azure data factory version 2 to extract the All-time Olympic Games medal table from the Wikipedia page and will store it in Azure storage. I will show steps using the Azure portal so that even a newbie can understand it. I will cover minimal/simple steps to create a data scraping tool in this guide, but it’s more complex if you go into deep web scraping techniques. Professionals can use Azure DevOps or Terraform modules for Azure data factory and can also automate the ETL process. There are companies in the market which offer readymade web scraping tools and services to quickly scrape any public website.
Step1 – Login to the Azure portal
The very first step is to log in to https://portal.azure.com, with your credentials. If you don’t have one, create it using the Azure free subscription program discussed in the pre-requisite section.
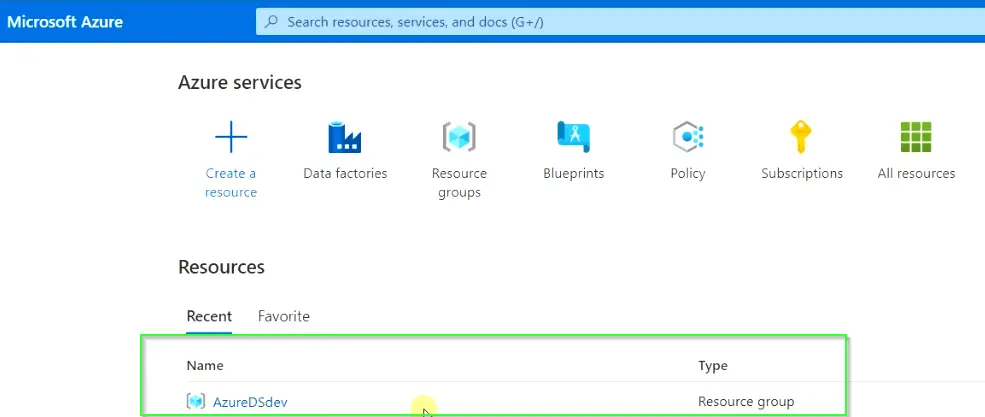
Step2 – Create a resource group or Use an existing one
I would suggest you create a new resource group for the web scraping tool. I will be using my resource group AzureDSdev, which I created especially for this guide. Creating a new separate Resource Group (RG) also helps you clean up the environment later if required.
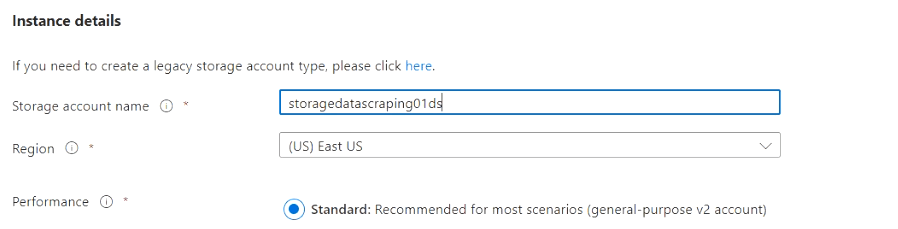
Step3 – Create a storage account or use an existing one
As I explained earlier, my recommendation would be to create a new separate storage account, but you can use the existing one also. I have created a storage account named storagedatascraping01ds, container inside will be used as the target to keep the scraped data.
Step4 – Create Azure Data Factory
Now let’s build the Azure data factory pipeline using the following simple steps –
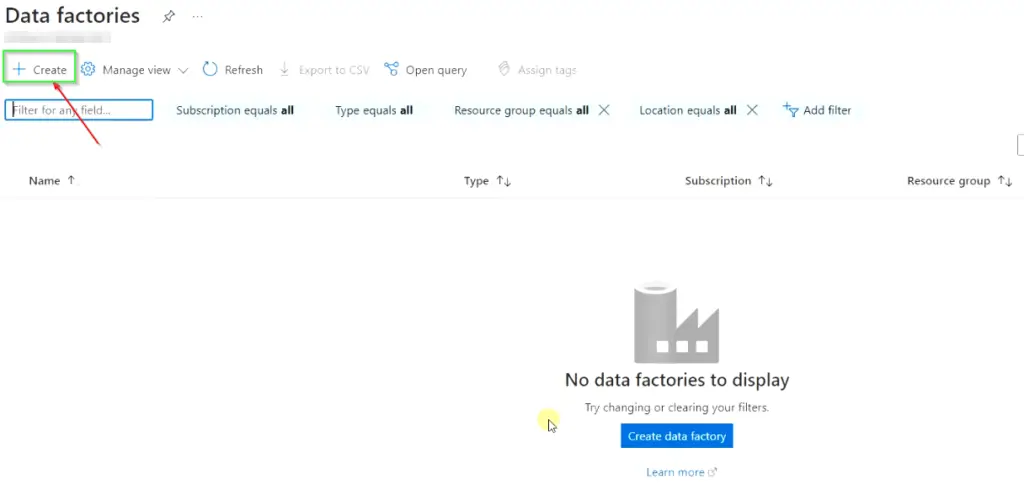
Step4.1 – Search and Open Azure data factories
- Search for Data factories service in the Microsoft Azure search bar as shown in the image.

- Click on Data factories service and open it. You will land on the data factories welcome page.
Step4.2 – Create a new data factory for your web scraping tool
- Click on
<+ sign> createit to start the data factory wizard.
Note** If you have never created any azure data factory earlier, you will see the “No data factories” display message.
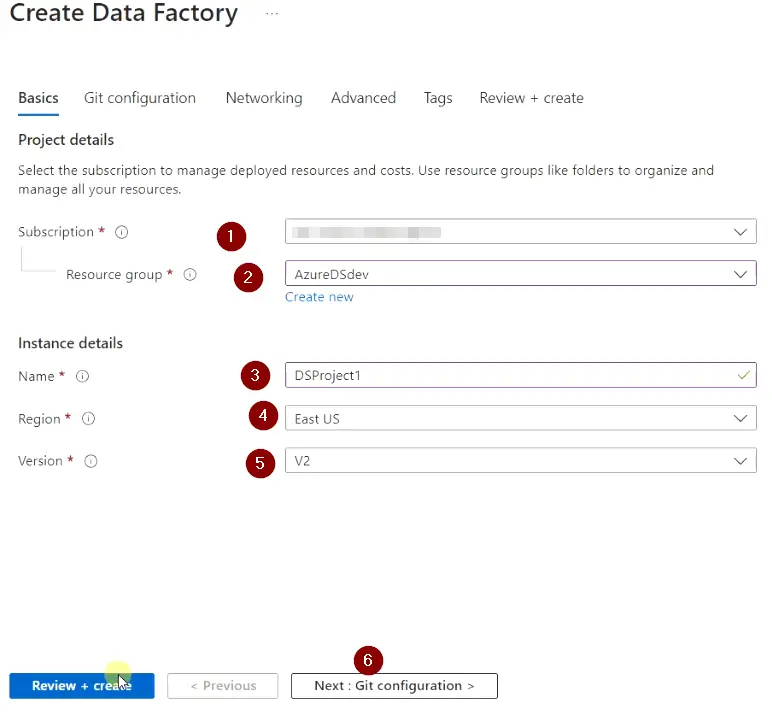
- Fill all the details in the Basics tab as shown in the image
- Subscription – Choose your subscription
- Resource Group – Select RG created in Step2
- Name – Provide your Instance’s unique name
- Region – Select the same region, you have chosen for your Resource Group
- Version – Azure data factory version 2
- Click
Next: Git configurationtab.
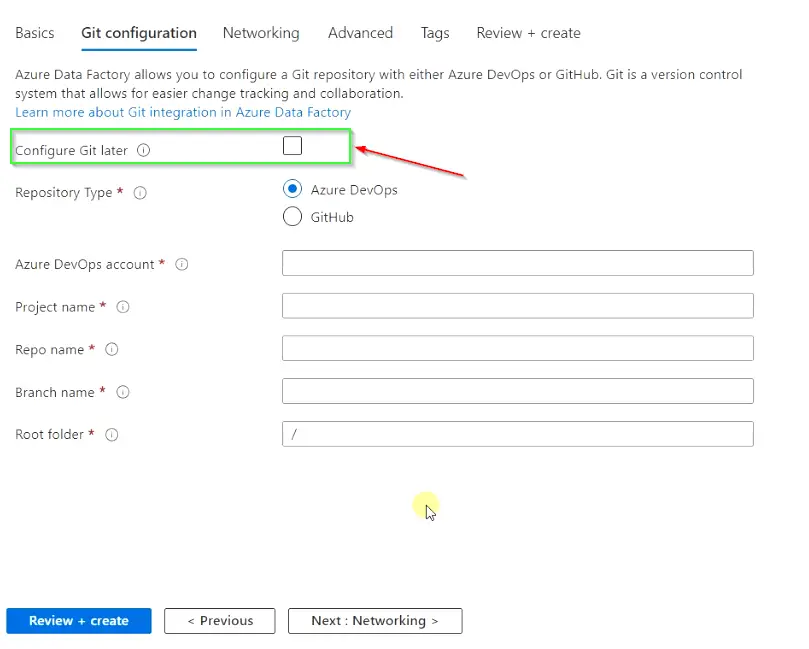
- Integrate the Azure DevOps of Github on this page
You can integrate Azure data factory with Azure DevOps or GitHub for building CI/CD pipelines and automation. You need to provide your Account details, Repo name, Branch name etc.
To keep it simple, I will just select <Configure Git later> option and will not integrate it with any DevOps account in this guide.
- Hit
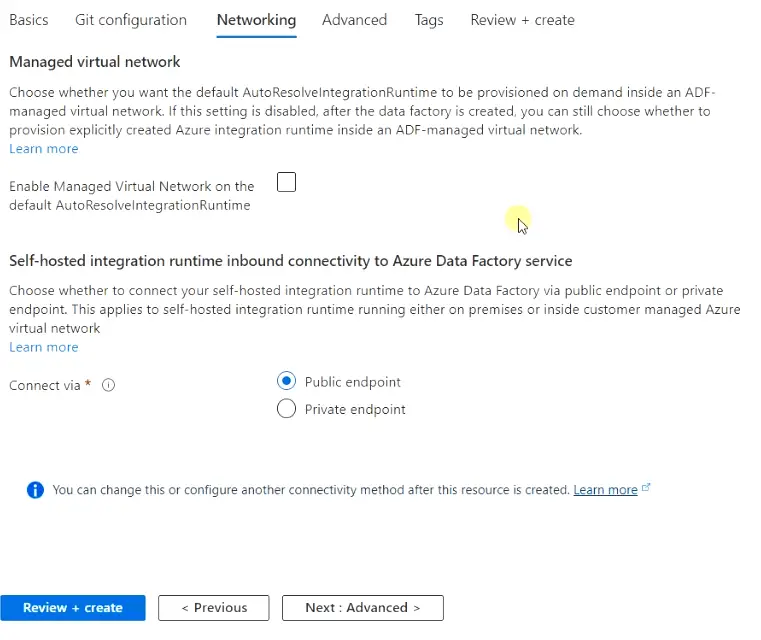
Next: Networkingtab to fill in networking details.
- Keep all settings default in the Networking section. For a production environment, the recommendation is to connect via a Private endpoint.
You can also enable the default AutoResolveintegrationRuntime option but I will use my deployed Integration Run time from the list in further steps. So leave this setting also as default.
- Click “
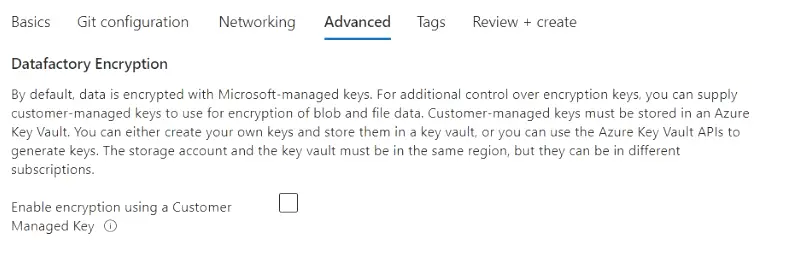
Next: Advanced” to move further.
- In the Advanced tab select the “Enable encryption using a customer-managed key” option. In case you want to manage Vault keys using a third-party key manager. I will keep it unchecked and will let Microsoft manage my keys.
- Click
Nexton the Tags section.
- Provide necessary Tags (Name and Value) information and click “
Next“.
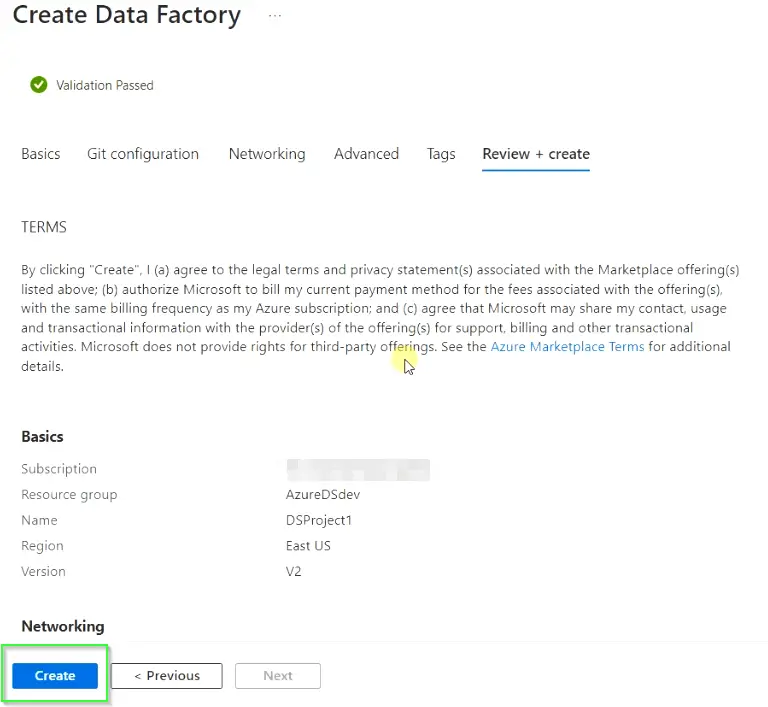
- On this screen “final validation” will run, if everything goes well. You need to click
Createto start the deployment of your Azure data factory resources.
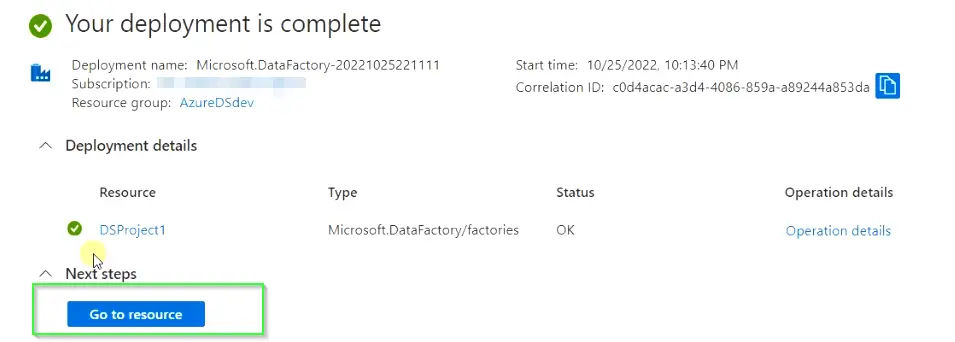
- Click on “Go to resource“, once the deployment is complete.
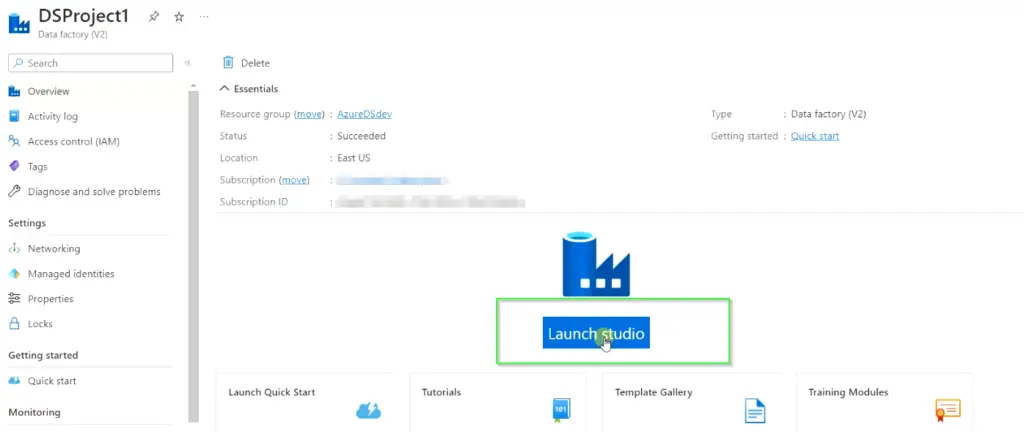
Step4.3 – Choose Launch studio to open the data factory project
On this screen, Choose Launch studio, it will take you to the data factory project page, where the further configuration will be done as shown in the images.
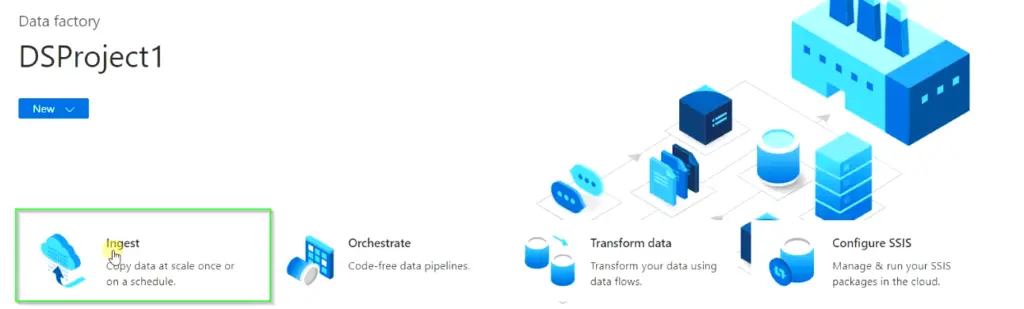
Step4.4 – Select the “Ingest” option for data copy at scale
- On this screen, select Ingest option which is used to copy data at scale once or on a schedule.
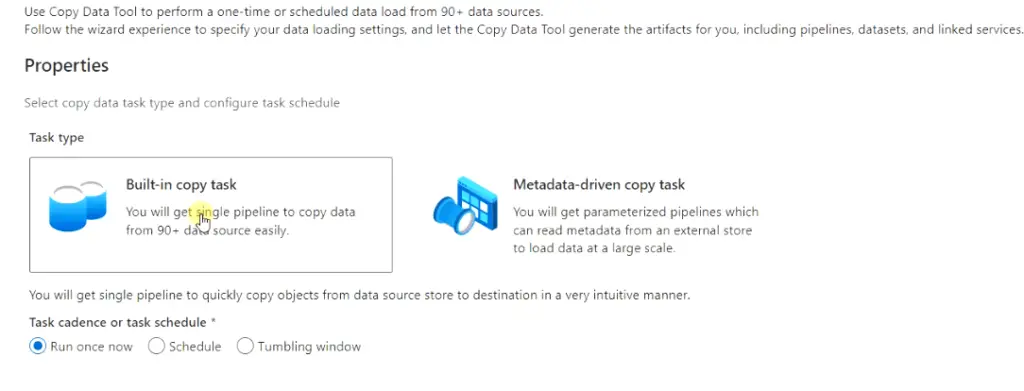
- Then choose the “
Built-in copy task" and "Run once now" optionsas shown in the image. You can schedule the job anytime if the task is successful. - Click “Next“
Step4.5 – Provide Source data
Here you need to select “Source type” Web Table from the drop-down and need to create a new connection to attach the source.
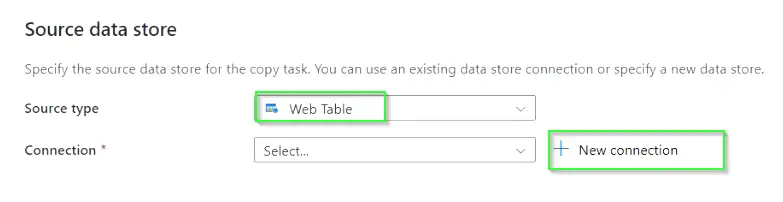
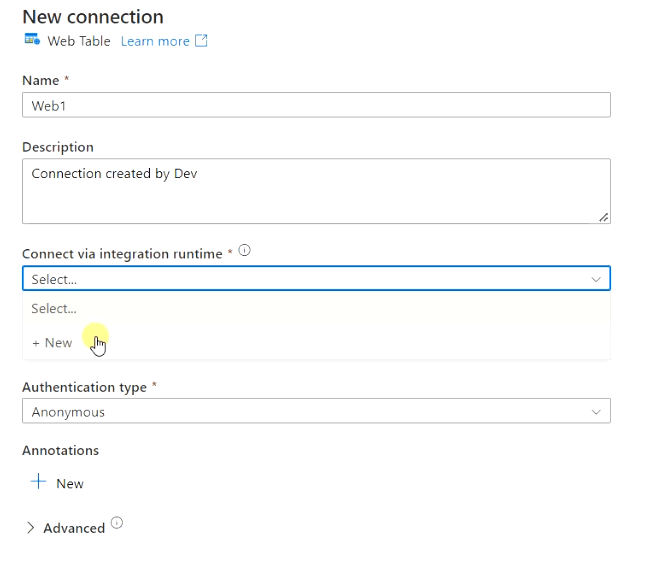
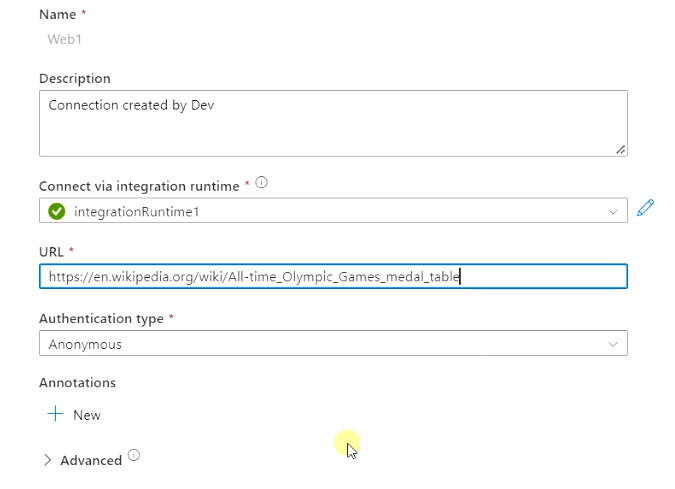
In the New connection blade, provide the necessary information as shown in the image.
- Name – Provide the name of the source connection
- Description – Provide a description
- Connect via integration runtime – Need to set up IR (Integration Runtime) and select it from the drop-down list.
- URL – Source URL (Wikipedia page of Gold medalist country list in our case)
Steps to setup Integration Runtime
- Choose “New” from the drop-down list of the “Connect via integration runtime” option as shown in the above image.
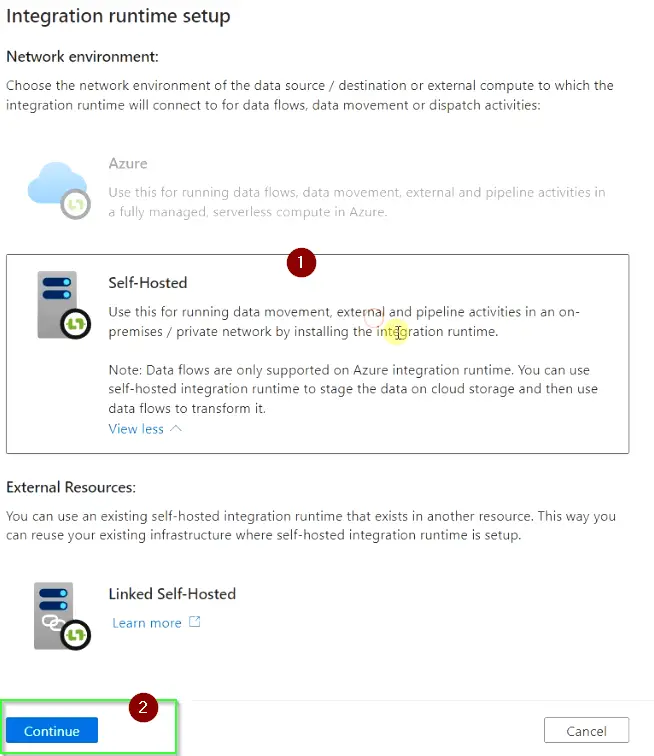
- Select the Self-Hosted option to set up Runtime in your on-premise or private network and click “Continue“. I will use my PC to install Integration Runtime with the credentials installed locally.
Integration runtime can also be set up using Azure and External resources. Integration Runtime is used for running dataflow, data movements and pipeline activities.
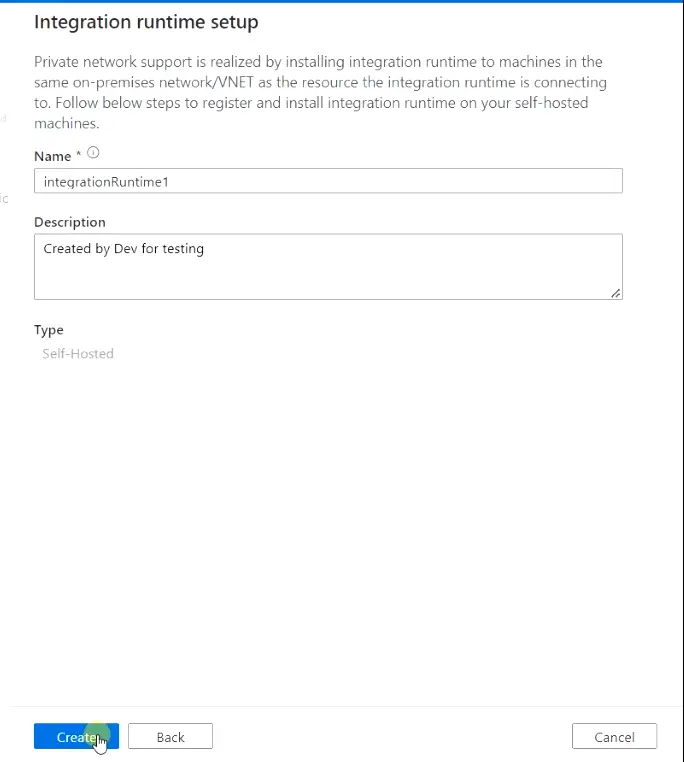
- Provide Name and description for Integration Runtime and click “Create“
- Choose “Express setup” to download the Integration Runtime and launch the setup to install it. In case it doesn’t run automatically
- Go to the download folder and run it manually.
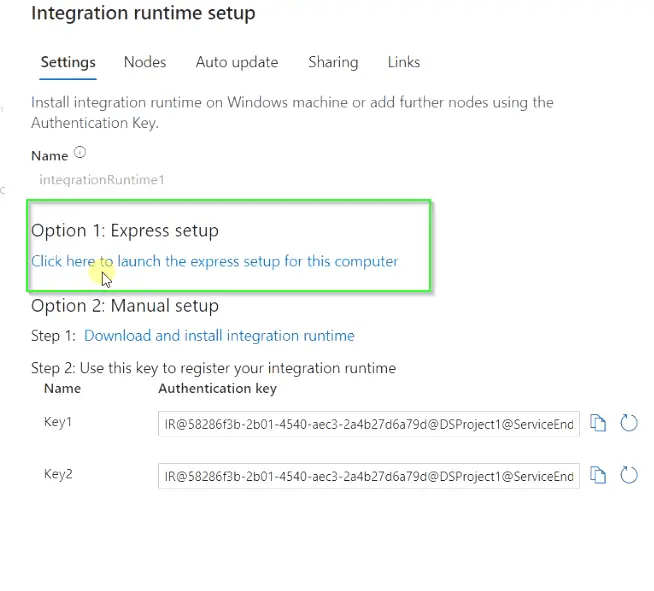
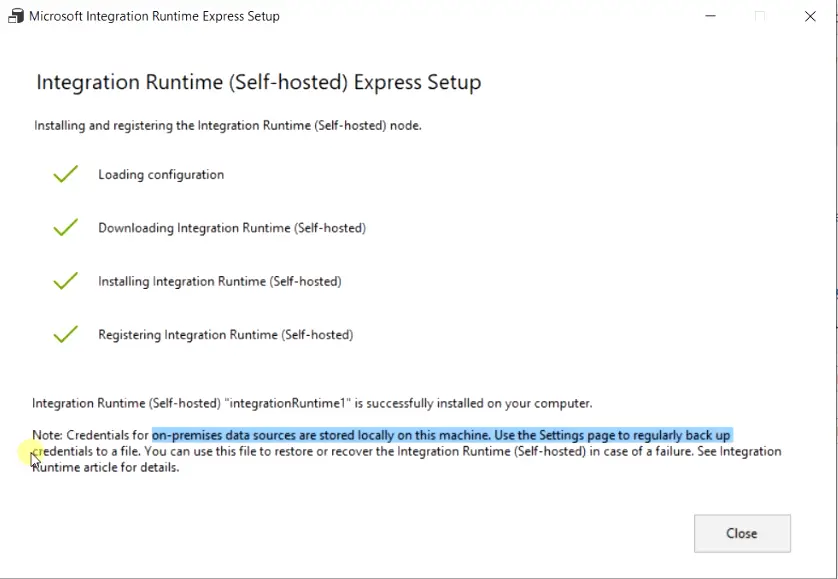
- Once you will run the Integration Runtime setup, it will install a self-hosted express setup on your device and will integrate it with Azure data factory keeping integration runtime credentials on your local PC.
- Make sure you take a regular backup of the credential keys to file using the setting page. you can use this file to restore the IR (Integration Runtime) in case of failure.
- Now close the IR setup page on the local PC and the Integration Runtime blade on the Azure portal.
- Move back to the “New connection” blade and refresh the Integration Runtime linked service.
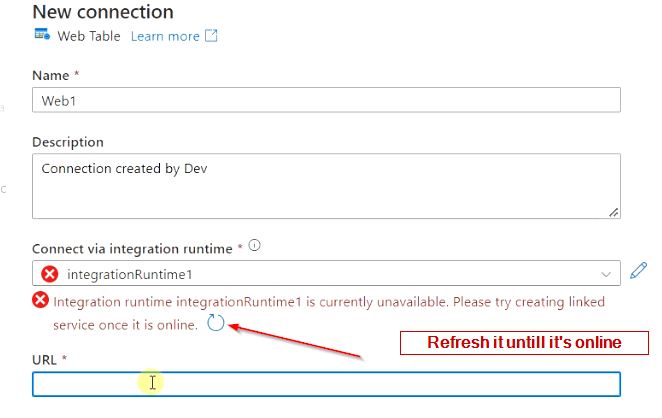
- Once Integration Runtime is available, then provide the URL to the wiki page, from where we are trying to scrape the web table as shown in the image.
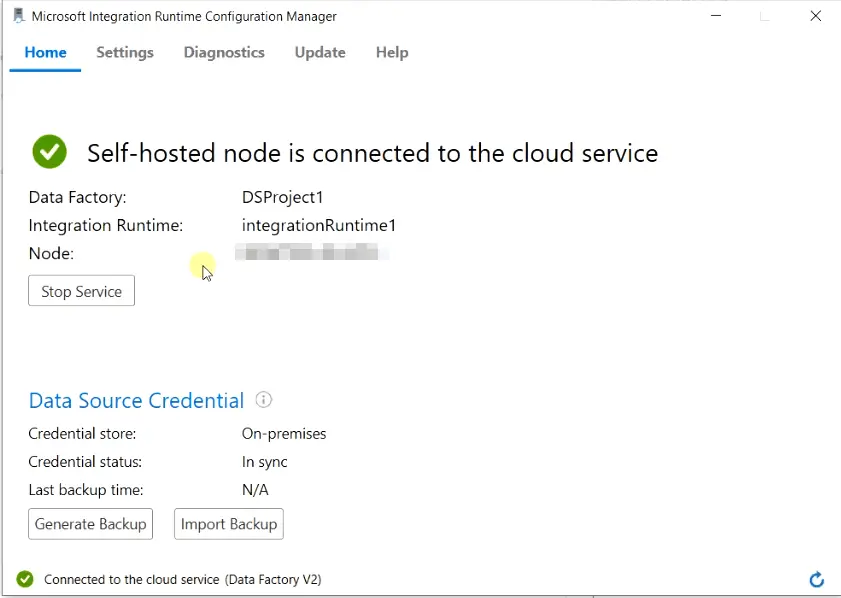
- You can also verify the connection using Integration Runtime installed on your PC. Just open the runtime configuration manager from your PC and check the status. It must show you the self-hosted node is connected to the cloud service as shown in the image.
- Choose “Create” to create the source connection.
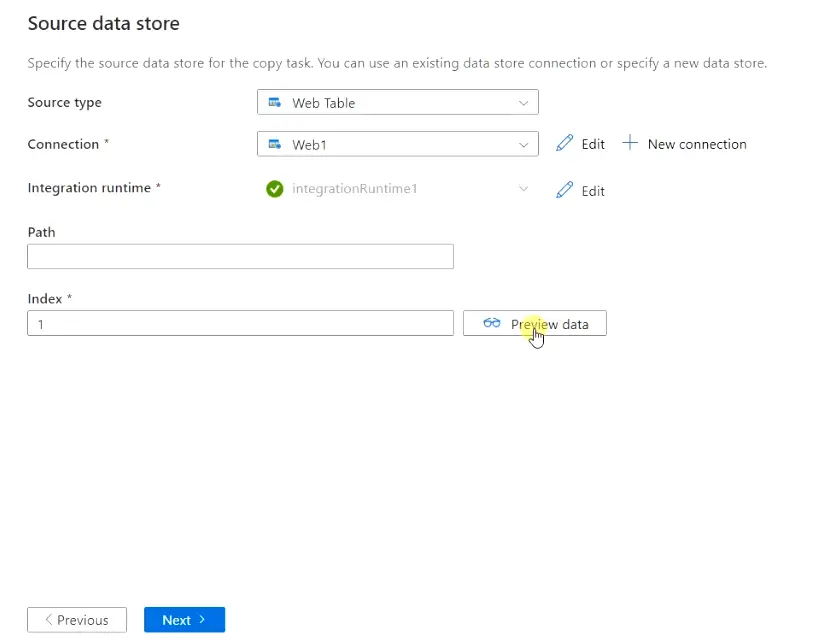
- Once you are done with the Integration Runtime connection, you will again reach to Source data store screen. Choose the Index value as 1 and leave the path as blank. You can also
previewthe data to see, how it looks at this stage.
- Click Next.
Step4.6 – Specify destination datastore
On this screen, you need to specify the destination or target datastore, where you want to keep the scraped data or files.
- Specify “Azure blob storage” as the destination type
- Select a new connection to set up Azure blob storage connectivity.
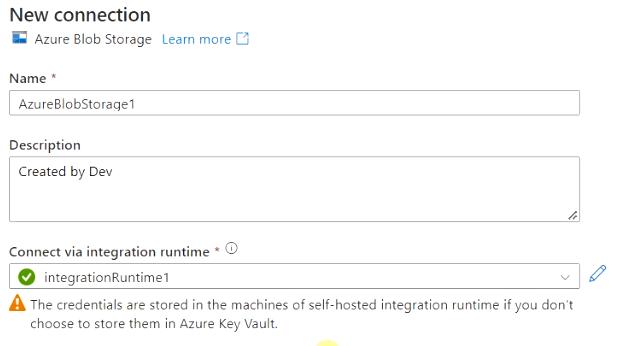
In the New connection blade of Azure Blob storage, provide the following information.
- Name – Specify Name
- Description – Provide a meaningful description
- Connect via Integration runtime – Select our integrationRuntime1 connection from dropdown create earlier.
- Authentication type – Account key
- Connection string – select default. You can also use Azure key vault, in case you want more security with credentials.
- Account selection method – From Azure subscription
- Azure subscription – Choose a subscription from the drop-down list
- Storage account name – Select the storage account created in the step3 of this guide
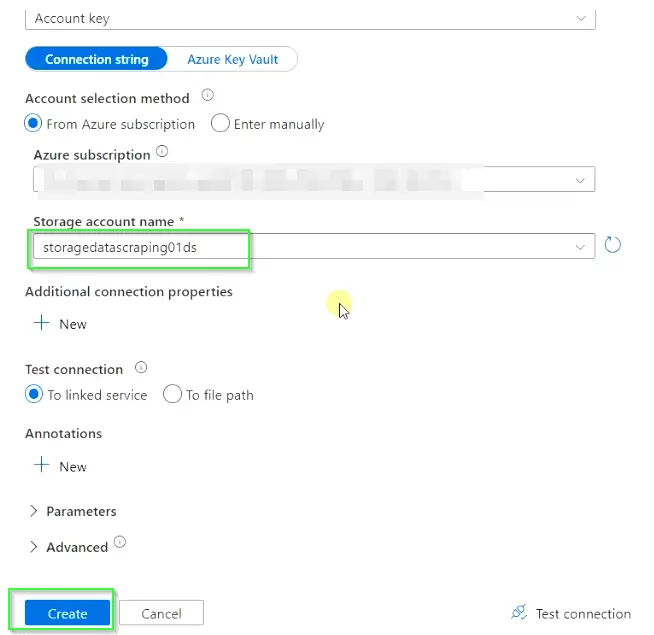
- Click Create to set up the Azure blob storage link service.
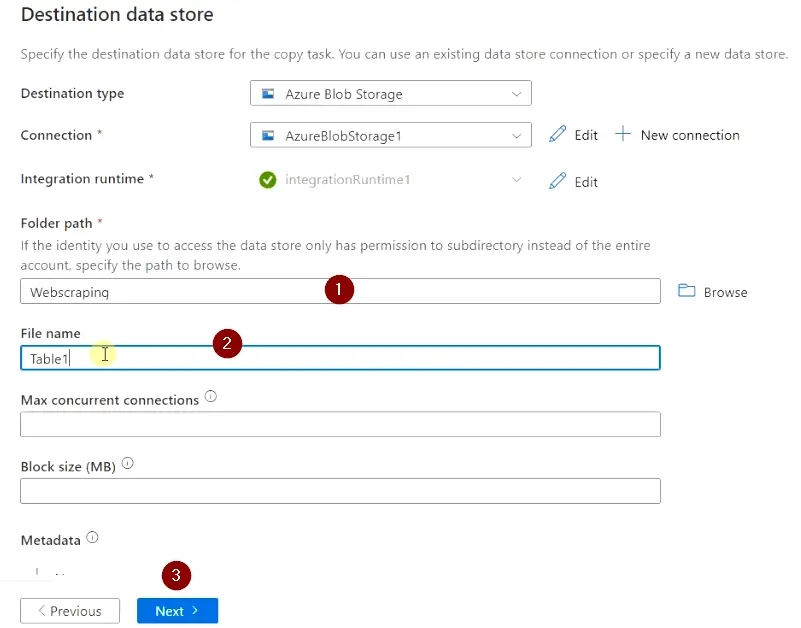
- Now on the Destination data store blade, provide the following information.
- Folder path
- File name
- Max concurrent connections
- Block size (MB)
- Metadata etc.
Click Next. I will provide only the Folder path (subfolder name) and File name (Output file) and will leave all other fields as default as shown in the image.
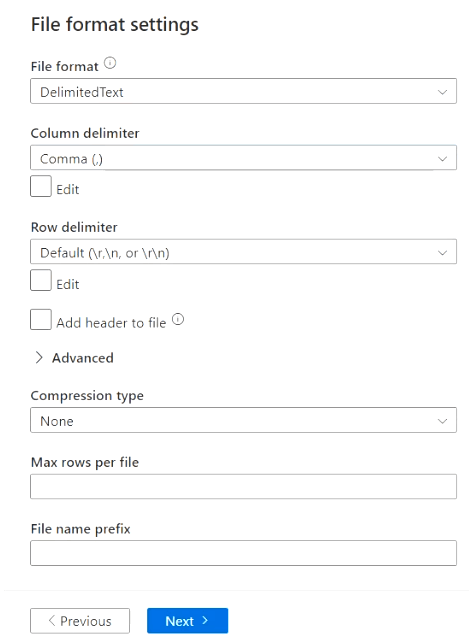
Step4.7 – Choose File format settings according to your requirement
I will keep everything default as it matches my requirement and Choose Next.
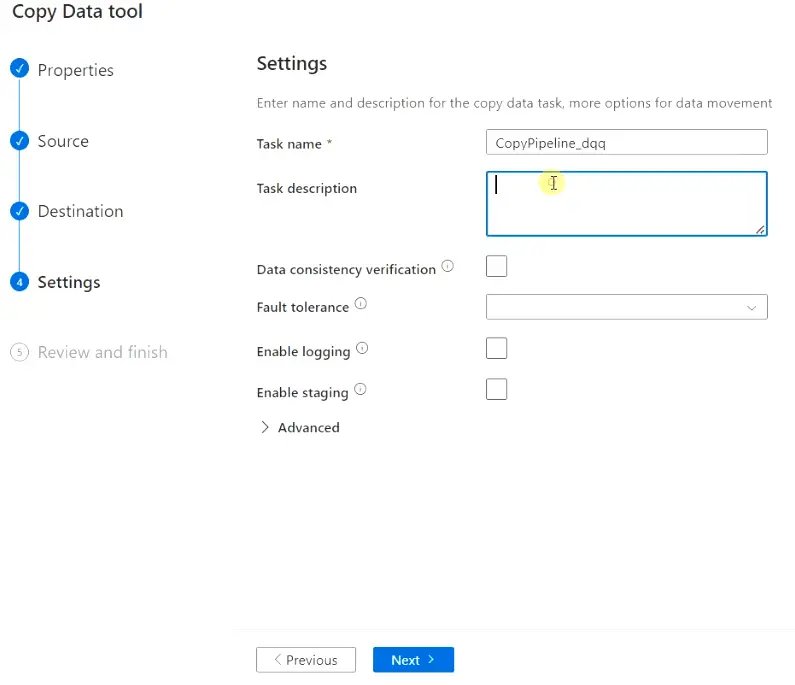
Step4.8 – Provide settings of copy data task and data movement
Provide Task Name and description as per your naming convention. You can enable Data consistency verification, Fault tolerance, logging, staging and other advanced option based on your requirements. I will keep them as is.
Choose Next.
- Review your task details on the Summary page and Hit
Next.
It will deploy the copy data (Web scraping) tool for your project. Click Finish once the deployment is done.
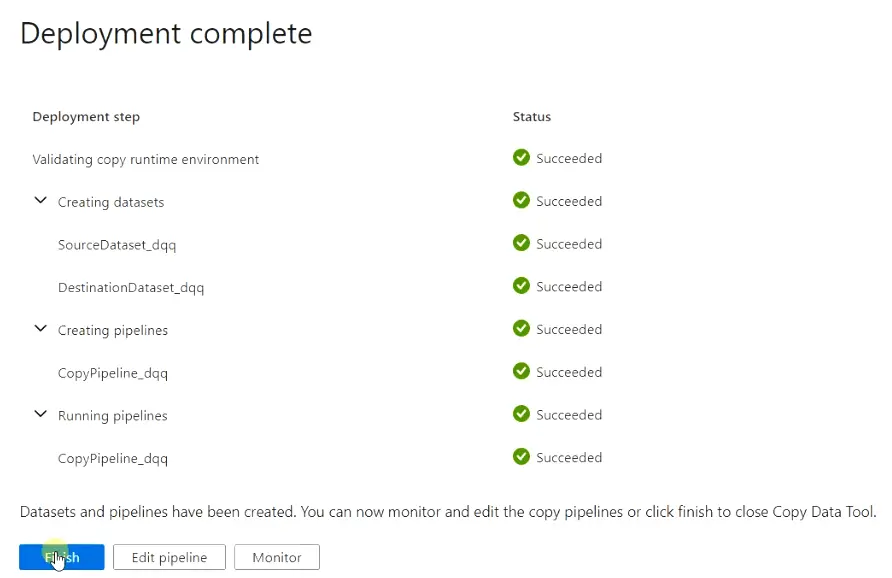
- Now you can edit or monitor the pipeline as per your requirement.
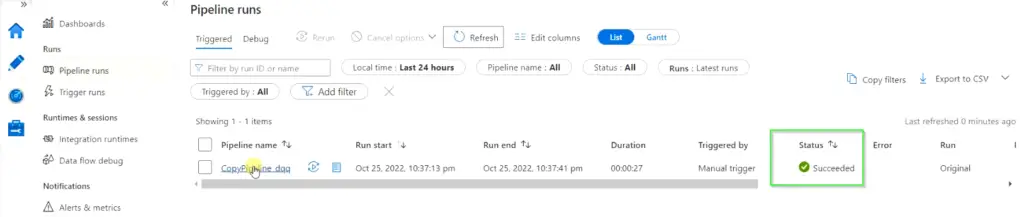
Step4.9 – Check the status of pipeline runs and Validate scraped data
- Now click on “Pipeline Runs” from the left pane and check for the status. Once the pipeline status changes from in progress to succeeded.
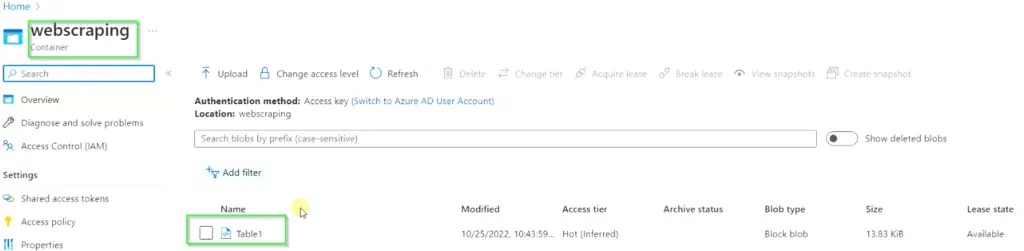
- Go to Storage account > Container (Webscraping) > Once you will browse it, you will find a file name (Table1).
- Download it and open it as plain text or open it with Excel. You can see the scraped data inside it. You can also view it on the Azure portal.
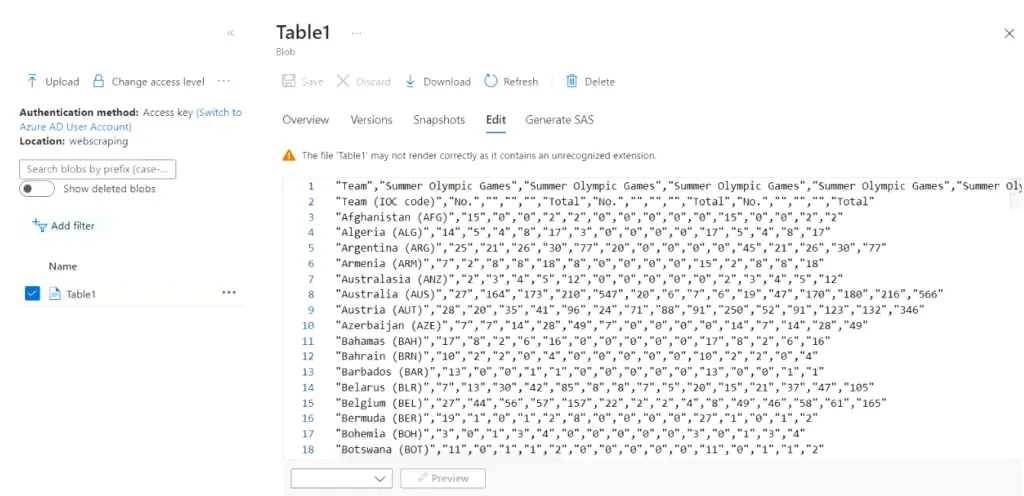
Congrats!! You built your first web scraping tool using Azure data factory (v2).
Conclusion
Creating a web scraping tool may be a bit lengthy process but it’s not difficult. Once you have created it, don’t forget to play around with scheduling and updating pipelines. Integrating it with Azure DevOps and GitHub. Also, try other sources and destination link services provided with Azure.
There are many other methods also available for data or web scrapings like using Programming, Excel, online websites and services with other Hyperscalers like Google and AWS. You can try all these methods to enhance your learning.
Let me know via comments, in case you face any difficulty building your web scraping tool. I will try to help you out.
Further readings
I will suggest you read the documentation of Microsoft on Azure data factory to learn more about this service.