Today, I will show the 3 easiest methods to install PyCharm on Ubuntu using GUI and CLI. PyCharm editor will definitely charm you with its un-matching features, whether you are a pro or an aspiring Python developer.
I will be using Ubuntu 20.04 but this tutorial applies to Linux Mint, Ubuntu 21.04 and all other Debian based Linux system distros. For non-Debian based distros, You can follow the standalone installation using the tarball method.
I will discuss different methods to install PyCharm, You can select any method as per your preference.
What is PyCharm
PyCharm is a cross-platform IDE available for Windows, Linux and macOS. It comes with amazing features like –
- Built-in intelligent code assistance
- Developer and scientific tools are built-in
- Python debugger
- Python web development frameworks support
It is pretty famous for Python development and comes in three different editions.
- PyCharm professional edition – A complete commercial stack with useful tools and features. it’s paid and 30 days trial version is available.
- PyCharm community edition – It’s free and open-source, Comes with limited features but enough to develop Python applications.
- PyCharm Edu edition – Free version for students, which provides courses and helps you to learn Python.
You can check out this comparison matrix for further reference.
System requirements to install PyCharm
To install PyCharm in your Ubuntu 21.04 or any other Debian based distro. Following are the minimum requirements.
- Any modern CPU with 4GB of memory.
- At least 5 GB of free space in your disk
- Monitor resolution of 1024×768
- Any Linux OS e.g. Ubuntu 16.04 or later, Linux Mint 20.1, Fedora 34, or any other Linux distro which supports Gnome, KDE or unity DE with GLIBC 2.14 or later. Obsolete OS like Centos 6 or RHEL 6 is not supported
- Python version 2.7 or version 3.6 to 3.10 must be installed on Ubuntu
- You don’t need to install Java as it’s already bundled.
Download PyCharm
Let’s download the PyCharm community edition. Which is more than enough for Python development as a beginner.
If you are a pro Python developer and looking for a complete stack. You can follow the same installation instructions for PyCharm Professional and with 30 days trial period.
Download PyCharm for Ubuntu
- Visit the jetbrains.com website and download the PyCharm community edition for Linux as shown in the image. Alternatively, Just Click on the Download button to get it immediately.
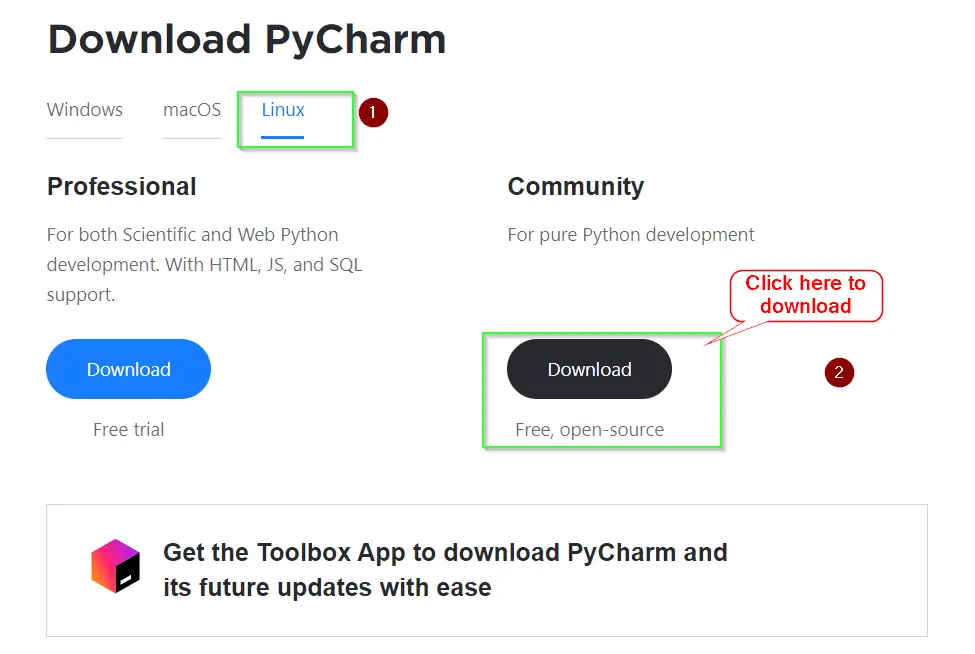
- There is one more option to download PyCharm. Get the Toolbox App, install it in your system and download PyCharm. It also helps you to install PyCharm automatically and easily. we will see this later in this tutorial.
- In case you are looking for an older PyCharm version, Click here.
How to Install PyCharm for Python
There are actually 3 ways to install PyCharm using either GUI or CLI. You can choose any method as per your preference.
- Install PyCharm Using GUI
- Using Toolbox App
- Install PyCharm using Terminal or CLI
- with Snap package manager
- Using the “Standalone installation” using tarball method
How to install PyCharm on Ubuntu using GUI
Method#1 – Install PyCharm Using JetBrains Toolbox app
- Make sure you download the ToolBox app from here.
- <Right-Click> and Extract the downloaded tar file “jetbrains-toolbox-1.20.8804.tar.gz“.
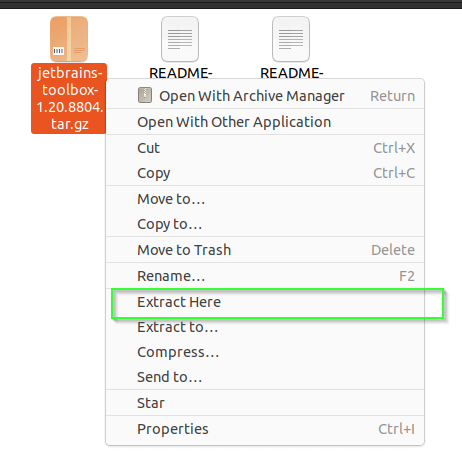
- Go to the extracted folder. You will find a file with the name “JetBrains-toolbox” inside it. Double click on this file to run it.
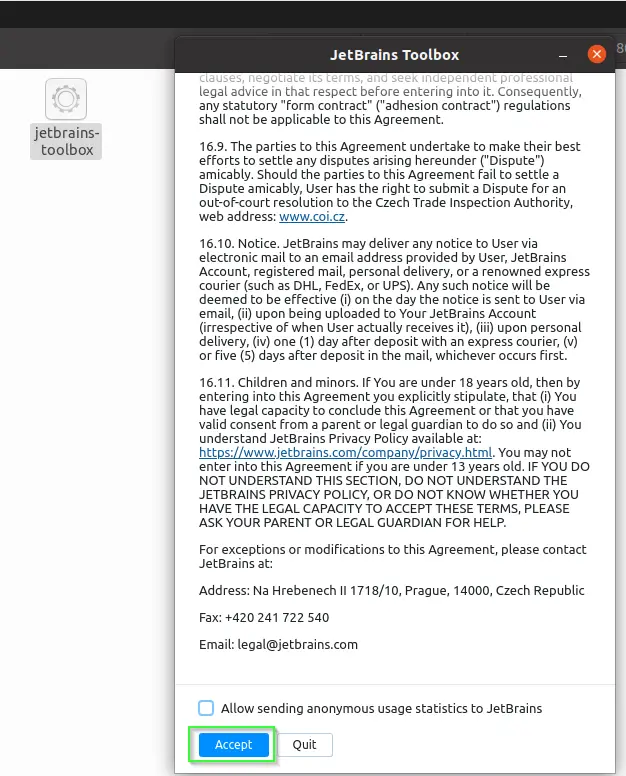
- Accept the license
- Select your PyCharm edition and version from the drop-down. It will start to install automatically as shown in the image.
- You can also install the EAP (Early Access Program) version using the Toolbox app.
Want to install a free PyCharm Edu community for students? Just scroll down a bit and you will find it.
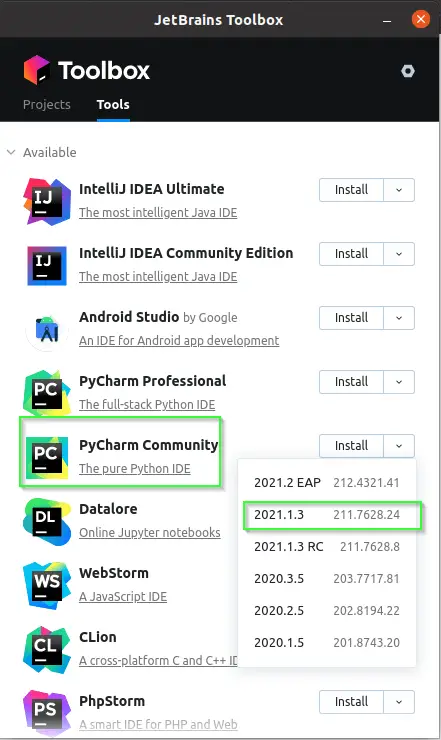
I will select the PyCharm community edition to install.
- Once installation is complete, Double click on the “PyCharm community” icon to launch PyCharm IDE.
- Accept “End-user license agreement” and click continue.
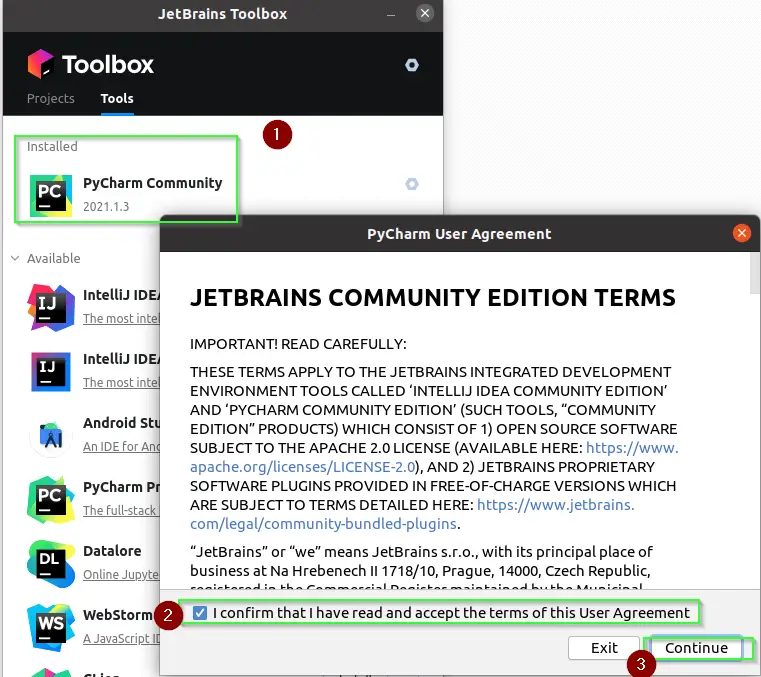
Congrats!! You have installed PyCharm IDE for python in your Ubuntu system.
How to install PyCharm on Ubuntu 21.04 using terminal
Method2# – Install PyCharm using Snap
- Run one of these commands to install the latest PyCharm package based on your preference.
I will install the PyCharm-community edition.
# To install free Pycharm-community version
$ sudo snap install pycharm-community --classic
# If you are interested in Professional trial/paid version
$ sudo snap install pycharm-professional --classic
# To install Edu edition
$ sudo snap install pycharm-educational --classic

Method#3 – Using “Standalone installation” script method
- Once you are done with the PyCharm tarball download. .
- Go to your download directory and extract it using the tar command. Install PyCharm in the recommended /opt directory.
$ sudo tar xzf pycharm-*.tar.gz -C /opt/
- Go to bin directory of PyCharm.
$ cd /opt/pycharm-*/bin
- Run PyCharm script
$ sh pycharm.sh
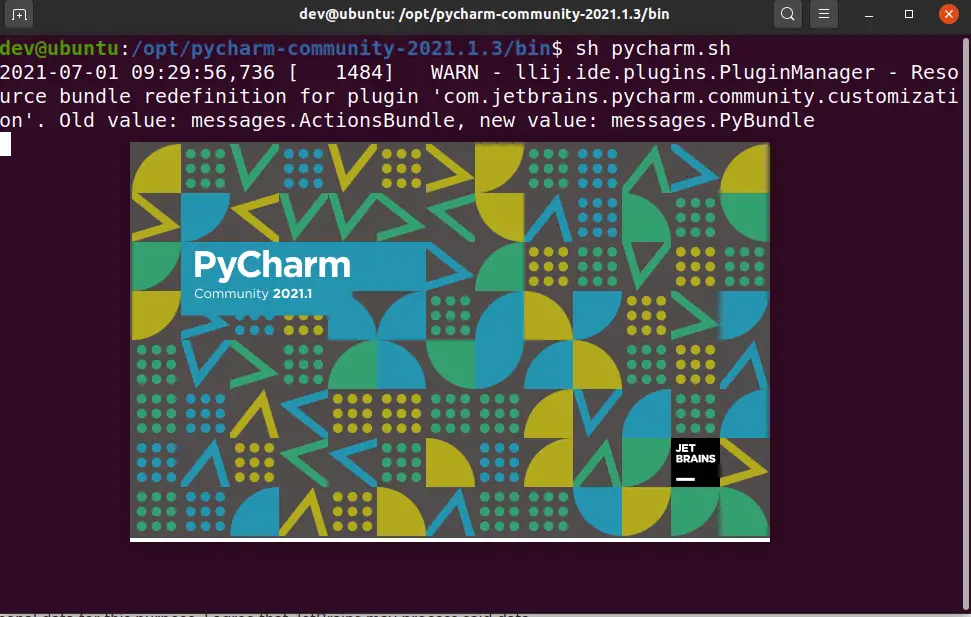
Select user interface theme and install plugins in PyCharm
Select default Darcula theme or light theme. Then install plugins.
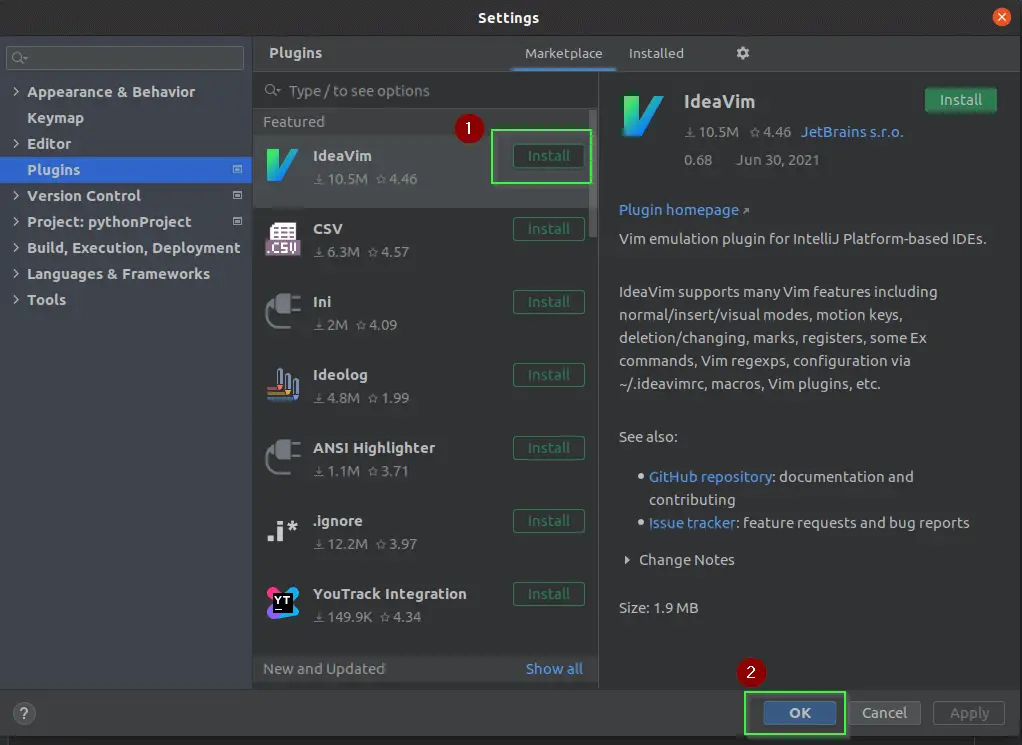
- Click <settings> Gear icon in the Right-hand pane as shown in image. click <Plugins>

- Download and install required plugins. You can also search for a specific plugin in the marketplace. To see existing plugins, you can click on “Installed” beside “marketplace” as shown in the image.
How to update PyCharm
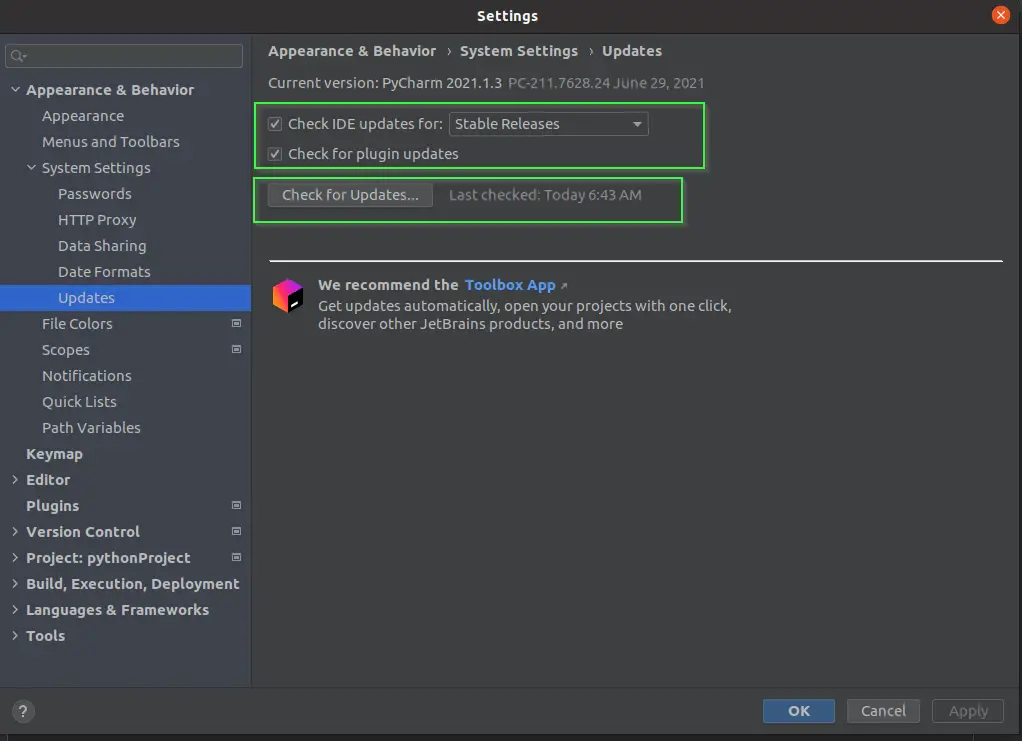
PyCharm updates automatically without manual intervention and notifies whenever a new version is available. Generally, updates are patch-based and require only the restart of IDE.
For Linux Users –
Go to File > Settings > Appearance & Behavior > System Settings > Updates
Below mentioned methods helps, in case patches are not getting update automatically.
- Using snap refresh, You can update PyCharm.
$ sudo snap refresh pycharm-community
- Standalone installation for latest version upgrade
In case you want to upgrade to latest version of PyCharm, You must choose the “Standalone installation” method shown in this tutorial. Just install the new version and open all your projects there.
Caution**
Don't overwrite existing installation directory with new version for upgrade. Always download and extract tarball of PyCharm to fresh directory and open all your projects.
- Using Toolbox app
- Open the Toolbox App and click
 in the top right corner.
 - In the Toolbox App Settings dialogue, expand Tools and select Update all tools automatically.
If you disable this option, you will need to click Update next to any instance when a newer version comes out.
Create a project and Run your first code in PyCharm
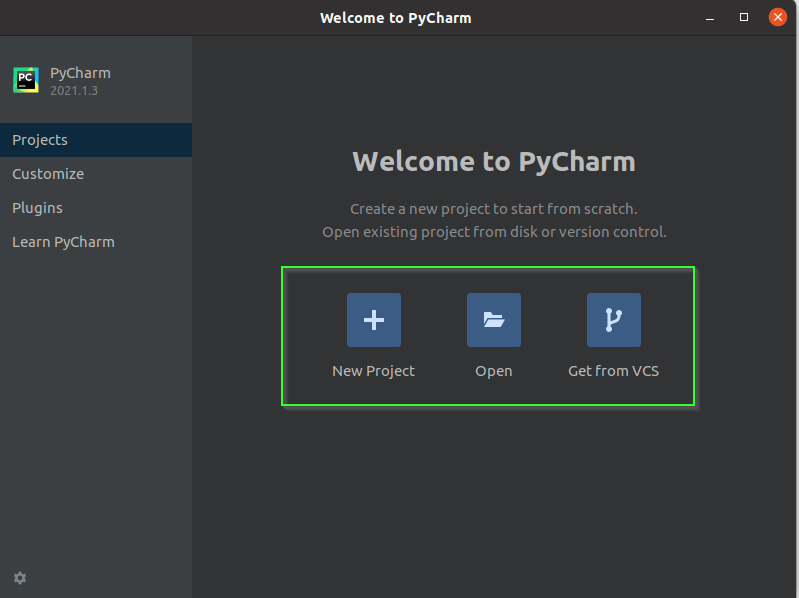
- Once you will launch PyCharm, the Welcome wizard will have three options –
- New Project – Select this option, if you are installing PyCharm first time and it will be your first project.
- Open – If you already have projects available. Then you can open it.
- Get from VCS (Version Control System) – To download it from the Git repository.
I will select “New Project“.
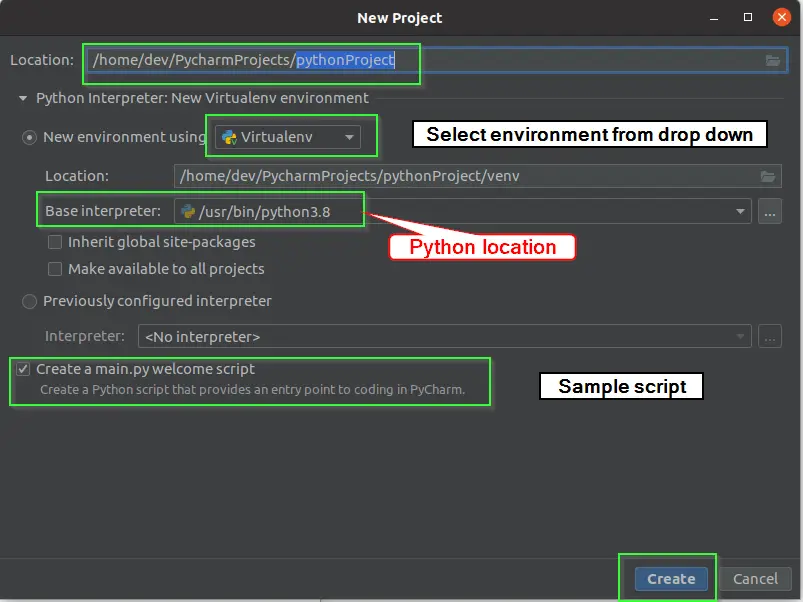
- On the next screen, you will find these options for “New project” as shown in image. You can keep the default or can customize it as per your wish.
- Location to keep your project files
- Select virtual env from the drop-down based on your requirements. Available options are :
- Virtualenv
- Pipenv
- Conda
- Select a location of your Python virtual environment
- Select Python Version in “Base interpreter“. Although PyCharm picks the installed Python version automatically. You can either select it from the Drop-down or provide the path to Python manually. Just select “…” and choose a location.
- Previously configured interpreter, if any
- Create a main.py welcome script.
Once you complete all the options, select “Create” as shown in image.
- In case you get this error “ModuleNotFoundError: No module named ‘distutils.util” in PyCharm.
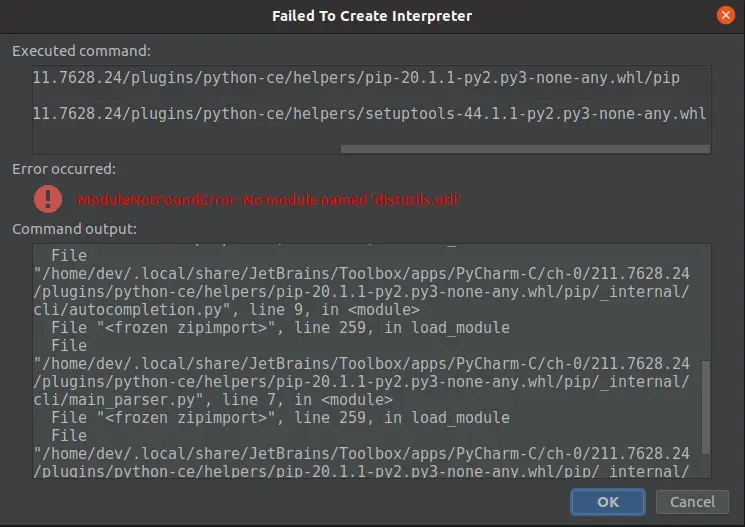
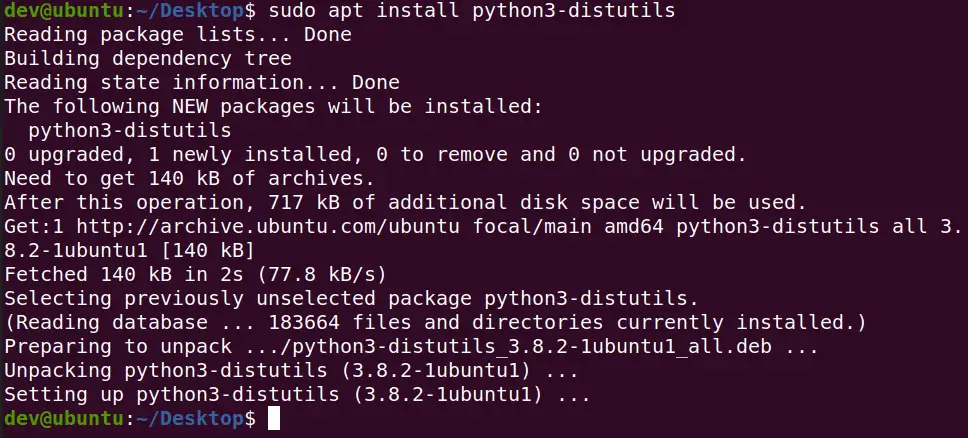
- Run this command to install python3-distutils. By default in Ubuntu, this package is not installed for Python.
$ sudo apt update
$ sudo apt install python3-distutils
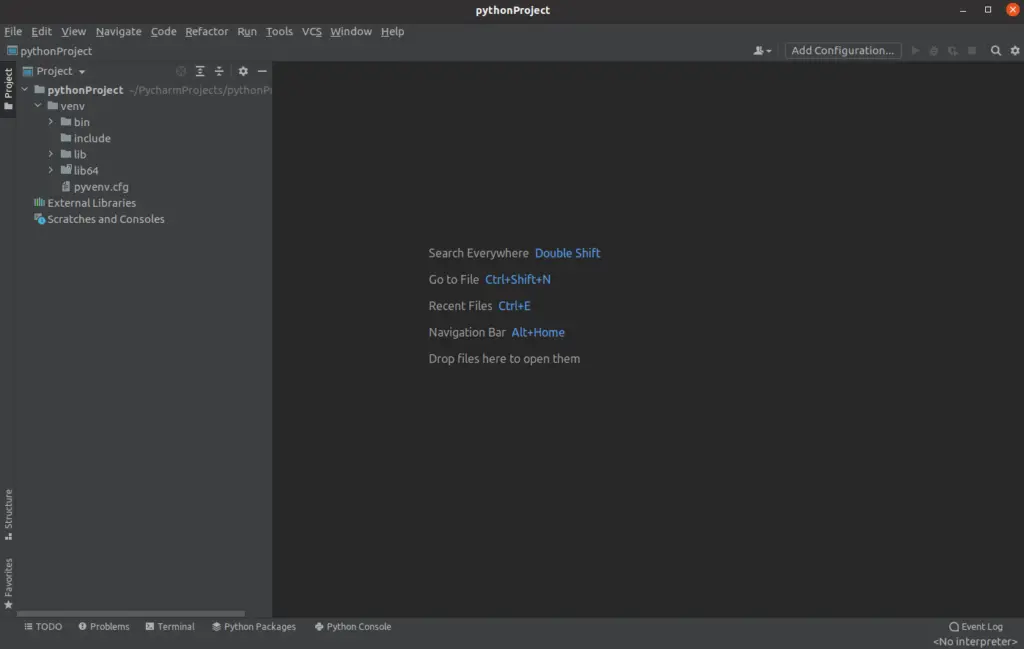
- Launch PyCharm again after Python3-distutils package installation.
To Run Your first code
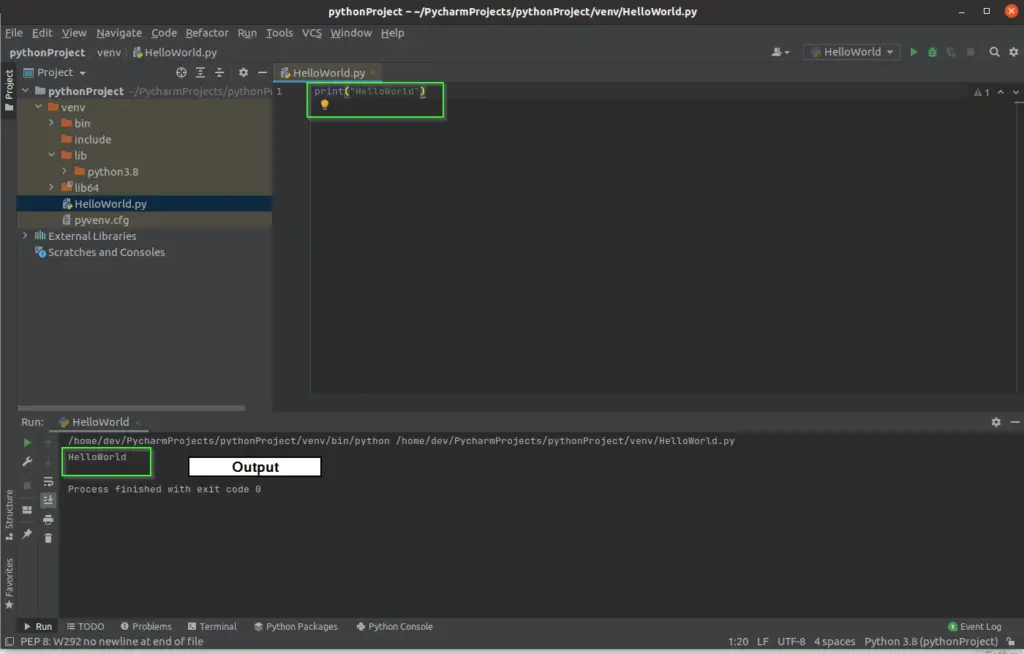
- Click on File in Menu > New File > Provide “File Name“. For example, I will give “HelloWorld.py” as the file name.
- Type print(“HelloWorld!”) in the editor
print("HelloWorld!")
- Select Run from menu > Select “HelloWorld.py” file > Run. Alternatively, press <Shift + F10> on your keyboard.
- You will see the “Hello World!” text as output
If you get the error “No Python Interpreter configured“. Just select the default python interpreter provided as shown in the image.

Hurray!! you have successfully run your first project code of Python in PyCharm IDE.
How to remove PyCharm
Based on how you installed the PyCharm, Follow these methods to uninstall or remove PyCharm from Ubuntu.
1.) Using Toolbox app –
Launch JetBrains Toolbox app, Select the PyCharm edition you want to uninstall.
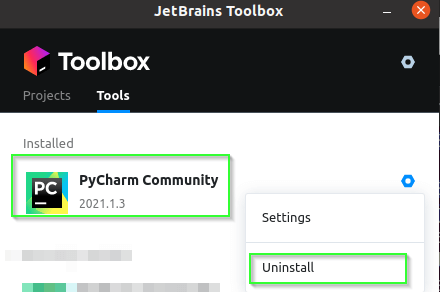
Select “Yes“, when prompted to confirm uninstall.
2.) Using Snap utility –
Just run the Snap remove command to get rid of the old PyCharm version.
$ sudo snap remove pycharm-community

3.) Manual cleanup in case of standalone installations
Run rm command carefully. It will remove all PyCharm directories in opt folder. You can also give a complete directory name in place of pycharm-*.
$ sudo rm -rf /opt/pycharm-*
Video Tutorial
Summary
I have shown you the 3 easiest methods to install PyCharm on Ubuntu. I hope you can now start your Python journey with this awesome IDE being a developer.
Let me know, which installation method you find best via your comments.


