In this tutorial, I will show you how to install Ubuntu 21.04 on VMware workstation without messing up with your existing operating system, whether Windows or Linux. The practice of installing Ubuntu or any other OS on VMware saves us from the problems that arise due to dual boot.
This post is basically for those people who already had Windows 10 or Linux installed as the host OS. And need to install the latest Ubuntu 21.04 on it as Guest OS. It may be for education, research or exploring new features of the new Ubuntu 21.04 operating system.
Installing any Guest OS is not limited only to Ubuntu, it may be used for any Operating system like Windows 10, Other Linux flavour like Linux Mint, Redhat, Fedora, Suse, AlmaLinux, Debian etc.
I am using Vmware workstation player 16 (free to use non-commercial) and Ubuntu 21.04 in my tutorial. But steps are more or less common for installing any operating system. Just need to follow instructions on the screen.
If you already having VMware workstation player installed, good but if not, then you can check my tutorials on
- How to install Vmware workstation in Ubuntu
- How to install VMware Workstation 16 player in Windows 10
Introduction
Ubuntu is a Debian based Linux distribution and composed mostly of free and open-source software. Ubuntu is officially released in three editions: Desktop, Server, and Core for Internet of things devices and robots. Ubuntu 21.04 release date is April 22, 2021, and a lot of enhancement has been done in this version.
Ubuntu is one of the most popular and widely used Linux operating system.
New features in the latest Ubuntu 21.04
Below mentioned are few important new features listed in Ubuntu 21.04.
- Wayland is the default display server, while it was optional earlier. Also, GNOME 40 is still not able to make it.
- Power mode option for laptop users
- Private home directory
- New refreshed icons
- Improved active directory integration
- Better dark theme
- nftables is the default firewall now replacing iptables.
- New Python 3.9.4
- New 5.11 Linux kernel
- The new version of Firefox 87 and Libre office 7.1.2
- Recovery key for encrypted installations
For complete list of Ubuntu 21.04 features and improvements, Checkout release notes.
System installation requirements of Ubuntu 21.04
- Connect your laptop or Desktop to a power source, so that it won’t get disrupted due to power-related issues
- Ensure you have downloaded Ubuntu 21.04 (HirSute Hippo) 64-bit ISO image
- At least 20GB or more disk space to install Ubuntu 21.0.
- At least 1 vCPU and 2 GB memory
- Internet connection, as it requires to download some packages online during installation
- Take a backup of data, as an IT professional, I understand data backup is really important, so if you are going to perform any major activity, always take a complete backup of your data.
Download Ubuntu 21.04
Follow these easy steps to download Ubuntu 21.04.
Step-1.1 Visit ubuntu.com and download the latest Ubuntu 21.04 iso image
As shown in the image. Visit ubuntu.com and click on “Download” to get ubuntu-21.04-desktop-amd64.iso to your system.

Alternatively, you click on this Blue “Download” button to get it without hassles for 64 bit systems.
Step-1.2 Download Ubuntu 21.04 using Torrent, for slow internet users
In case internet is an issue for you and you want to download Ubuntu 21.04. You can easily do it using Torrent file.
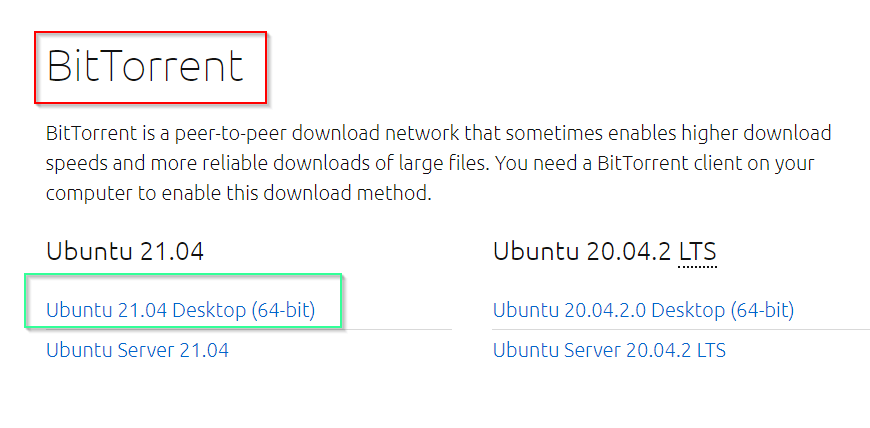
To download a torrent file, visit “https://ubuntu.com/download/alternative-downloads” and scroll down to the bottom of the page.
Look out for the BitTorrent section as shown in the image. Click on Ubuntu 21.04 Desktop (64-bit) link.
It will download a torrent file on your system. Open it with any torrent program (BitTorrent or Transmission) and download Ubuntu 21.04 using a peer network.
How to install Ubuntu 21.04 in VMware Workstation Player
Installing Ubuntu to your system or VMware workstation is really very easy. This will be a two-phase process. First, create a virtual machine and second, Install Ubuntu 21.04 on Virtual Machine.
Follow these simple step by step instructions to install Ubuntu 21.04 –
Step2.1 – Create a new virtual machine
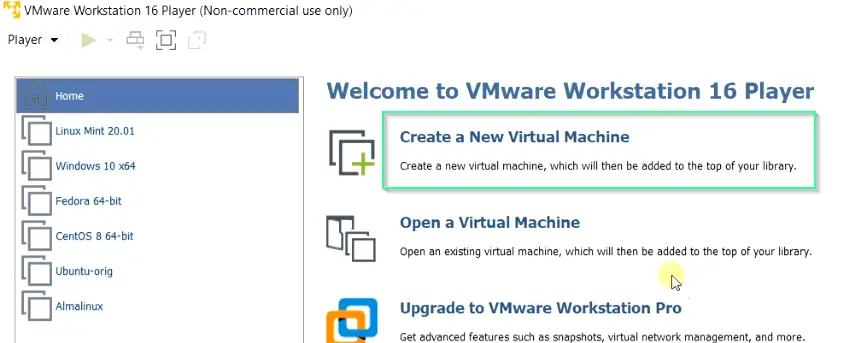
Let’s create a virtual machine first to Install Ubuntu 21.04. Open VMware workstation 16 and click on “Create a new virtual machine” as shown in the image.
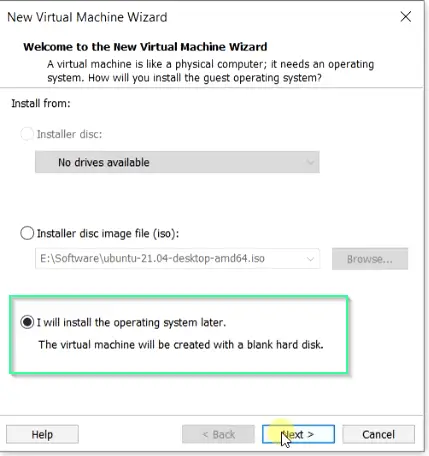
Step2.2 – Select the “Install operating system later” option
On this welcome page, select “I will install the operating system later” option.
We will first create a virtual machine and then install Ubuntu 21.04 on top of it.
Hit Next.
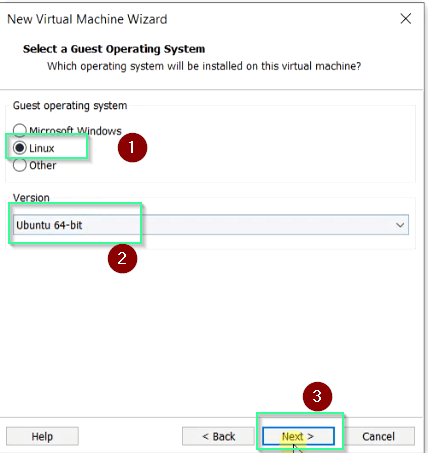
Step2.3 – Select Guest operating type and version
Here you need to select “Linux” as Guest operating system and “Ubuntu 64-bit” as version from drop down. Then, click Next.
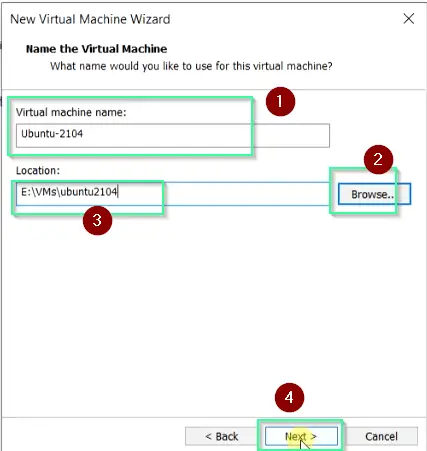
Step2.4 – Give Virtual machine Name and location
In this section, you need to provide the name and location of the new Ubuntu virtual machine. For example, I have given the name “Ubuntu-2104 and Location “E:\VMs\Ubuntu2104“.
Click Next.
Step2.5 – Specify disk capacity for Ubuntu 21.04 VM
By default it’s 20GB recommended, I will suggest you keep it at least 20GB or more for disk space to install Ubuntu 21.04 Linux.
VMware workstation can keep the disk in two formats –
Store virtual disk as a single file – You can select this option, but I won’t recommend this as managing a large file of 20GB or more would be difficult, in case you want to copy or move this VM to other PC or laptop.
Split virtual disk into multiple files – management of Virtual machine disk file is easy but may have some performance impact due to large files.
Let it be 20GB as size and choose “Split Virtual disk into multiple files” then Click Next.

Step2.6 – Customize hardware (Optional) and Finish Wizard
In this step, you can have a final look at your configuration, like name, location, Operating system, Hard disk size, Network adapter, Memory and CPU.
By default provisioned memory will be 4096 MB and the CPU will be 2 Cores. If you have enough CPU and RAM availability in your system, you can leave it default.
Otherwise, you can change it as per your needs by tapping the “customize hardware” tab. Just make sure it must meet minimum requirements.
To customize hardware and reduce CPU cores –
- Select Customize Hardware as shown in the image.

- Click on Processors from the Hardware window.
- In the Number of processor cores, Change 2 to 1 from the drop-down list
- Click Close

You can follow the same procedure to customize RAM {Memory} and Network Adapter.
I have enough resources, so I will go ahead with default options. Click “Finish“, Once you are done with hardware customization.
Step2.7 – Edit VM settings and Connect Ubuntu 21.04 ISO image file
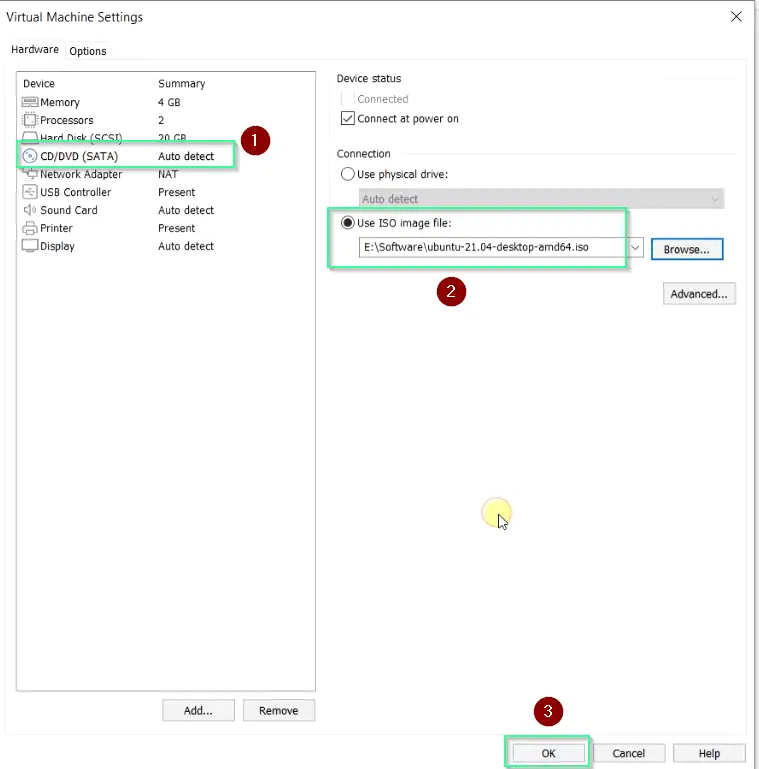
Now you need to attach your media (Ubuntu 21.04 ISO) image. To do this –
- Select “Edit Virtual machine settings“.
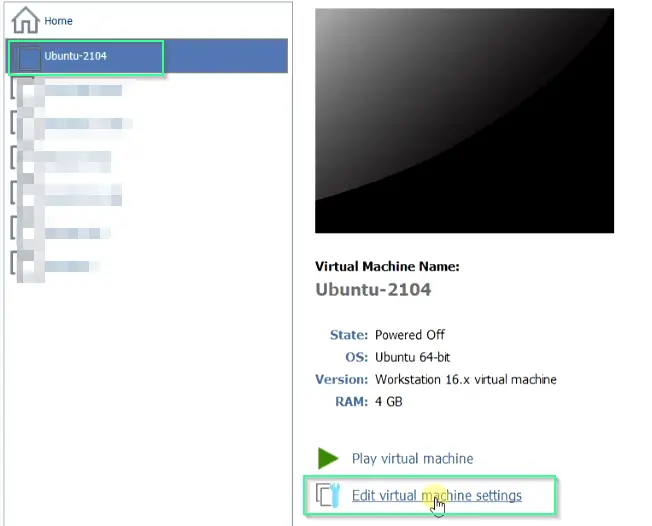
- Select “CD/DVD (SATA)” in the left pane as shown in the image. Now Select the “Use ISO image file” option and Browse for your Ubuntu 21.04 ISO image.
For example, in my case it’s stored in E:\software as shown in image.
- Make sure “Connect at power on” option is selected in “Device status“. Click OK and move further.
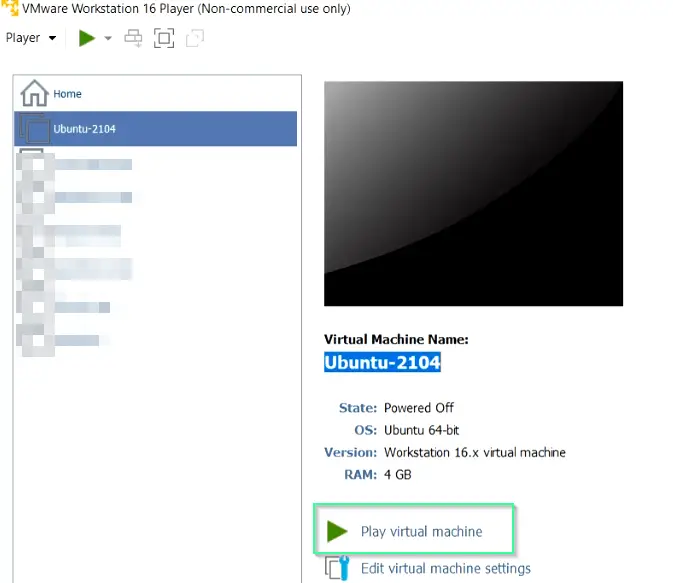
Step2.8 – Power on Ubuntu 21.04 virtual machine
Once you have attached your installation media, Select “Play virtual machine” to power on your VM.
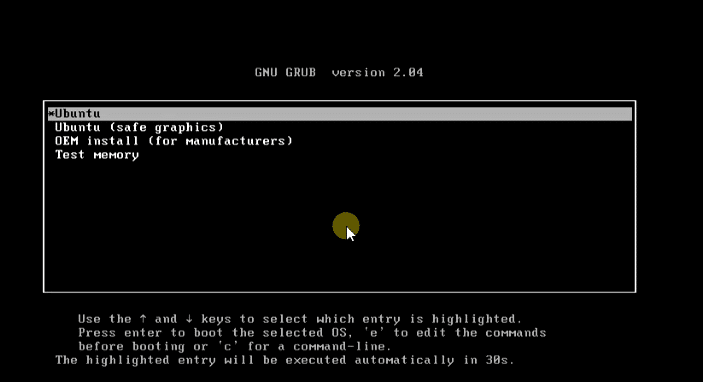
Step2.9 – Select “Ubuntu” on the grub menu
On this GNU Grub screen, you will get four options –
- Ubuntu
- Ubuntu (Safe graphics)
- OEM install (for manufacturers)
- Test memory
Select first option “Ubuntu” and hit Enter.
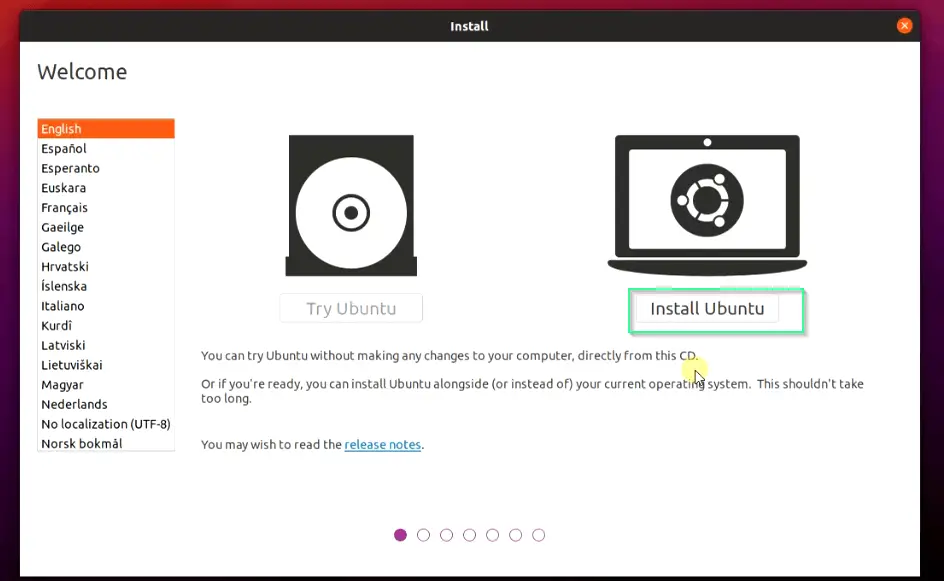
Step2.10 – Select the “Install Ubuntu” option
On welcome screen you will get two options-
- Try Ubuntu – Using this option, you can try Ubuntu 21.04 without making any changes to your computer. Actually, it’s directly booting from the ISO image without installing it on your disk.
- Install Ubuntu – You can go with this option if you are firm on your decision to install Ubuntu 21.04 😉
Click on “Install Ubuntu” as shown in image to move further.
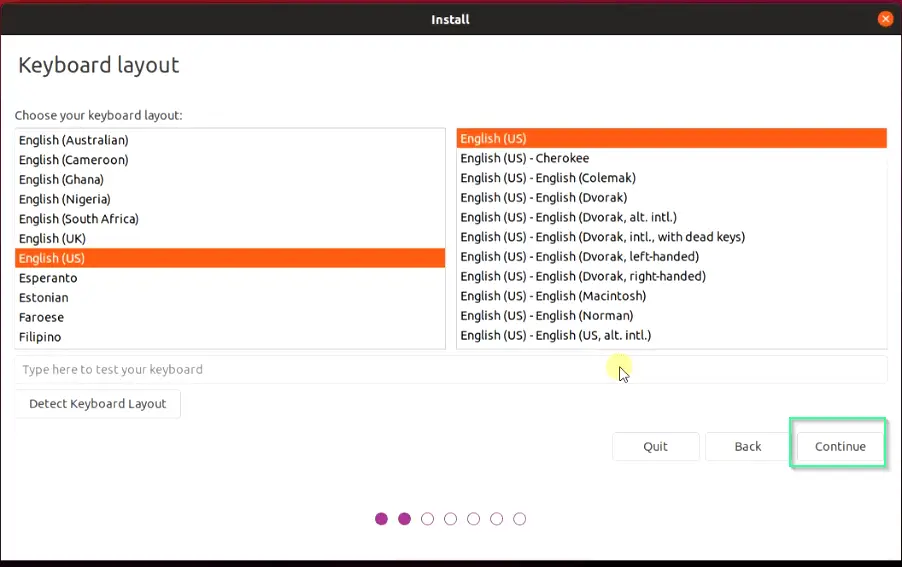
Step2.11 – Select keyboard layout
On Next screen, Select your favourite keyboard layout. I will select “English (US)“.
Click Continue.
Step2.12 – Select “Normal Installation” or “Minimal” installation
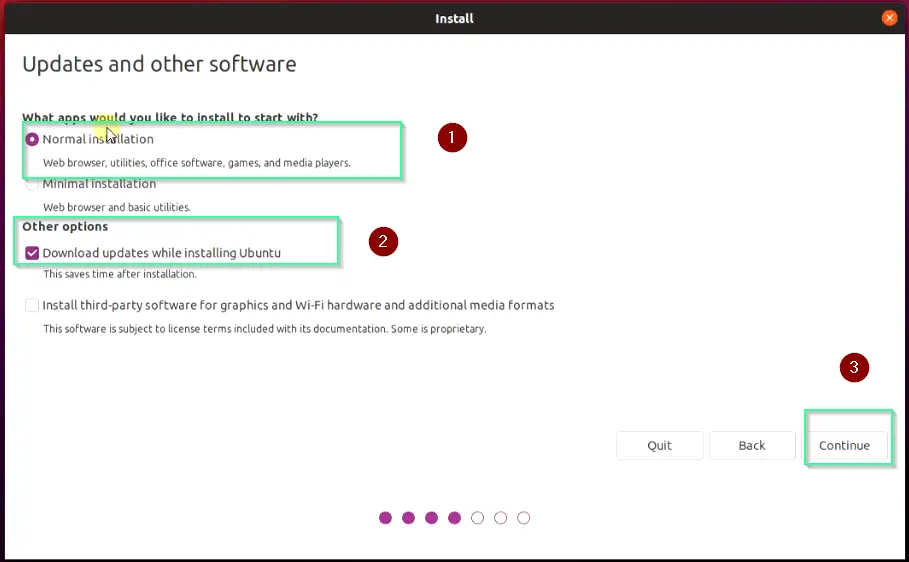
On updates and other software page, You will see four options –
- Normal installation – Selecting this option will install all necessary software like Web Browser, utilities, office, games, media player and more. The installation will take more time but helpful for new Linux users. You can experience Ubuntu with all the necessary software installed beforehand.
- Minimal installation – You will get basic utilities and installation would be much faster. You can install any required software or utility as per your wish later. It will also save some space in your drive.
- Download and updates while installing Ubuntu – If you will select this option, any old software/package will also get an update during installation. You don’t need to run the apt upgrade command later.
- Install third-party software for graphics and Wi-Fi hardware and additional media format – If you will select this option, it installs third-party drivers required for your detected hardware.
I will recommend you to select option 1, option 3 and 4. if you are new to the Linux world and Hit “Continue” to move further.
If you have already worked on any Linux distro, then you can select option 2 only and can update required packages later.
I have done the same and I will show you how to upgrade packages later in this article from the command line.
Step2.13 – Select Erase disk and install Ubuntu
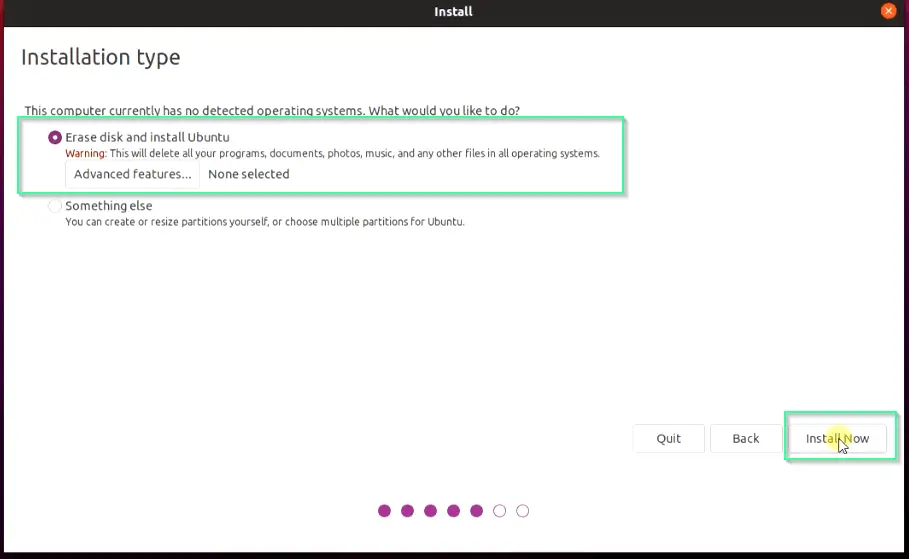
There will be two options to erase and partition your disk on this page.
- Erase disk and install Ubuntu – You can select this option and it will erase all data on 20GB disk and will create partition automatically. You can visit the Advance feature tab for LVM like configuration if you wish. Otherwise, keep it default.
- Something else – If you want to make the partition according to your wish. You can select this option.
I will suggest to choose option-1 “Erase disk and install Ubuntu” and click Install now.
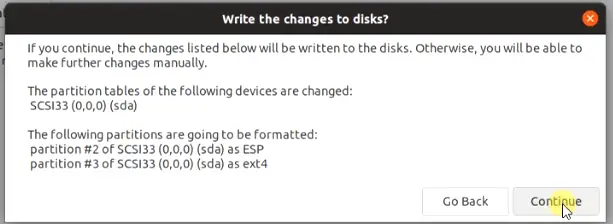
The next screen will show you the partition and disk details as shown in the image. It will prompt you to get agree with this disk layout as shown in image.
Click Continue.
Step2.14 – Set time zone
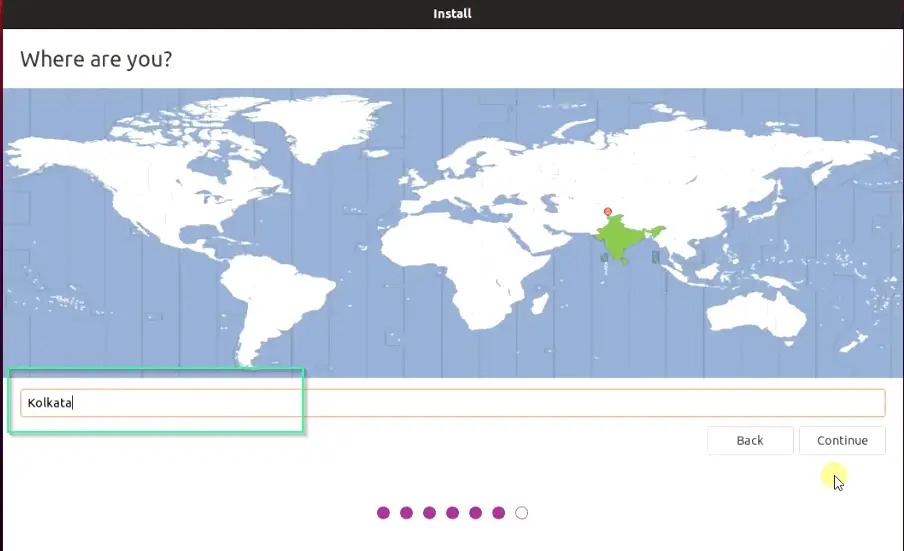
Select your Time zone and hit Continue. For example, I am in India, so I will go ahead with Kolkata time zone.
Step2.15 – Set “Username” and “password”
On this screen, you need to give Your name, computer’s name, username and password as per your wish. Make a note of this username and password. You will need it to log in to Ubuntu 21.04 later.
You also get the additional options –
- Log in automatically – Select this option, which will allow auto-login. If nobody else uses your laptop, you can go ahead with this option. Otherwise, avoid using it.
- Require my password to log in – You would need to enter your password every time you need to login into your ubuntu system. It’s a more secure option compared to “log in automatically“
- Use Active directory – In case you want to log in with your active directory user. It’s not applicable in our case, so you can skip it.
I will suggest you to select “Required my password to log in” and hit Continue.

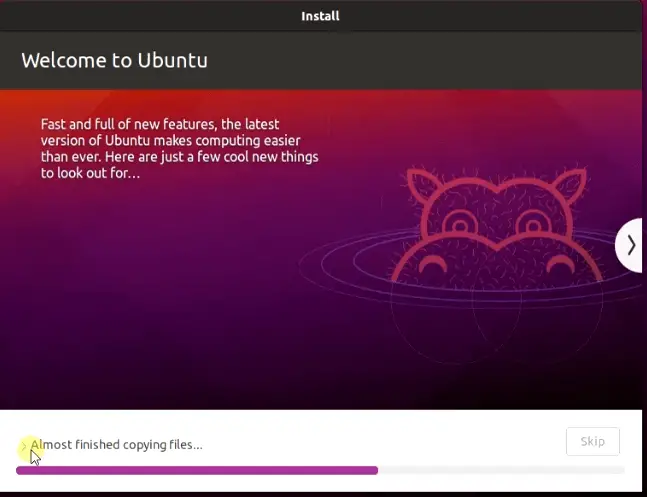
Step2.16 – Sit back, relax and let Ubuntu 21.04 installation complete
At this point, Ubuntu Installation will start. Just sit back and grab a cup of coffee. Because it may take around 15-20 minutes to install Ubuntu depending upon the speed of your internet and the resources (CPU & RAM) you assigned initially.
During installation, following steps will occur (Just high level overview)
- Configure storage, Create and format the partition on Disk.
- Pre-installation tasks will run
- Software and packages will be installed
- Boot loader installation will happen
- Creating users
- Initramfs will generate
- Post-installation tasks
Step2.17 – Restart and remove installation media
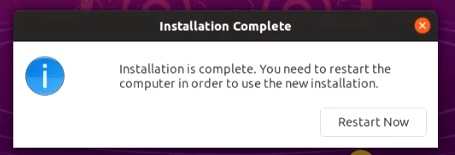
Once Ubuntu 21.04 installation is complete. You need to restart the computer. Click “Restart Now” button.
Step2.18 – Remove Media and Press “Enter”
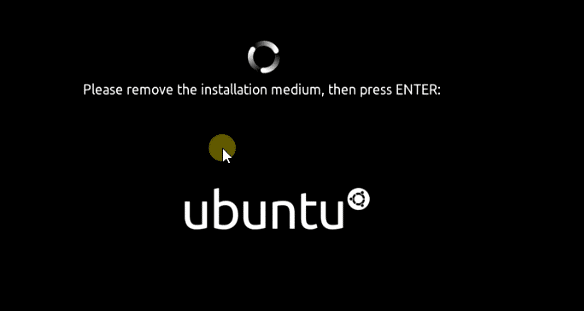
On the next screen, Remove or disconnect media (iso image) and press Enter.
To disconnect Media, Go to the “virtual machine settings” >> Select CD/DVD (SATA)
In the Device status section, Uncheck the “Connect at power on” option. In rare cases, if the “Connected” option is also enabled, uncheck it as shown in the image.
Click OK.
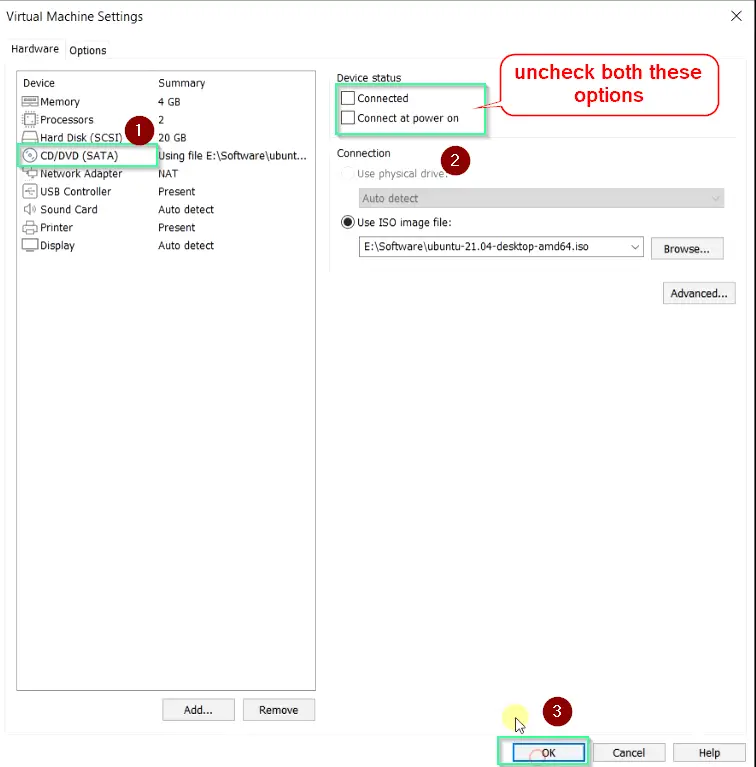
Now your machine will boot from disk instead of ISO image.
Step2.19 – Login with username and password
Once you will get Login screen, click on Your username and enter password, created earlier.
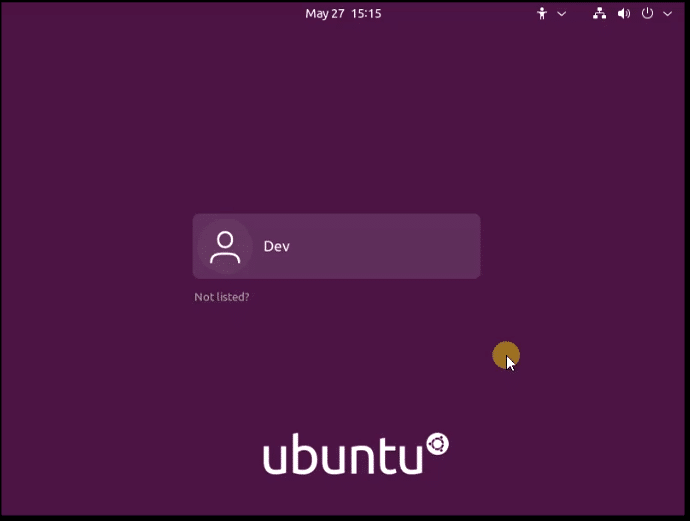
Step2.20 – Complete initial setup wizard
Once you will log in, you will get the Welcome wizard. Just provide your choices and complete them. Otherwise, you can skip it.
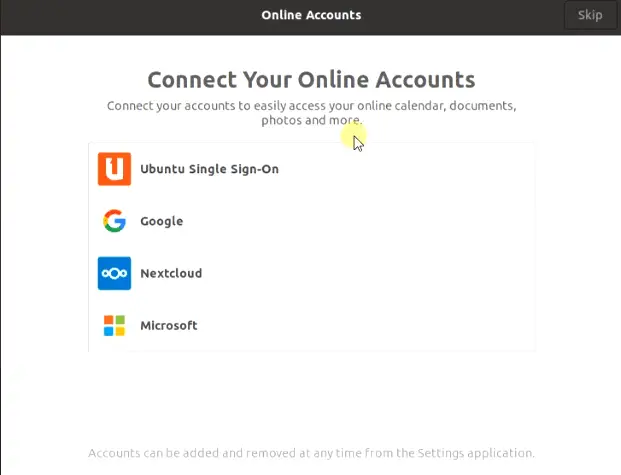
Step2.21 – Change Display resolution to make Ubuntu fullscreen
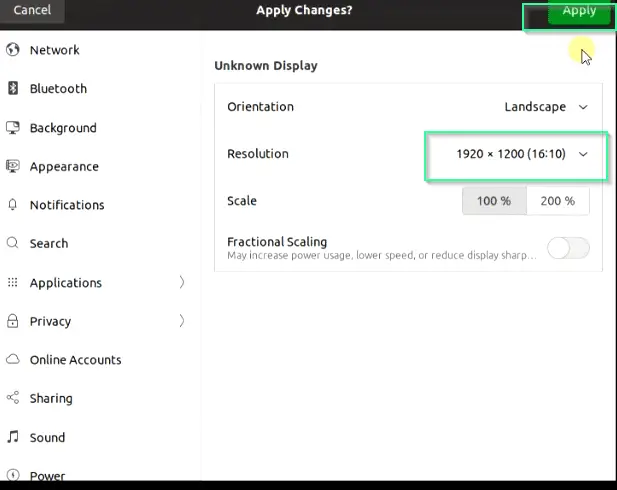
You need to change resolution of your Ubuntu 21.04 desktop as it will be set to 800×600 by default.
To do this, right-click on Desktop >> Select Display and then select resolution as per your wish to make it full screen. I have selected 1920×1200.
In case you have issues, check out this article on resolving screen resolution issues in VMware.
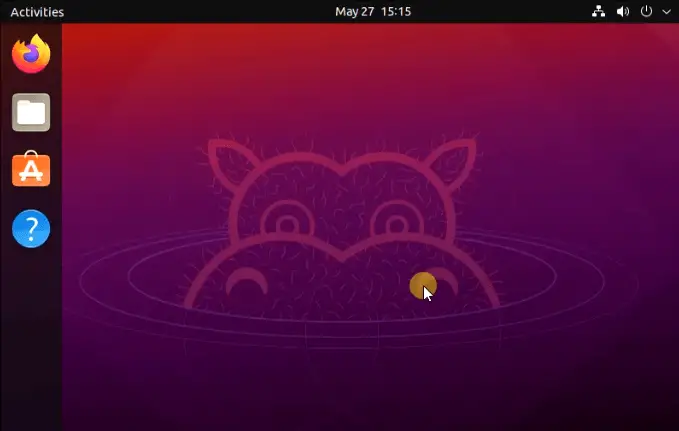
Step2.22 – Welcome to Ubuntu 21.04 HirSute Hippo Desktop
Congrats!! You have successfully completed the installation of Ubuntu 21.04. You can now explore this new Ubuntu Linux and cute Hippo wallpaper will keep you engaged all the time 😉
How to upgrade packages in Ubuntu 21.04 after installation
Once you are done with the new Ubuntu 21.04 Linux installation. I will suggest you to refresh the repository and upgrade old packages, in case any.
Step2.23 – Refresh repository and update packages
Run apt update command to update Ubuntu repository.
$ sudo apt update

If you found there are old packages, that can be upgraded as shown in above image. Run apt upgrade command.
For example There are 66 packages, required upgrade.
Run apt upgrade command to keep your packages up to date.
$ sudo apt upgrade
Video tutorial
I have created this useful video, on ” How to install Ubuntu 21.04 in VMware Workstation player“. You can refer to it anytime if you have doubt about any of the steps in the article.
Ending Note
The beauty of installing Ubuntu 21.04 in VMware is, You don’t have risk of losing your existing Operatins sytem, like it happens in dual boot.
You can play, explore and install it N number of times without second thought. You can take a copy/backup of the Ubuntu installation directory and restore it, in case you have ruined your Ubuntu VM during your play 😉
Let me know, How you find the new Ubuntu 21.04 Linux version via your comments.
Keep learning and keep exploring.

