
The Installation of WSL1 or WSL2 was really complex in Windows earlier. So in the latest Windows insider preview released on 29th July 2021, Microsoft made the installation of WSL (Windows Subsystem for Linux) too easy. Now you can install Linux on Windows using a single “wsl –install” command.
As per Microsoft, this functionality is available in Windows 10 version 2004 and higher. To get this WSL single command functionality, you have to install KB5004296 using Windows update.
I will install Ubuntu 20.04 on Windows 10 in this tutorial. You can install your favourite Linux distro from the available list.
What is WSL
WSL (Windows Subsystem for Linux) was aimed to enable bash shell and core Linux commands/utilities for Developers and users. WSL2 (Windows subsystem for Linux version2) is an upgraded version of WSL1.
The main motto of introducing WSL2 was to increase the performance and to support full system call compatibility with a lighter VM. Installation of Docker, Editors, Core Linux utilities and Developer tools is now possible in WSL2.
A complete Linux kernel has been introduced by Microsoft and future upgrades will be in pipeline, the only major limitation of WSL is no GUI (although debatable), you have to deal with the command line.
Let’s understand the pre-requisite in detail and install WSL in Windows.
Pre-requisite to install WSL on Windows with Single command –
- Windows 10 version 2004 and higher. Make sure KB5004296 (OS Builds 19041.1151, 19042.1151, and 19043.1151) preview is installed in your system
- Computer with Hyper-V or Virtualization support and enabled from Bios.
- 64-bit Processor with Second Level Address Translation (SLAT) for WSL2. For WSL1, SLAT is not mandatory and it works fine without it.
If you don’t want to install the preview KB in your Windows system. You can still install WSL in your Windows 10 system. Click on the button to get the WSL tutorial.
How to Install WSL in Windows easily using one command
Step-1 Update your Windows 10 system
As per the 1st pre-requisite, check your Windows system, it must be 2004 and higher. Also, you need to install KB5004296. Let’s see how to achieve this in two steps –
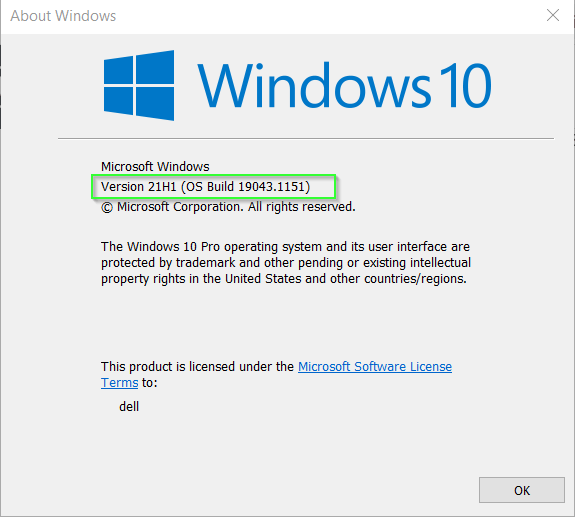
Step 1.1 – Check your Windows version
- Press <Windows Key + R> on your Keyboard.
- Type “winver” in the open Run box
If you see in the image, I have already updated the required OS build (19043.1151). If you are not on the required level keep reading.
Step 1.2 – Update your Windows 10 system
To update your Windows 10 system, follow these steps –
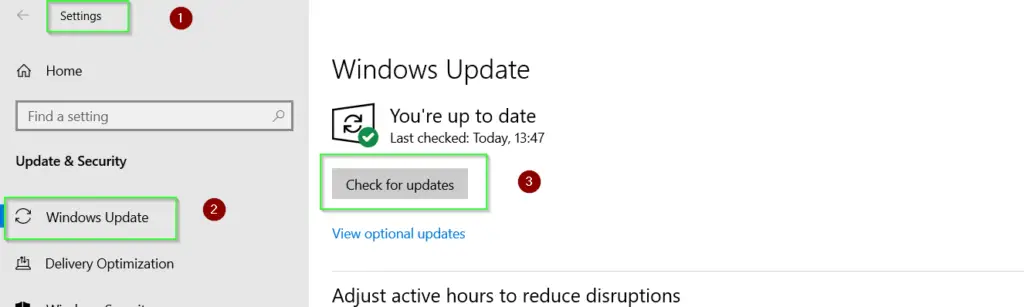
- Go to settings > update and security > Windows update
- Select check for Updates as shown in image
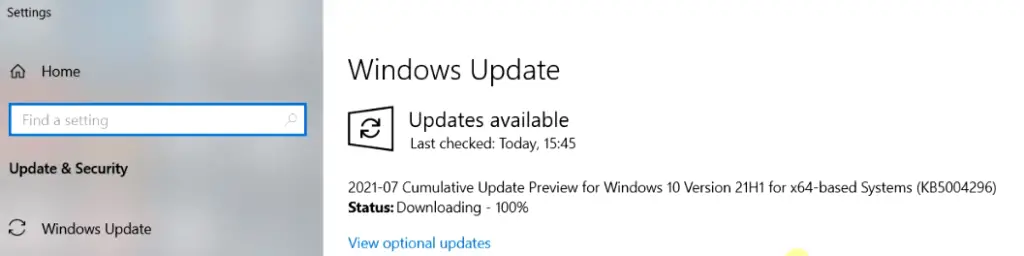
- Depending upon “on what version you are currently”, You may need to update Windows and restart serveral time to reach (“KB5004296“) as i did. You can see in image, i have updated “2021-07 Cumulative update preview for Windows 10 version 21H1 for x64-based systems” KB to get WSL single command functionality.
Step-2 List available Linux distros online
Once you complete Step-1, You are ready to install WSL (Windows Subsystem for Linux). You need to check the available distro first and then install that.
- Open command prompt with administrator right and Run this command to check WSL distro available online.
C:\> wsl --list --online

output

NAME            FRIENDLY NAME
Ubuntu          Ubuntu
Debian          Debian GNU/Linux
kali-linux      Kali Linux Rolling
openSUSE-42     openSUSE Leap 42
SLES-12         SUSE Linux Enterprise Server v12
Ubuntu-16.04    Ubuntu 16.04 LTS
Ubuntu-18.04    Ubuntu 18.04 LTS
Ubuntu-20.04    Ubuntu 20.04 LTS

If you get a “wsl not recognized as an internal or external command, operable program or batch file” error, visit Step1 again and validate for KB5004296. If it’s installed, then restart your system once to make it work.
Step-3 Install WSL using wsl –install with preferred Linux distribution
This tutorial will show you how to install Ubuntu 20.04 on Windows 10 in a single command using WSL. But you can install your favourite Linux distro out of the available versions.
If you will just run “wsl –install“. It will automatically install Ubuntu 20.04 by default in your system.
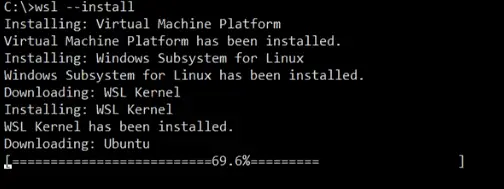
During this installation, wsl –install command perform these steps automatically-
- Installation of Virtual machine platform
- Installs WSL2 (Windows Subsytem for Linux version 2) by default
- Download and installation of WSL Kernel
- Download and installation of selected Linux distribution
- Launch Linux distro, e.g. Ubuntu in my case.
All the above-mentioned steps need to perform manually earlier when preview KB was not released.
c:\> wsl --install
For any other version, Give -d <distro name>. E.g. to install the rolling version of Kali Linux on Windows 10, run the following command.
c:\> wsl --install -d kali-linux
Step-4 Create Username and password
Once installation completes, it will launch the Ubuntu or your favourite Linux distro automatically. Provide Username and password as per your wish.

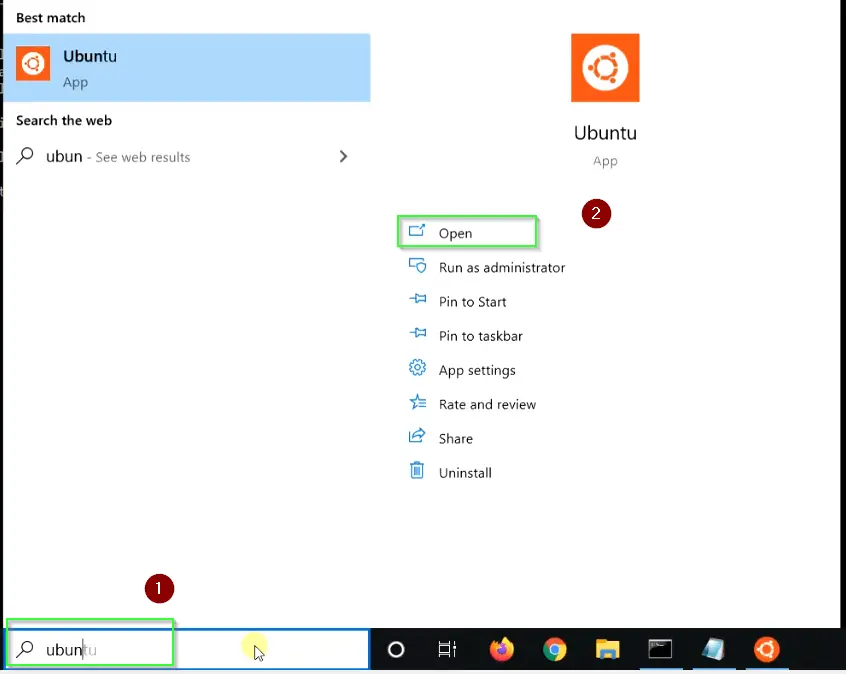
Step-5 Launch Ubuntu in Windows 10
To launch Ubuntu 20.04 or Your preferred Linux distribution in Windows 10. Simply search for Ubuntu or your distro name in the search bar of Windows 10. Then click Open.
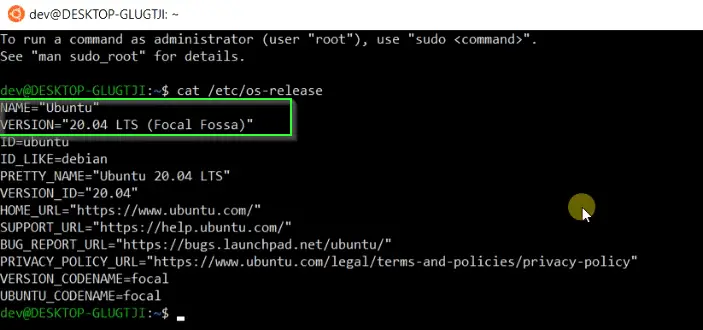
Step-6 Check Ubuntu version
To check the Ubuntu version, run the following command.
$ cat /etc/os-release
Step-7 Check WSL status
Run the “wsl –status” command to check distribution, WSL version and Kernel version.
$ wsl --status
These are the default versions installed with wsl –install command.
- Default distribution : Ubuntu
- Default Version: 2
- Kernel version: 5.10.16

Step-8 Run sudo apt update and install package in Ubuntu installed using WSL
Update your Ubuntu repository package using the “apt update” command.
$ sudo apt update

- Run apt install command, if you want to install any package in Ubuntu. For example to install VLC package in WSL ubuntu version, run following command.
$ sudo apt install vlc

How to update WSL in Windows 10
Run the “wsl –update” command to update your WSL Linux kernel in Windows 10.
$ wsl --update
You need to run “wsl –update rollback” to revert to a previous WSL Linux kernel version.
$ wsl --update rollback
Conclusion
Microsoft is trying to make WSL simple so that developers can install Linux on Windows and use it efficiently. I hope you can install WSL on Windows 10 easily using this single command. Also, you can avoid the hassle of dual boot (Linux + Windows) by using WSL on Windows 10.
Let me know if you like this article via your comments.
![How to fix “add apt repository command not found” on Ubuntu/Debian/Kali/CentOS/Fedora Linux [Update 2023]](https://cloudlinuxtech.com/wp-content/uploads/2022/07/solved-add-apt-repository-command-not-found-error-270x161.png)