
The mkvirtualenv command helps to create a virtual environment in Python for your projects. If you are getting a “mkvirtualenv command not found error“. The reason may be either virtualenvwrapper & virtualenv packages being missing or the shell is configured improperly.
When I tried to install it, I got the same error. so I decided to write a detailed article to help others.
The mkvirtualenv command depends on (virtualenvwrapper & virtualenv) packages. The virtualenvwrapper is a set of shell functions defined in “BASH” compatible syntax e.g. bash, ksh and zsh.
On the other side, virtualenv package enables you to create more than one python environment for your projects.
All these below mentioned errors point to the same issue related to “virtualenvwrapper & virtualenv” packages and can be solved by following this article step by step –
- bash: mkvirtualenv: command not found
- mkvirtualenv command not found windows
- mkvirtualenv command not found ubuntu 20.04
- mkvirtualenv command not found mac
- Python mkvirtualenv command not found
Why “mkvirtualenv command not found” occurs?
Following may be the reasons to get the “mkvirtualenv command not found” error while you are trying to create a virtual environment.

- You have misspelled the command “mkvirtualenv”
- The packages virtualenvwrapper & virtualenv are not installed in system
- You have not configured your shell correctly
- Path variable is not setup correctly
System requirements to run “mkvirtualenv” command
- Python 2 Or Python 3 must be installed already in your system
- Pip installation, if you prefer otherwise “apt” can also be use for virtualenvwrapper and virtualenv package installation
- Python build tools
- sudo or root access on your system
How to fix “mkvirtualenv command not found” error?
Follow these steps and provided solution will definitely fix your mkvirtualenv issue.
Solution – Install virtualenvwrapper and virtualenv packages correctly
If you are getting the “mkvirtualenv” command not found error, the first thing you must check is whether you have the required packages installed or not in your system.
For example to check virtualenvwrapper and virtualenv packages are installed or not, run the dpkg-query -L command in case of “APT” package manager.
$ sudo dpkg-query -L virtualenv
$ sudo dpkg-query -L virtualenvwrapper
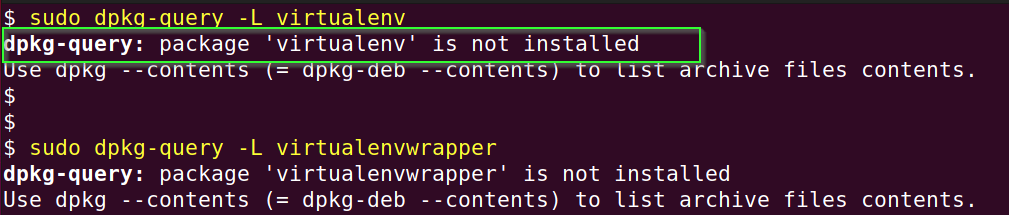
If you are getting “dpkg-query: package ‘virtualenvwrapper’ is not installed” as output, then you need to install the packages first in your system.
- If you use PIP as python package manager, then run following command to check whether virtualenv and virtualenvwrapper is already installed or not.
$ pip list | grep virtualenv
If both packages are already installed, then move to step 1.4 in this article.
Otherwise run the following sequence of commands to install the virtualenvwrapper and virtualenv packages in Ubuntu.
Step1.1 Update repository
Just do a quick update of your Ubuntu repository before any package installation.
$ sudo apt update
Step1.2 Install python build tools
Python3 is installed by default in all the latest Linux operating systems. In case it’s not installed, you can refer following articles on Python and Pip installation according to your operating system –
To install python build tools run the following command –
For Python 2 –
$ sudo apt install python-pip python-dev build-essential
In the case of Python 3 –
$ sudo apt install python3-pip python3-dev build-essential
Check packages, which are going to install as referred in the image. Type “Y” on your keyboard and press Enter, when prompted to continue with installation.

You can run python or python3 command on your terminal to know the version of Python on your system.
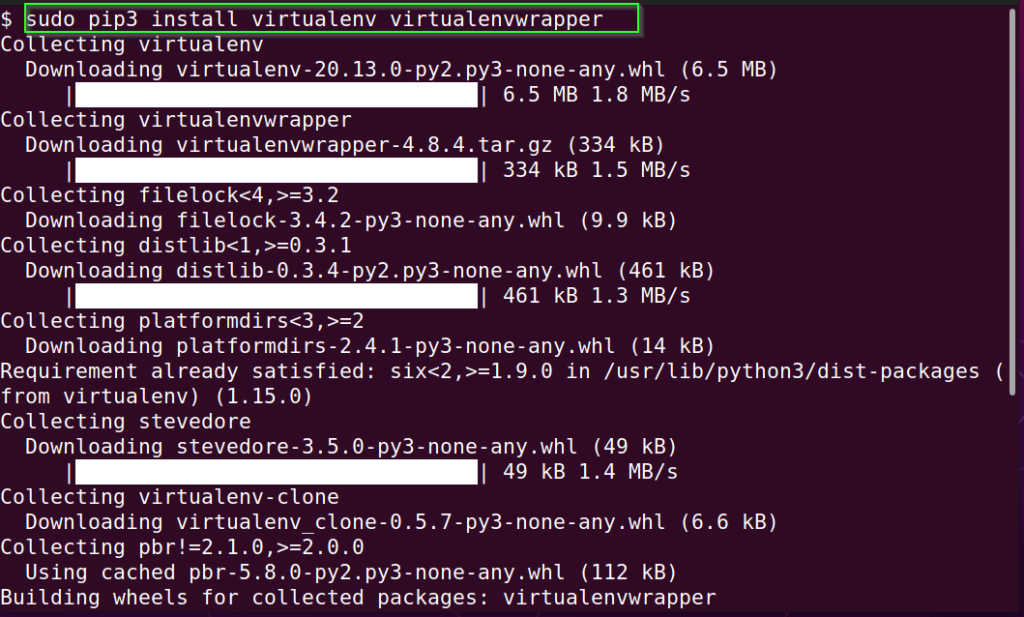
Step1.3 Install Virtualenvwrapper and virtualenv packages
If you have pip installed in your system run the following command else follow my other article on how to install pip.
- For Python 2
$ sudo pip install virtualenv virtualenvwrapper
- In case of Python 3
$ sudo pip3 install virtualenv virtualenvwrapper
If you want to install it locally instead of globally, run the following command –
$ pip install --user virtualenv virtualenvwrapper
If you have anaconda installed instead of pip, then you can use the “APT” package manager also.
$ sudo apt install virtualenv virtualenvwrapper
Step1.4 Locate virtualenvwrapper.sh file
In most of the cases, you will get your “virtualenvwrapper.sh” file in “/usr/local/bin” directory. In case you don’t find it run find command as follows to locate it.
$ sudo find / -iname virtualenvwrapper.sh

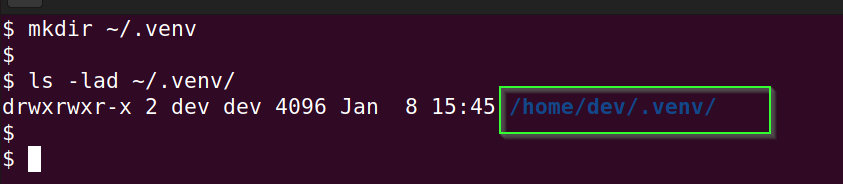
Step1.5 Create a directory for virtual environments
Once you are done with installation of Virtualenvwrapper package, you must create a directory where all your virtual environments will reside.
For example, i keep them in “~.venv” directory.
$ mkdir ~/.venv
Step1.6 Define the PATH of virtualenvwrapper.sh and WORKON_HOME directory
Now we need to configure our .bashrc or .profile files to tell “bash” or your shell about virtualenvwrapper.sh script and virtual environment home directory.
Edit .bashrc or .profile file using your favourite editor and add following lines in the end of the file.
*** Make sure you replace all the variable paths highlighted in “red” with your values. For example, in case you are using python2 in your setup, then provide path of python2 not python3.
If you are following this article step by step, then these values will work for you.
export VIRTUALENVWRAPPER_PYTHON=/usr/bin/python3
export WORKON_HOME=~/.venv

source /usr/local/bin/virtualenvwrapper.sh
Reload .bashrc configuration to commit changes.
$ source ~/.bashrc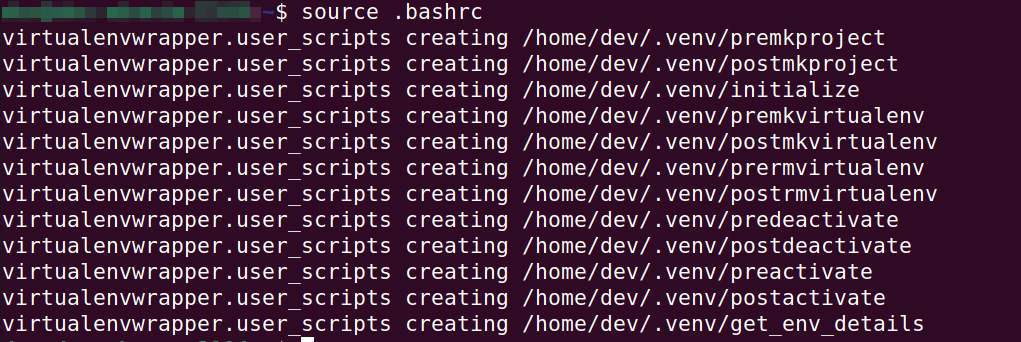
Step1.7 Run “mkvirtualenv” command and check version
Now you can run mkvirtualenv command and check version
$ mkvirtualenv --version

Congrats!! you have successfully fixed the mkvirtualenv command not found error.
Troubleshooting tips
If you are getting ” Python could not import the module virtualenvwrapper.hook_loader” error while running source ~.bashrc command.
Make sure you are exporting ” VIRTUALENVWRAPPER_PYTHON” variable path correctly as shown in step1.6 of this article.
bash: /usr/local/bin/python3.9: No such file or directory
virtualenvwrapper.sh: There was a problem running the initialization hooks.

If Python could not import the module virtualenvwrapper.hook_loader,
check that virtualenvwrapper has been installed for
VIRTUALENVWRAPPER_PYTHON=/usr/local/bin/python3 and that PATH is
set properly.
Conclusion
The main reason of “mkvirtualenv command not found” error is either packages are not installed or your shell is not configured correctly.
If you follows this article step by step, i am confident, you will be able to fix this error, whethere it’s Linux, MacOS or you have installed it in windows using WSL.
Let me know, in case you face any issue via your comments. I will try to help.
![How to fix “ng command not found” error for node.js @angular/cli [7 solutions]](https://cloudlinuxtech.com/wp-content/uploads/2022/03/How-to-Fix-ng-command-not-found-error-angular-cli-270x161.png)
![How to fix “pip command not found error” in Linux, Mac or Windows [Update 2023]](https://cloudlinuxtech.com/wp-content/uploads/2022/03/How-to-fix-PIP-command-not-found-error-270x161.png)