This post will show you, how to create an Azure VM using Terraform and pass custom data to the Virtual machine. I will deploy a virtual machine and will install a simple web server after the VM creation. I will not cover much theory, it will be more of a hands-on article, So just be ready with your terraform setup and start typing infrastructure as code (IaC) for your Virtual machine.
Pre-requisite to deploy Azure VM with custom data
Below mentioned are the requirements to get Azure VM deployed in Terraform with custom data –
- You must have at least basic knowledge of Azure and Terraform
- You must have a set up that is ready to execute terraform commands i.e. editor like visual studio code or Vim, Azure CLI, Terraform plugins. In case you don’t have the terraform and Visual code installed in your system. Then follow these articles on the installation of Terraform in Linux and Windows.
- Create a Microsoft Azure account, if doesn’t exist already.
- Internet connectivity obviously 😉
What Azure resources will be created during this exercise?
We will create or use the following resources during this exercise –
- Azure Resource Group
- Azure Virtual Network
- Azure Subnet
- Azure Public IP
- Azure Network Interface
- Azure Linux Virtual Machine
- random_string Resource
- Azure custom_data argument
- Terraform file Function
- Terraform filebase64 Function
Steps to create Terraform Azure VM with Custom Data example
In this article, we will create a Linux virtual machine with the installation of the web server as custom data using Terraform. I would try to make you understand every step in detail so that you can create any VM with custom data in future.
Following are the steps –
- Generate SSH Keys for Linux Virtual machine
- Write infrastructure as code for Linux VM
- Run terraform commands to deploy all the resources
- Clean up resources, if required
Step1 – Create SSH Keys for your Linux Azure virtual machine
We will generate ssh keypair to access our new Linux VM, once it will get provisioned. This is a recommended practise and must be followed compared to using Username and password to login to your Virtual machines.
I am using Windows machine to run all these steps, you can just replace the Windows command with Linux command on terminal to get the same output.
To generate SSH keys on Windows 10 –
- Open the “
Windows PowerShell” Prompt - Run
ssh-keygencommand
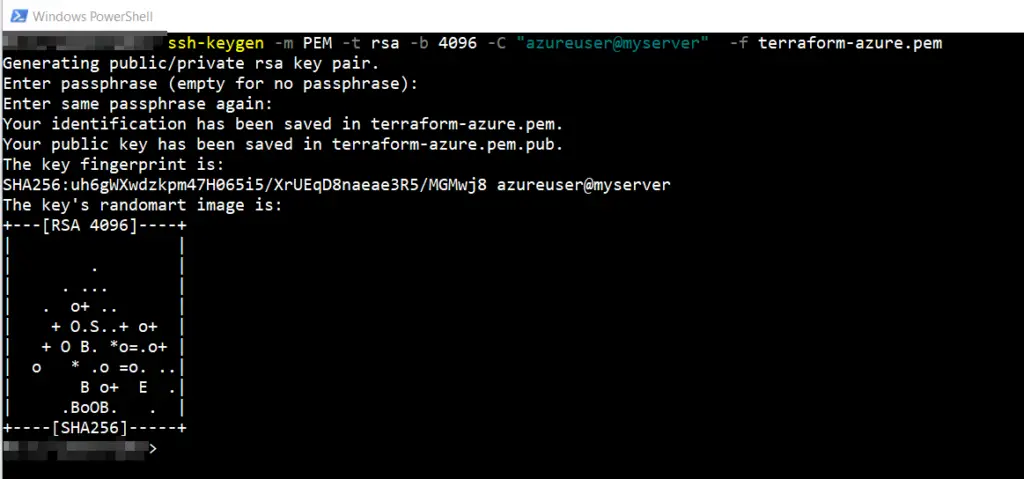
C:\> ssh-keygen -m PEM -t rsa -b 4096 -C "azureuser@myserver" -f terraform-azure.pem
In this command –
Username is azureuser and file name is “terraform-azure.pem“. You can give passphrase as blank or can enter a value. I have kept it blank for demo. You will find this key in the directory you were working on.
Important Note: If you give passphrase during ssh key generation, then everytime you login to VM, you also need to provide passphrase in the ssh command.
- List the directory and files to validate our ssh Keys got generated.
C:\> ls
You will find terraform-azure.pem and terraform-azure.pem.pub as shown in the file.
# Files Generated details -

Public Key: terraform-azure.pem.pub
Private Key: terraform-azure.pem

- Just rename “terraform-azure.pem.pub” file to “terraform-azure.pub“
C:\> mv .\terraform-azure.pem.pub .\terraform-azure.pub
- Create a directory “ssh-keys” , where you have your Terraform working directory. In my case, i will create it in the “terraform manifes” directory. I am using it for my terraform codes and configurations. Ignore the spelling of manifest, it has been kept knowingly 🙂
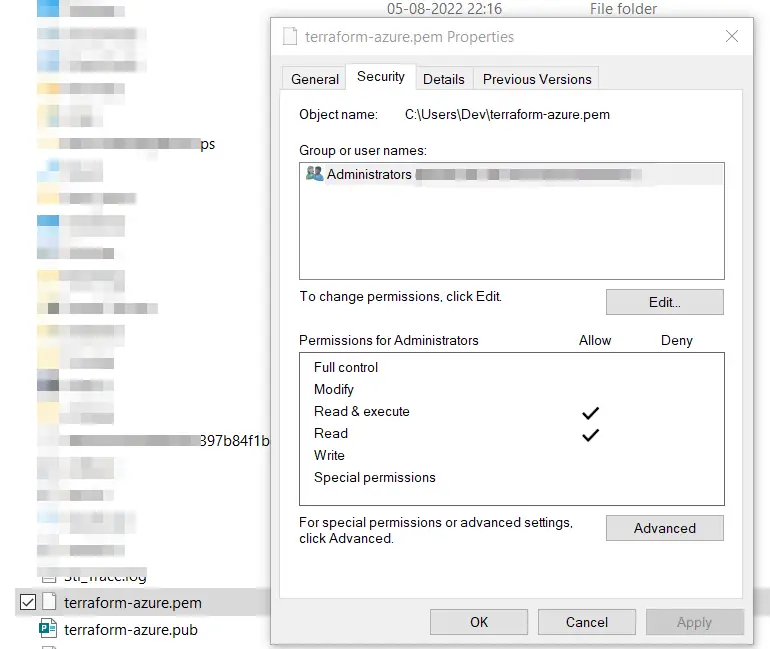
- Change terraform-azure.pem key to Read and execute only. This is equivalent to setting chmod 400 in Linux.
- Right-click on
"terraform-azure.pem" key file > Properties > Security> Remove all other users except administrator or your own user, in case you are not logged in with administrator and give only “Read and Execute” permission.
Step2 – Write terraform code to deploy required resources for Linux VM in Azure
Follow these steps to write terraform code and to deploy Linux virtual machine.
Important note – I am creating all resource from scratch. You must replace the variables, argument values and follow naming convention according to your environment, if you already have all resources deployed and just need to create VM.
Step2.1 Create c1-versions.tf file in the visual studio code editor
In this file we will keep our Terraform block, provider block and Random string resource code.
# Terraform Block
terraform {
  required_version = ">= 1.0.0"
  required_providers {
    azurerm = {
      source = "hashicorp/azurerm"
      version = ">= 2.0"
    }
    random = {
      source = "hashicorp/random"
      version = ">= 3.0"
    }
  }
}

# Provider Block
provider "azurerm" {
 features {}
}

# Random String Resource
resource "random_string" "myrandom" {
  length = 6
  upper = false
  special = false
  numeric = false
}
Step2.2 Create c2-Resource-group.tf file
# Resource-1: Azure Resource Group
resource "azurerm_resource_group" "myrg" {
  name = "myrg-1"
  location = "East US"
}
Step2.3 Create virtual network resource file – C3-Virtual-network.tf
In this file, we will write terraform code to deploy Virtual network, Azure subnet, associate Azure public IP, and virtual network interface.
# Create Virtual Network
resource "azurerm_virtual_network" "myvnet" {
  name                = "myvnet-1"
  address_space       = ["10.0.0.0/16"]
  location            = azurerm_resource_group.myrg.location
  resource_group_name = azurerm_resource_group.myrg.name
}

# Create Subnet
resource "azurerm_subnet" "mysubnet" {
  name                 = "mysubnet-1"
  resource_group_name  = azurerm_resource_group.myrg.name
  virtual_network_name = azurerm_virtual_network.myvnet.name
  address_prefixes     = ["10.0.2.0/24"]
}

# Create Public IP Address
resource "azurerm_public_ip" "mypublicip" {
  name                = "mypublicip-1"
  resource_group_name = azurerm_resource_group.myrg.name
  location            = azurerm_resource_group.myrg.location
  allocation_method   = "Static"
  domain_name_label = "app1-vm-${random_string.myrandom.id}"
  tags = {
    environment = "Dev"
  }
}

# Create Network Interface
resource "azurerm_network_interface" "myvmnic" {
  name                = "vmnic"
  location            = azurerm_resource_group.myrg.location
  resource_group_name = azurerm_resource_group.myrg.name

  ip_configuration {
    name                          = "internal"
    subnet_id                     = azurerm_subnet.mysubnet.id
    private_ip_address_allocation = "Dynamic"
    public_ip_address_id = azurerm_public_ip.mypublicip.id
  }
}
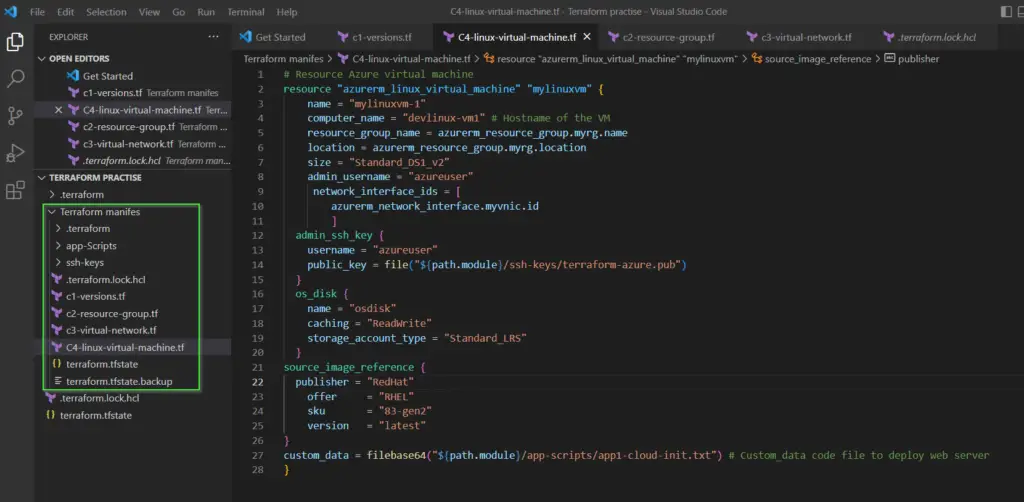
Step2.4 Create Linux Virtual machine in C4-Linux-virtual-machine.tf file
Here i am selecting “Standard_DS1_V2” virtual machine with RedHat 8.3. You can change these values as per your requirements.
# Resource: Azure Linux Virtual Machine
resource "azurerm_linux_virtual_machine" "mylinuxvm" {
  name                = "mylinuxvm-1"
  computer_name       = "devlinux-vm1" # Hostname of the VM
  resource_group_name = azurerm_resource_group.myrg.name
  location            = azurerm_resource_group.myrg.location
  size                = "Standard_DS1_v2"
  admin_username      = "azureuser"
  network_interface_ids = [
    azurerm_network_interface.myvmnic.id
  ]
  admin_ssh_key {
    username   = "azureuser"
    public_key = file("${path.module}/ssh-keys/terraform-azure.pub")
  }
  os_disk {
    name = "osdisk"
    caching              = "ReadWrite"
    storage_account_type = "Standard_LRS"
  }
  source_image_reference {
    publisher = "RedHat"
    offer     = "RHEL"
    sku       = "83-gen2"
    version   = "latest"
  }
  custom_data = filebase64("${path.module}/app-scripts/app1-cloud-init.txt") # Custom_data code file to deploy web server
}
Step2.5 Prepare custom data file as app1-cloud-init.txt
Write following lines of code in a text file to deploy the web server in your Linux virtual machine. We are calling this file in last step using filebase64 function in our terraform code shown in Green text. Make sure you gave the path right in custom_data field for this file as shown in the red text.
#cloud-config
package_upgrade: false
packages:
  - httpd
write_files:
  - owner: root:root
    path: /var/www/html/index.html
    content: |
      <h1>Welcome to cloudlinuxtech.com - APP-1</h1>
  - owner: root:root
    path: /var/www/html/app1/index.html
    content: |
      <!DOCTYPE html> <html> <body style="background-color:rgb(250, 210, 210);"> <h1>Welcome to cloudlinuxtech.com - APP-1</h1> <p>Terraform Demo</p> <p>Application Version: V1</p> </body></html>
runcmd:
  - sudo systemctl start httpd
  - sudo systemctl enable httpd
  - sudo systemctl stop firewalld
  - sudo mkdir /var/www/html/app1
  - [sudo, curl, -H, "Metadata:true", --noproxy, "*", "http://169.254.169.254/metadata/instance?api-version=2020-09-01", -o, /var/www/html/app1/metadata.html]
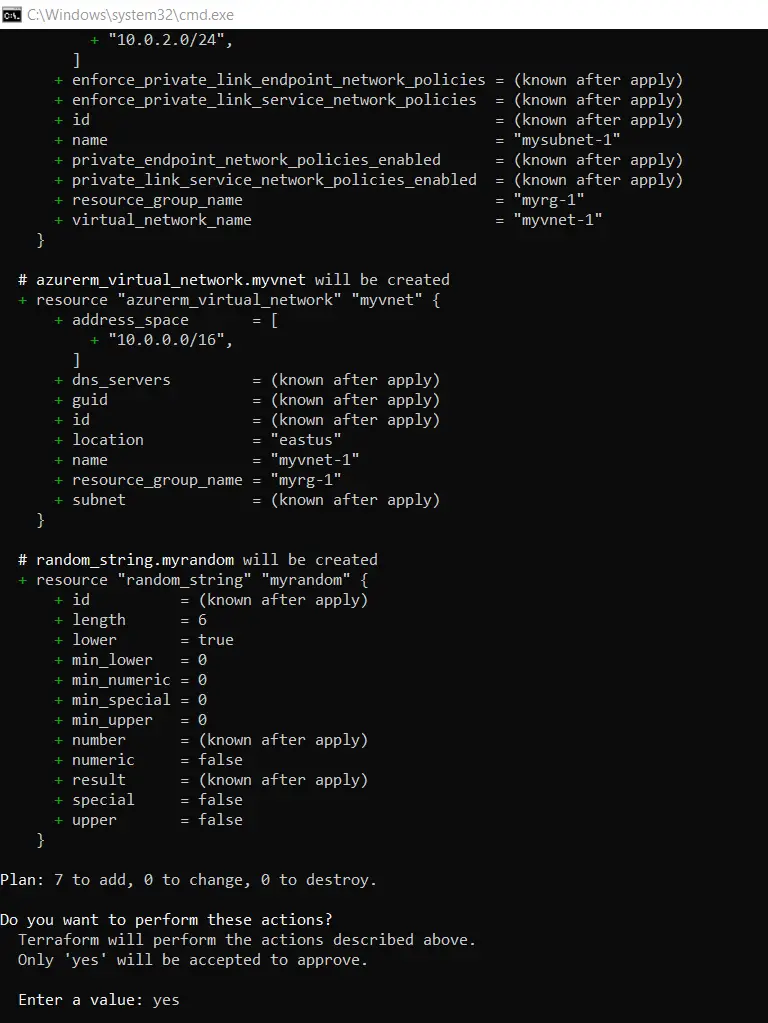
Step2.6 Run Terraform commands to deploy these resources
Run the following terraform commands one by one from the Azure CLI prompt.
# Initialize Terraform
terraform init

# Terraform Validate
terraform validate

# Terraform Plan
terraform plan

# Terraform Apply
terraform apply
Step3 Verify the resources manually from the Azure portal
- Login to Azure portal and quickly check the new resources you have just created.

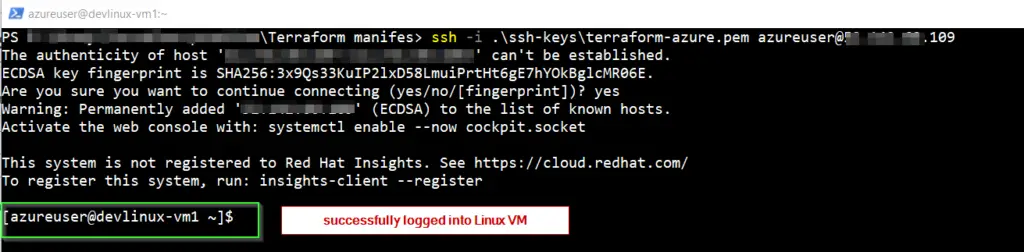
- Try login into your Linux virtual machine with your public IP as shown in the image.
# Connect to VM and Verify
ssh -i ssh-keys/terraform-azure.pem azureuser@<PUBLIC-IP>
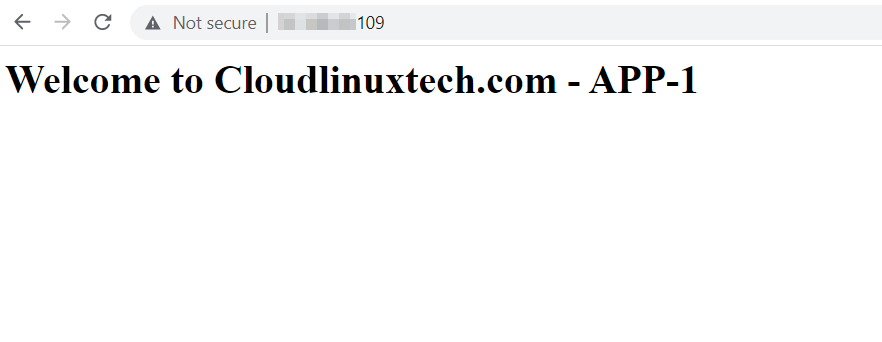
- Try accessing the following web pages to check web server is working fine.
http://<PUBLIC_IP>
http://<PUBLIC_IP>/app1
http://<PUBLIC_IP>/app1/metadata.html
Step4 – Clean up the resources, in case you are testing to avoid charges
If you are running these commands in the test lab, then make sure you clean all deployed resources after testing is finished. Else Azure will keep charging you for the resources deployed.
#Terraform destroy to clean up resources
terraform destroy
End note
I hope you are able to create the Azure VM with custom data usisng Terraform. Please make a note, you need to keep the terraform version and terraform provider version same. In case you have different version, you just need to tweak the code according to your Terraform version. Else you will get those errors or warnings during Terraform validate or plan command.
If you want to know, how to pass custom data to Azure VM using ARM, follow this link. You can also check Azure registry documentation, in case further information required regarding terraform code.