Let’s explore Python and Pip in this post and learn “How to install python on windows 10 properly“. We will discuss the latest version available today for Python (3.9.1) and pip (20.2.3). Also, I will explain how to modify and uninstall Python software. In case either additional feature needs to add/remove or you want to get rid of the old python version.
I am confident, even if you are new to Python, you will be able to install it easily, following this post step by step. So let’s deep dive in.
What are Python and pip
Python is a simple, Object-oriented, interpreted, high-level programming language with dynamic semantics. Due to its non-complicated syntax and fast edit-test-debug cycle, the Programmer community loves it. Python also reduces the cost of software management due to its simple nature.
Pip is a package manager for python, it allows you to install and manage additional libraries and dependencies that are not distributed or part of the standard library.
Linux users can check out my post on “How to install the latest Python in Linux“.
Pre-requisite to install python on Windows 10
- Windows 10 machine
- Internet connection
- Approx. 200MB of disk space (varies according to features and options selected).
Let’s find out the steps to install Latest Python and pip –
How to install Python on Windows 10 using GUI
Step1- Python and pip download
You can download the latest python version 3.9.1 for windows or your respective operating system from python.org website.
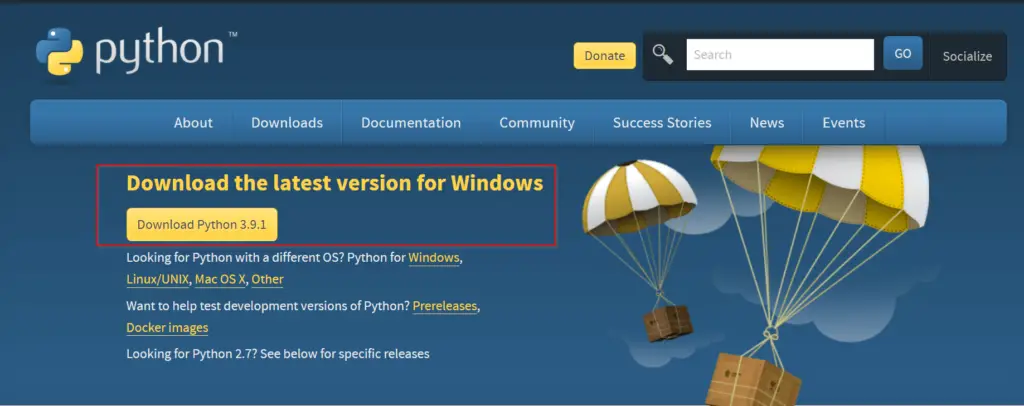
Otherwise, you can simply click on the below-mentioned button to download python for windows 10.
Click here to download an older release of Python like 3.8 or 2.7, for your project. Once you click on this link, scroll down and select your old python version as shown in the image.

You don’t need to download pip separately as it’s part of Python 3.9.1 software. You will know it while following this post further.
Step2- Run Python 3.9.1 (64-bit) installer
Once your download completes, visit your “download” directory. Then double click python-3.9.1-amd64 file to start the python setup wizard.

Step3- Choose “Install Now” or “Customize” installation
At this point, You will get two installation options –
- Install Now – This option is helpful if you are a newbie. Just select “Install now” and it will install Python 3.9 with default settings. Python default installation directory would be “C:\users\”your-username”\AppData\Programs\Python\Python39”. It will also install IDLE, pip, documentation and shortcuts.
- Customize installation – If you are a pro and need to know, what all features will be installed with python. Also, in case you already have python installed and want to test the latest version. Using the Customize installation option, you can choose a different installation folder and can keep both python versions.
Keep following this post, if you want to see options covered in Customize installation.
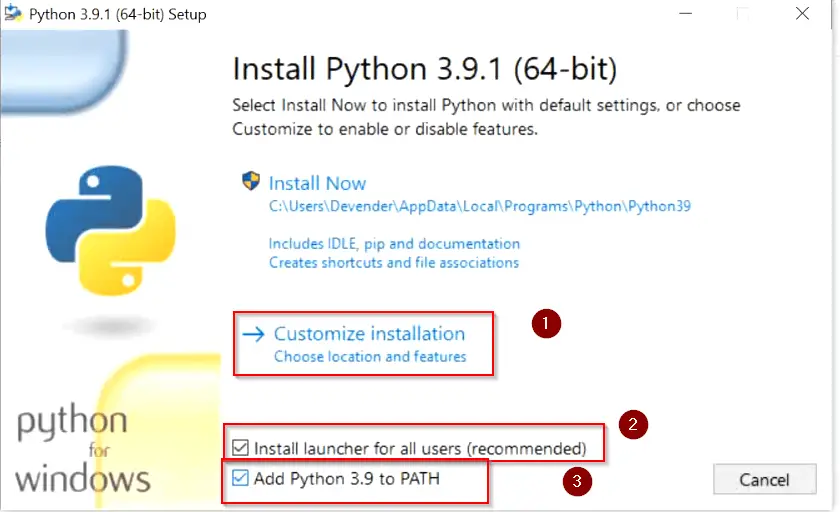
There are two more checkboxes to look into –
- “Install launcher for all users (recommended)” – Select this check box and it will make a python launcher shortcut for all user profiles exist in your machine. Whomsoever will login to your system will be able to use python 3.9.
- Add python 3.9 to path – Select this check box to add Python and pip “Path Variables” in the system environment automatically. If you will not select this option now, you need to add the path variable manually later after installation. My recommendation is to select it here itself.
So let’s click on “Customize installation” and check both the boxes as shown in the image.
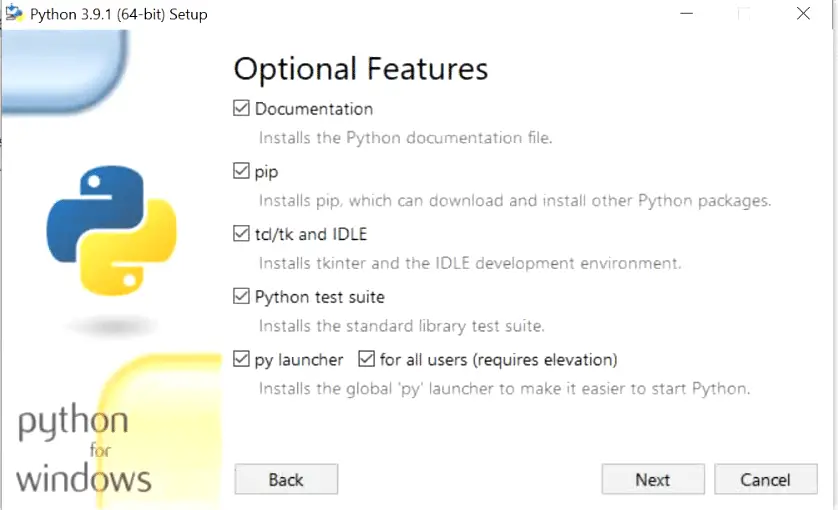
Step4- Add or remove “Optional Features“
On this window, you can add or remove optional features, available with python 3.9. Let’s see few details of each optional feature available –
- Documentation:- Selecting this box will install all the Python documentation and manuals.
- pip:- As I informed you in Step 1 download section. Pip is already part of python 3.9. Select this check box, If you want to install pip automatically with Python 3.9 (which I strongly recommend).
- tcl/tk and IDLE:- Selecting this check box will install Tkinter and the IDLE development environment. You don’t need to install it separately then.
- Python test suite:- Installs the standard library suite.
- py launcher for all users (requires elevation):- Installs the global ‘py launcher‘ for all users. It requires admin rights (elevation) to perform it. Because it will allow all users to launch python easily from their user profiles.
Choose your required optional features and click Next. I will suggest you to keep all options checked.
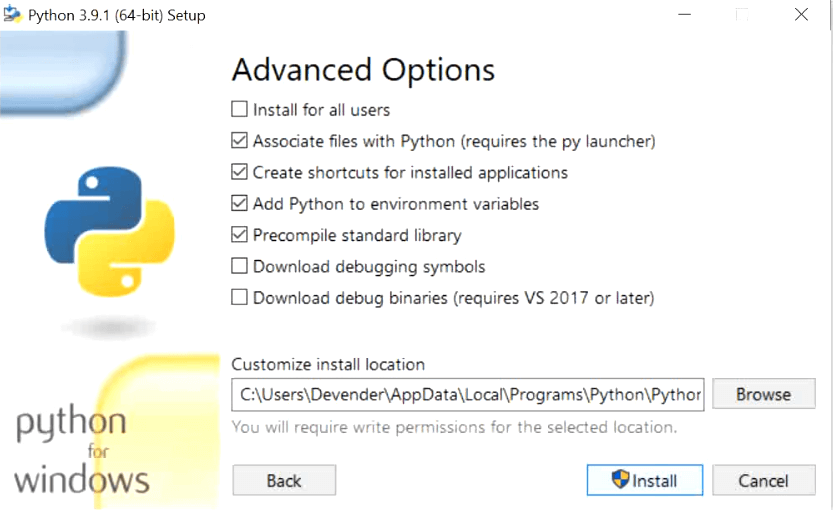
Step5- Choose “Advanced Options” of python 3.9
These are the advanced options available, which are self-explanatory.
- Install for all users – Python 3.9 will install for all users in your machine. In my case, I am the only user. So this option really doesn’t matter much for me.
- Associate files with Python (requires the py launcher) – Link associated files to the py launcher
- Create shortcuts for installed applications – Create shortcuts icons for Python, pip and installed optional features.
- Add python to environment variables – Add environment variable for python and pip
- Precompile standard library – Adds precompiled libraries.
- Download debugging symbols – You can download and install the debugging symbol, which attaches additional information to the symbol table.
- Download debug binaries (requires VS 2017 or later) – To install required and dependent debugging binaries.
If you are a pro and know your required options. Select those options as per your need. In case you are a newbie, you can proceed with default selected options as shown in the image.
Click Install –
Step6 (optional)- Select custom install location folder
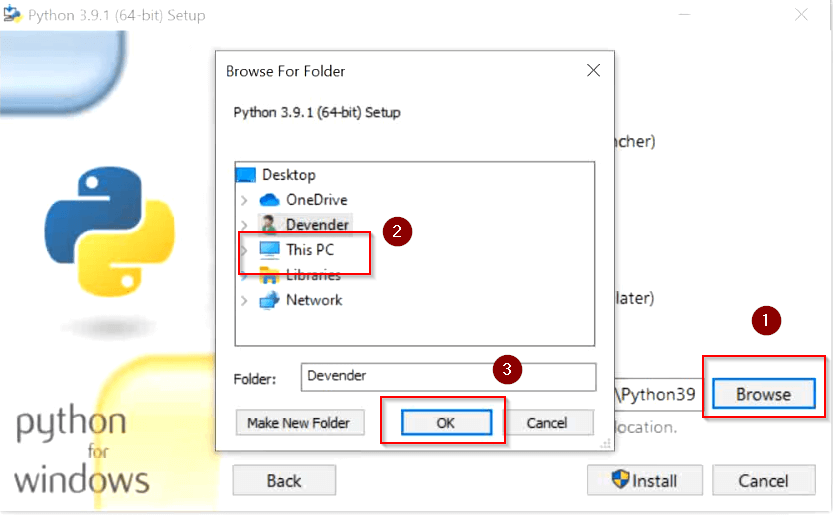
If you already have Python version installed and want to keep it safe. Also, you want to install a newer python version for testing. To make this happen, On Step 5, click Browse – Select your destination installation folder – click OK and click Install.
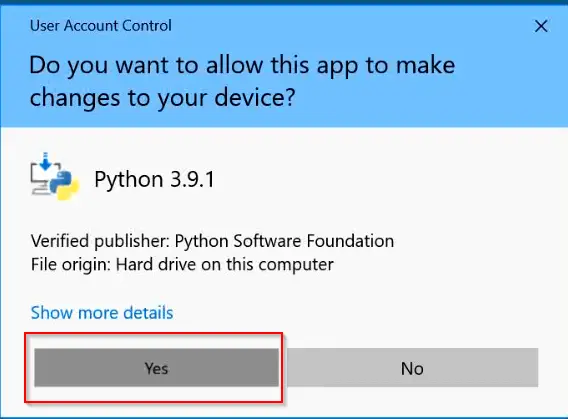
Step7- Allow Python 3.9.1 to make changes
Choose “Yes” to allow Python 3.9 to make changes to your system.
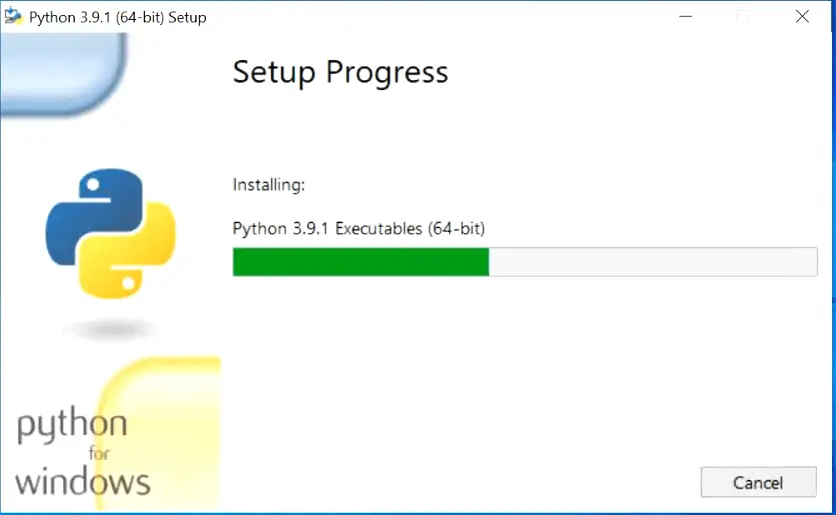
Step8- Let Python 3.9 and pip setup complete
Sit back and relax. Python and pip installation will take some time to complete.
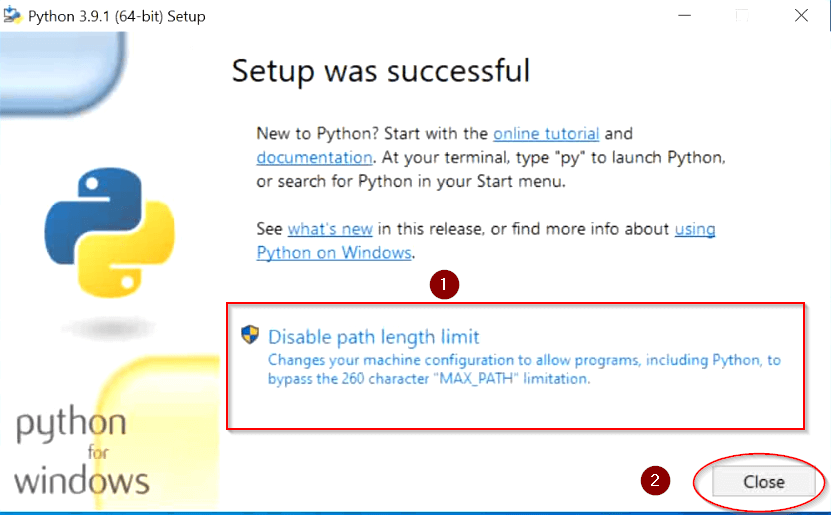
Step9- Select “Disable path length limit”
At this point, Python and pip have been installed successfully in windows 10. But you need to select “Disable path length limit” here. Because it allows python to bypass the 260 characters “MAX_PATH” limitation. Basically, it means, if the number of characters exceeds 260 in your installation directory path. Python will not be able to add it to the path variable. It’s a limitation of Windows 10.
Select “Disable path length limit” – then Allow Python 3.9 in user access control and Select Close.
How to Check Python and Pip version on Windows 10
Follow below mentioned steps to check python and pip version. Additionally, it will also validate path variable is added properly in system environment.
Step10- Validate Python and pip versions
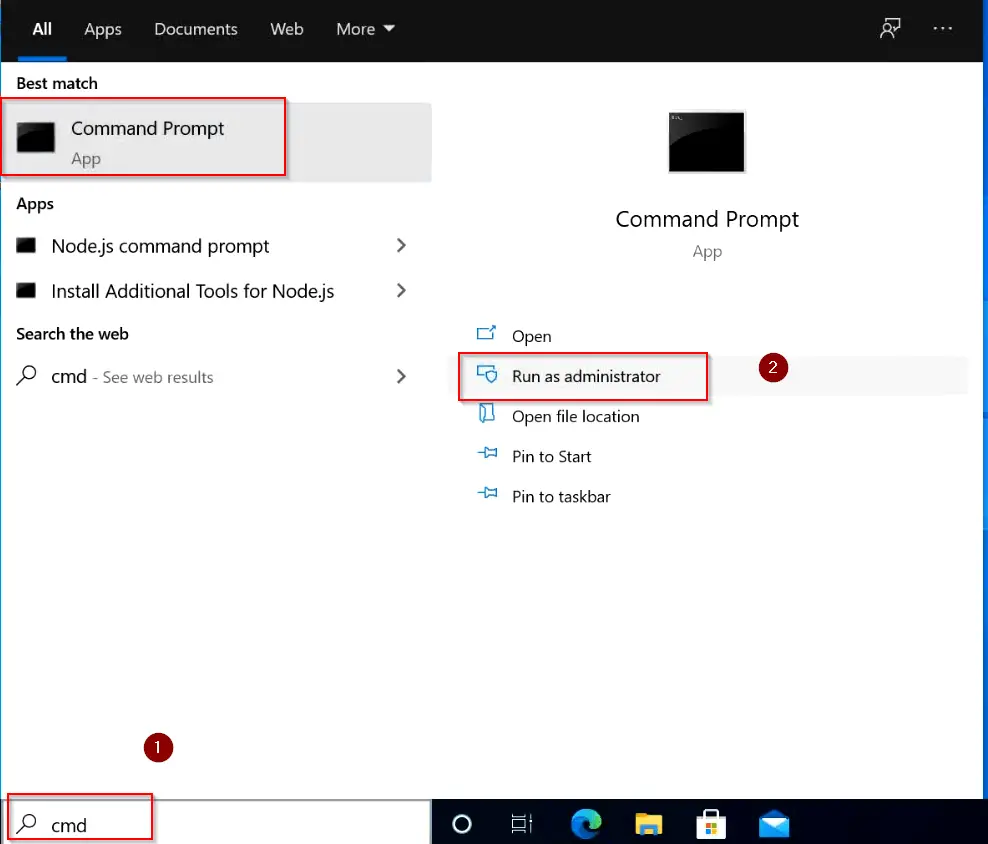
- Open elevated command prompt “as administrator” by typing “cmd” in search bar of windows 10.
- Run python or py (short form) command to check Python version. You can see it’s version 3.9.1 installed in my case. You will see your installed version.
C:\> py
### OR ###
C:\> python

Type exit() or press “Ctrl + Z” on your keyboard to exit from python prompt.
- To check Python-pip version, type pip –version command. it will show you the pip version. it’s pip 20.2.3 in my case.
C:\> pip --version

Running pip and python version command successfully also validates, that your python and pip path variables are added successfully in Windows 10. Check out this post, if you are still getting ‘pip’ is not recognized as an internal or external command, operable program or batch file.
Step11- Launch Python alternative method
I showed you how to get python prompt and version from the command prompt. Let me show you an alternate way to launch the Python console.
- Type “Python” in the search bar of windows 10. Click “open“.
- (optional) If you will check bullet 3 in the image, I have shown you that if you need open or check Python manuals or documentation. You select one of them and open. Additionally, you can open IDLE from the search bar.
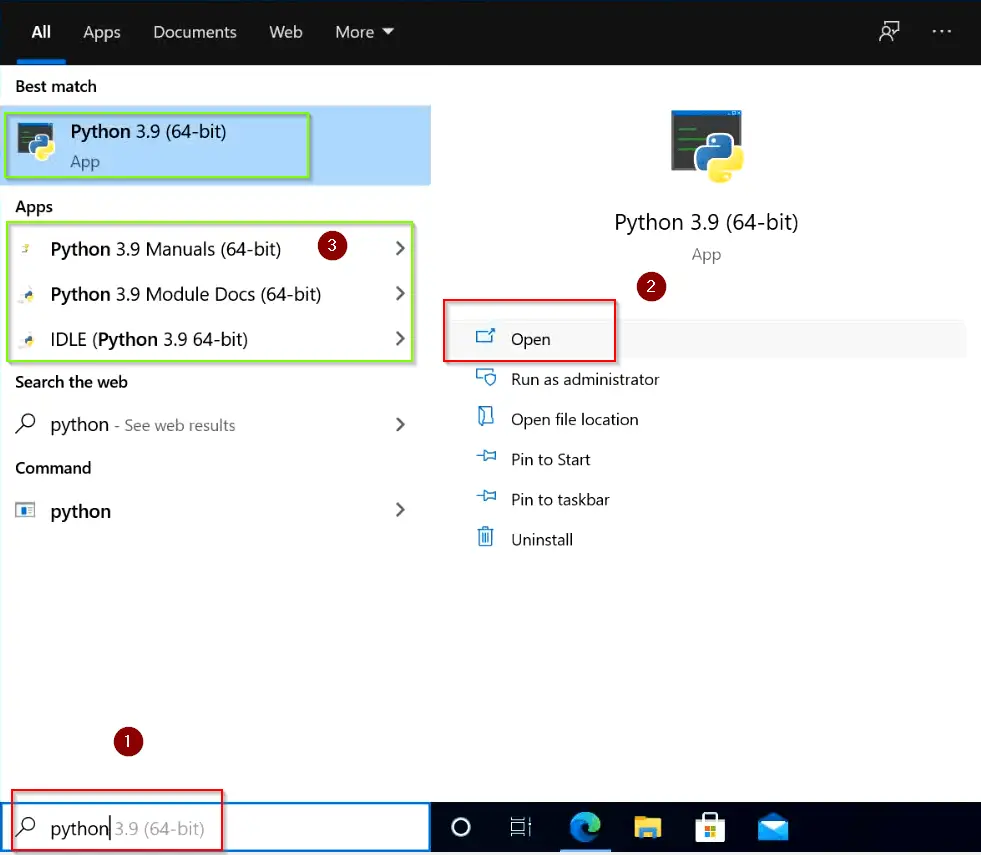
- After opening, it will take you to python 3.9 window. Enjoy and start your python projects.

How to install python on windows 10 (command line)
Although preferred and recommended option to install Python and pip in windows 10 is through GUI. But in case you want to learn python 3.9 version installation from the command line. Follow these simple steps –
Step1 –
- Open elevated command prompt by typing “cmd” in search bar.

Step2 –
- Go to your Downloads directory and Run “Python-3.x.x exe” as shown. In my case, it’s Python 3.9.1-amd64.exe. Below mentioned are the arguments and options used in the command –
- /quiet – means no interactive wizard.
- InstallAllUsers=1 – Install for all users
- PrependPath=1 – Install Python variable path
- Include_test=0 – Don’t include or install test suite
0 – means disable (don’t install)
1 – enable (install)
C:\> cd "path to your home directory"
C:\> python-3.x.xexe /quiet InstallAllUsers=1 PrependPath=1 Include_test=0
For example –
C:\> cd "users\devender\Downloads"
C:\> python-3.9.1-amd64.exe /quiet InstallAllUsers=1 PrependPath=1 Include_test=0

Just wait for a couple of minutes and latest python will install. Enjoy..
How to repair or modify Python in windows 10
There are some scenarios when you are not confident about additional features and options. Later you realize that you need that feature or advance option as shown in step4 and step5 in this post during installation. Then you don’t need to worry, it’s easy to add or remove features and advance options even after installation is done.
Follow these easy steps –
- You need to type “Control Panel” in the windows search bar. Click Open.
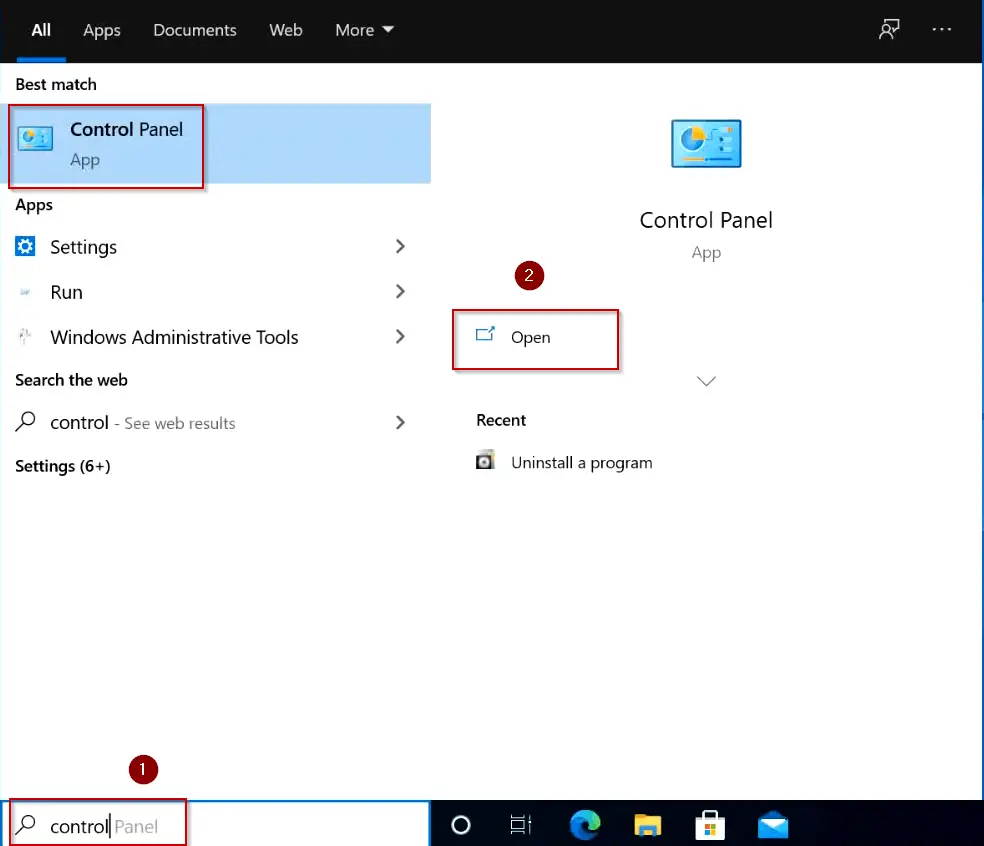
- Select “uninstall a program“
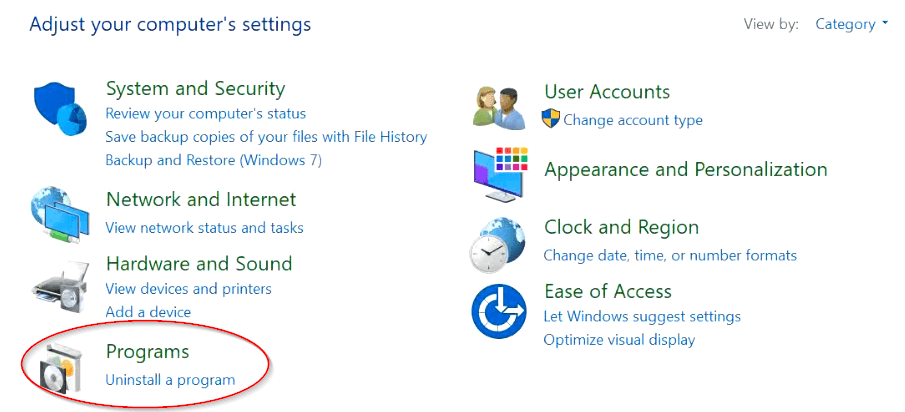
- Select “Python 3.9.1” or your version and click “Change“.

- Select “Modify” and press Next. You can also repair your installation using this wizard, in case installation issues.
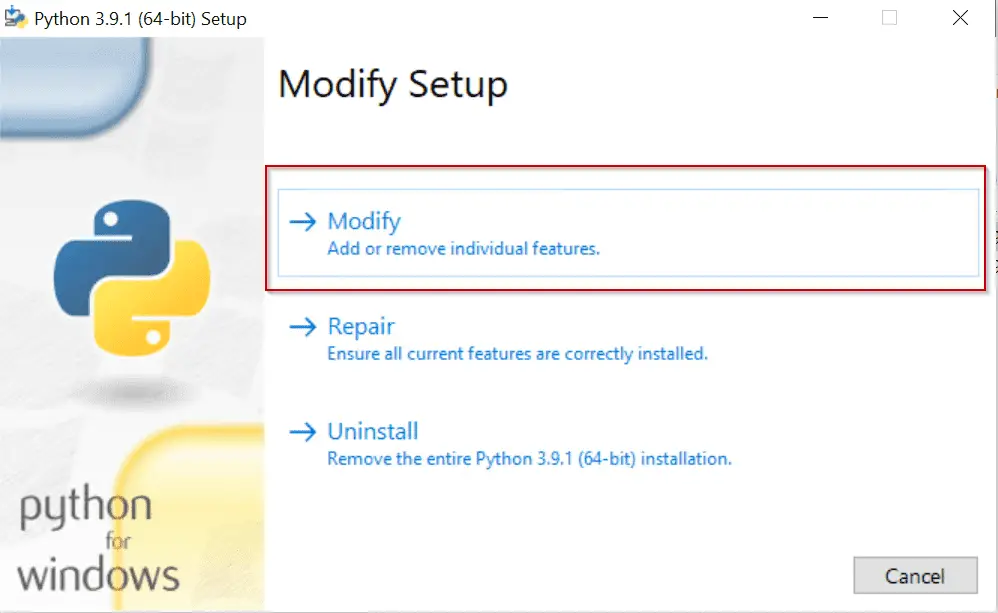
Select Features and advanced option as per your need and complete installation. Refer Step4 and Step5 for further reference as shown in “How to install Python on Windows 10 using GUI” section.
How to uninstall Python in windows 10
If you have installed the latest Python and pip version by following this post. Now you want to get rid of your old Python version. Follow these simple steps to remove or uninstall Python in Windows 10.
Step1. Open Control panel from search bar
To start the uninstallation process of older Python and pip software from your windows 10. You need to type “Control Panel” in the windows search bar. Click Open.

Step2. Select “Uninstall a program“

Step3. Select Python and click “Uninstall or change a program”.
Step 3.1 – I have shown Python version 3.9.1, but you need to select your old Python version. Once you select, click “uninstall“.

- Wait for uninstallation progress bar to complete and click “Close“.
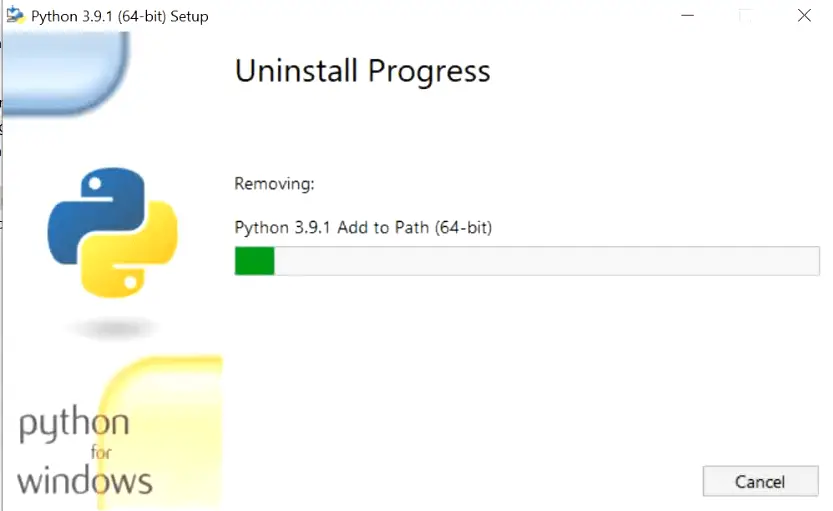
Step 3.2(optional) – Once python uninstallation completes and if you can see Python Launcher also.
- Then, Just select “Python launcher” and click “Uninstall“.
- Select “Yes” in “uninstall python launcher” dialogue box as shown in image.
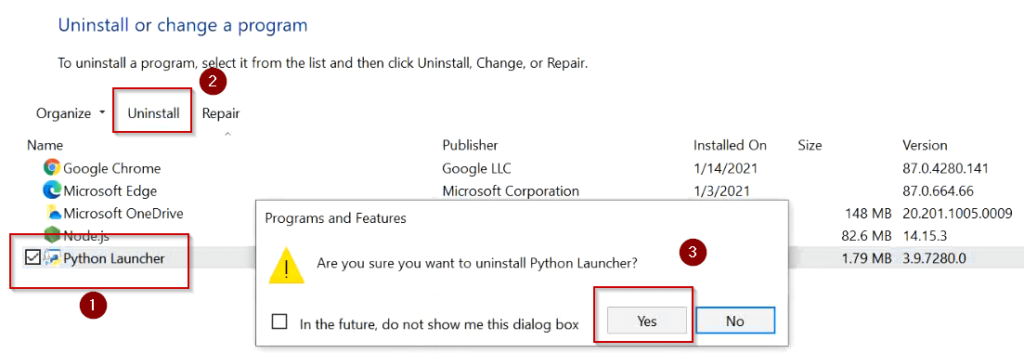
- Permit in allow “User access control” box and uninstallation of Python will be done.
Hurray, You have got rid of old version of Python.
Video tutorial
If you don’t like reading, watch this tutorial to know “How to Install Python on Windows 10“. Also “Uninstallation of Python from windows 10“.
Conclusion
Congrats!! Now you know approximately everything on how to install, modify and uninstall Python in windows 10. Also, you must have a good idea of pip installation with Python3. Nowadays, Microsoft also recommends installing development software on WSL (windows subsystem for Linux).
If you like this post, you can share it on your social media wall to help others.
Frequently Asked Questions:-
Is Python EXE safe?
Yes, Python exe is completely safe. Make sure you download it from python.org website or from legitimate source only. Then you should be good with the installation. In case you have not installed it and still, you can see in your system. Go to control panel – click on “Uninstall a program” – Then check for Python software installation. If it is visible there and you don’t want, you can uninstall it. If you don’t found it in programs, then it may be a virus or malware. Scan your system and remove it.
Is Python free to download?
Yes, Python is free opensource software. You can download and install it in your system from https://www.python.org/downloads/ website.
How do I run Python on Windows 10 from the command line?
Open elevated command prompt – type py or python and hit enter.
Can I learn Python by myself?
Yes, it’s one of the easy languages with no complex syntax. There are many websites with free tutorials. Checkout free Python tutorials.
Why Python is not working?
May be either python is not installed or you have not set up Python path variable in the system environment.


