In this tutorial, I will show you how to install ubuntu 20.04 on VMware workstation without messing up with your existing operating system, whether Windows or Linux. Also, we will learn the installation of VMware tools on Ubuntu.
This post is basically for those people who already had Windows 10 or Linux installed as the host OS. And need to install ubuntu Linux newer version on it as Guest OS. It may be for education, research or exploring new features of the Ubuntu Linux operating system.
Installing any Guest OS is not limited only to Ubuntu Linux, it may be used for any Operating system like Windows 10, Other Linux flavour like AlmaLinux, Mint, Redhat, Suse, Fedora, Debian etc., and even Solaris, Free BSD, Novell also.
I am using Vmware workstation player 15 (free to use non-commercial) in my tutorial and ubuntu 20.04. But Steps are more or less common for installing any operating system. Just need to follow instructions on the screen.
If you already having a Vmware workstation player installed, good but if not, then you can check my tutorials on
- How to install Vmware workstation in ubuntu
- How to install VMware Workstation 16 player in Windows 10
Overview:-
I have selected Ubuntu OS 18.04 LTS as Host operating system, just because it’s open-source (No license required), easy to use, secure, accessible and free to download :-). It has everything, I need to make this tutorial.
The requirement for Ubuntu Installation:-
- Connect your laptop or Desktop to a power source, so that it won’t get disrupted due to power-related issues
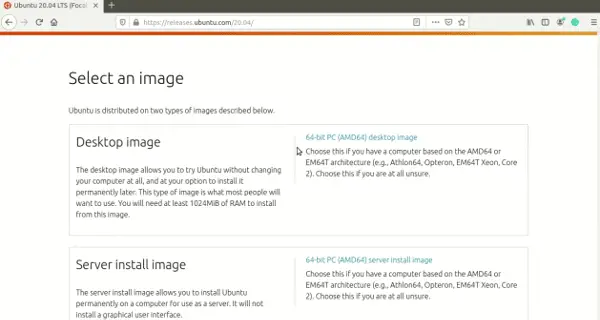
- Ensure you have downloaded Ubuntu 20.04 LTS (Focal Fossa) Iso image from the Ubuntu website but if you have a question in mind, Where do I get Ubuntu ISO? Click here… Make sure you download Desktop image 64bit PC. if you want to perform some research on Server image, you are free to do so.
- At least 20GB space for Ubuntu 20.04 Linux installation
- Minimum 1 GB memory and 1 vCPU.
- Take a backup of data, as an IT professional, I understand data backup is really important, so if you are going to perform any major activity, always take a complete backup of your data.
- Internet connection, as it requires to download some packages online during installation
Installation Steps of Ubuntu Linux:-
There are two ways to complete the installation of Ubuntu 20.04 on the Vmware workstation, both steps are more or less similar. I will differentiate it during my tutorial.
1.) Create a new virtual machine in Vmware workstation Player 15 and then install Ubuntu – it will be a two-step process
2.) Create a new Virtual machine and install Ubuntu in one Wizard – it’s a bit easy and automated, so I will showcase this method in my tutorial.
let’s start
Step1:- Download Ubuntu 20.04 image
Download Ubuntu 20.04 iso image for desktop.
Step2:- Open Vmware Workstation Player
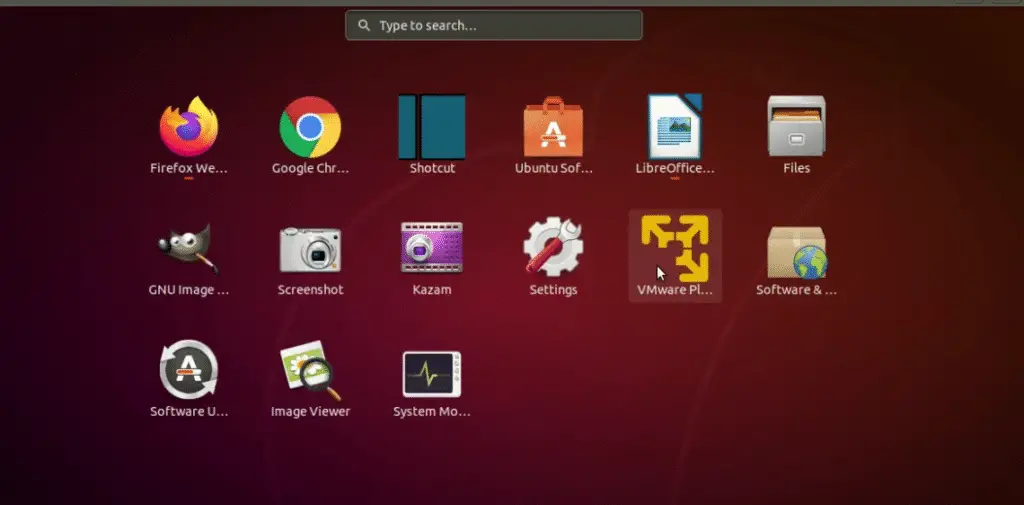
Click on show applications and search for “Vmware workstation player”, then open it.
Step3:- Create a new Virtual machine
Click on Create a new virtual machine, it will start the New Virtual machine creation wizard for Ubuntu 20.04

Step4:- Select your iso image
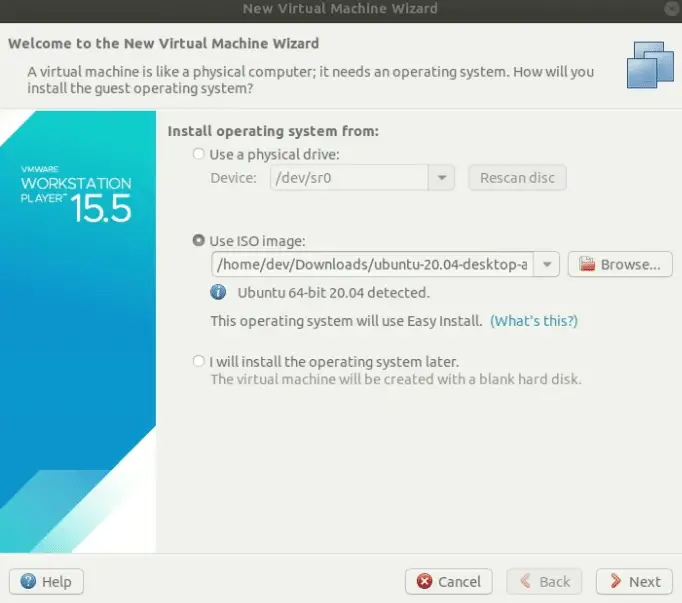
you will get a Media selection page, you have three options.
Use a physical drive – if your laptop or PC has CD/DVD drive and you love to burn iso images to CD’s and Dvd’s (old school method). You can select this option. Your physical drive will be visible as /dev/sr0, and you just need to insert the installer disc, you prepared and then click on Next.
Use iso image – using this option, you can just browse for your downloaded ISO on your laptop or PC and then click Next. I will be using this method and it’s my recommended method for you also.
I will install the operating system later – if you are not willing to install the Operating system immediately or you are not ready with Burnt Ubuntu iso CD or image, you can select this option. If you will continue using this option, it will create a new Virtual machine for you, as I mentioned in the installation steps option1. You can install Ubuntu Linux 20.04 later in the second stage.
Step5:- Provide Username and Password
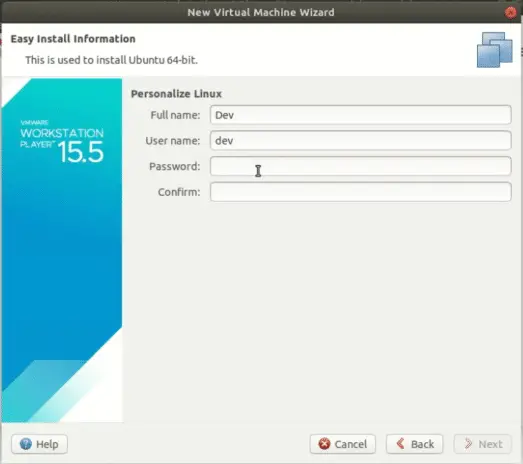
Once you are done with media selection, Wizard will ask you to fill in “Easy install information”. it’s all about personalizing your Ubuntu Linux. Provide full name, username, password, confirm the password and you are done. Click next
Step6:- Provide VM name and installation location
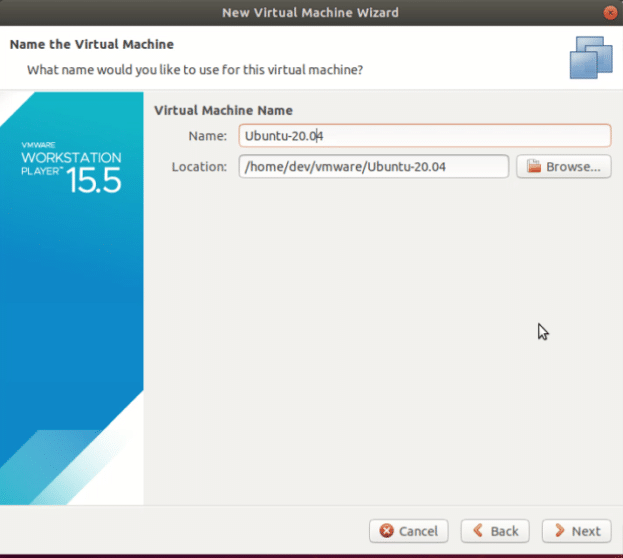
In this step, you need to provide the name of your virtual machine and location where you want to keep configuration files and disk for Ubuntu (Guest os)
Step7:- Select disk format
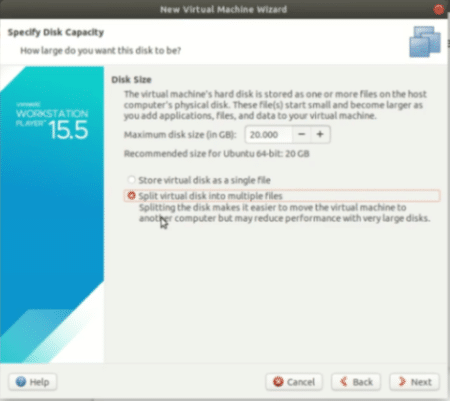
Specify disk capacity, by default it’s 20GB recommended, I will suggest you keep it at least 20GB or more for Ubuntu 20.04 installation.
Vmware workstation can keep the disk in two formats –
Store virtual disk as a single file – you can select this option, but I won’t recommend this as managing a large file of 20GB or more would be difficult, in case you want to copy or move this VM to another PC or laptop.
Split virtual disk into multiple files – management of Virtual machine disk file is easy but may have some performance impact due to large files.
Step8:- Review your configuration or Customize hardware
Final confirmation wizard, in this step you can have a final look at your configuration, like name, location, Operating system, Harddisk size, Memory ({2GB} is selected by default as recommended), Network adapter and other devices.
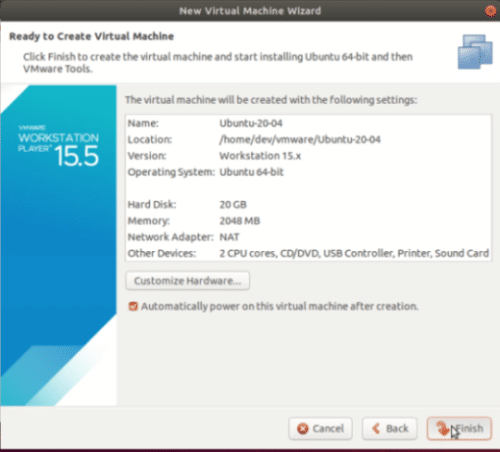
if you want to make any change, you can select customize hardware option.
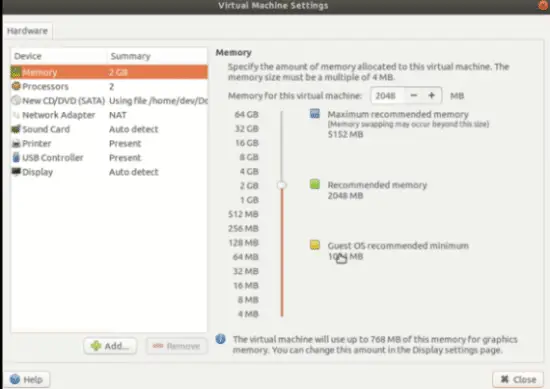
In case you are not happy with the location or disk option you selected earlier, you can select back and can change information, you don’t like.
Automatically power-on this virtual machine after creation option can be enabled(checked) or disabled (unchecked) as per your preference, it will basically start the installation immediately after you click Finish on the wizard.
if you will disable this option, you need to start the virtual machine manually from the VMware workstation console.
Once all done, click finish.
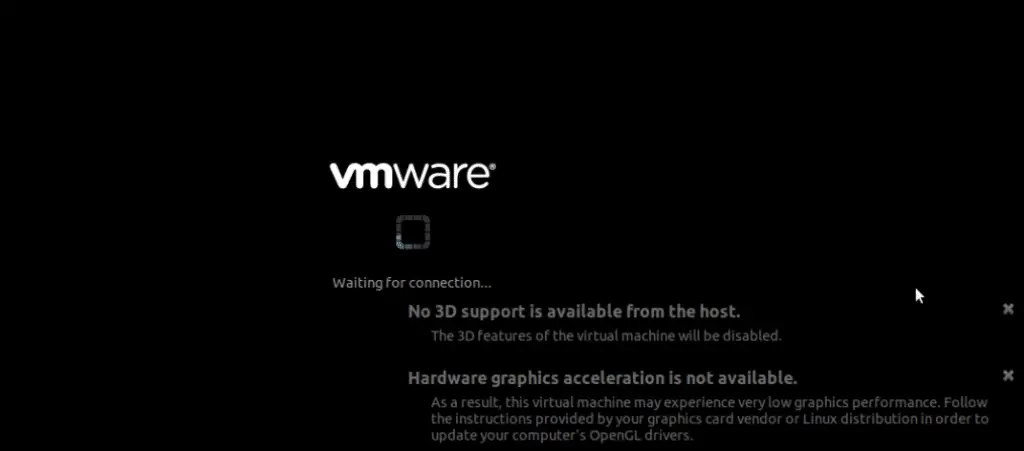
After reboot, you may see errors regarding “No 3D support is available from the host” or “hardware graphics acceleration is not available. These errors can be ignored as maybe your hardware doesn’t support this for your Ubuntu Linux Guest OS like mine.
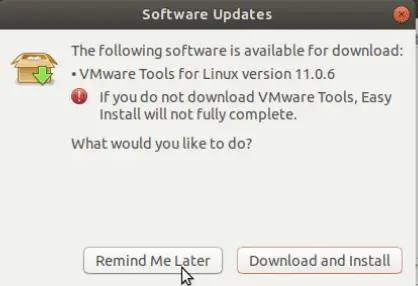
Select “Remind me later” for Software update of Vmware tools, as we don’t want to mess up with tools updates before Ubuntu installation.
Step9:- Disk check Process
The virtual machine built for Ubuntu 20.04 will restart and start checking the Disk. You can press Ctrl+c if you want to cancel the disk check.
once disk check is done, a message will appear saying, “check finished, no errors found”.

Step10:- Verify installation configuration and File System
Wizard will now “Verify the installation configuration” and after that, Scanning and creation of file systems.
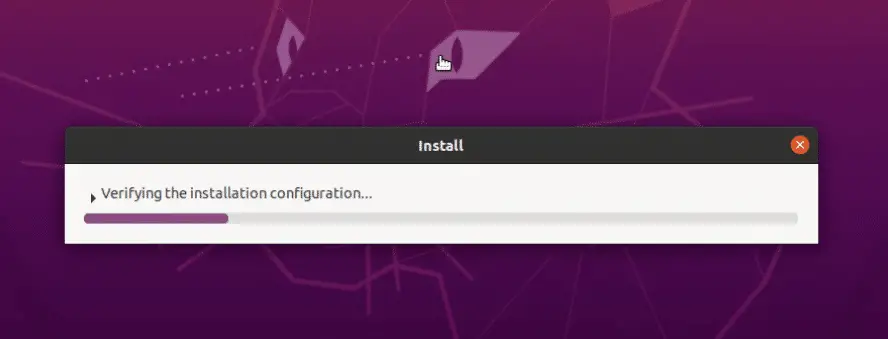
The beauty of installing Ubuntu Linux 20.04 on the VMware workstation player is, you don’t need to fill or provide too many options, regarding time, language, creating a file system, it will automatically perform all these steps for you.
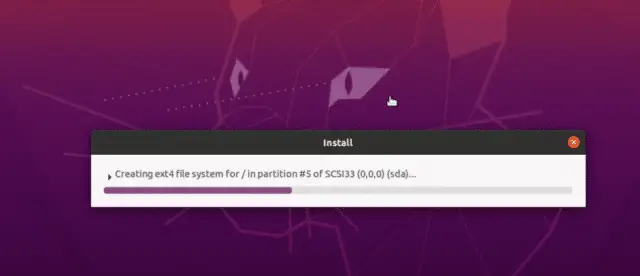
The virtual machine will get most of the time or language-related settings from the host operating system, you just need to sit back, relax and watch the installation.
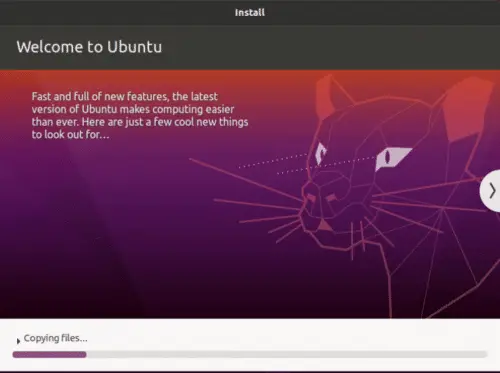
Step11:- Copy file progress
once Verification and Creation of file system done, it will start extracting or copying files to virtual machine disk.
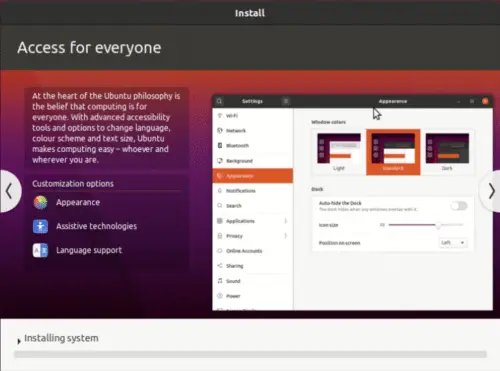
Step12:- Installing and configuring system
In the next step, Wizard will start with installing and configuring the system. which involves configuring hardware and installing drivers.
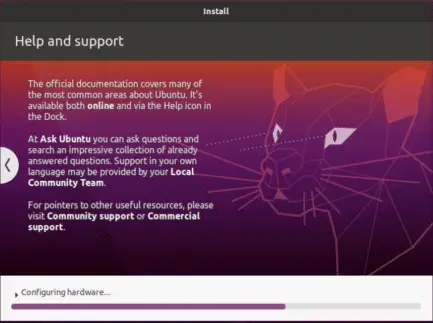
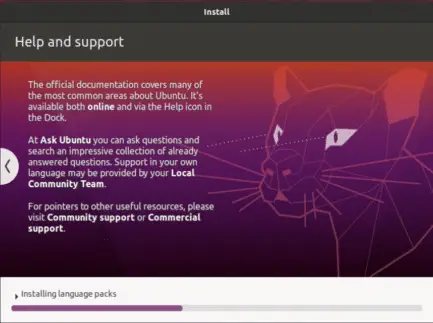
Step13:- Ubuntu 20.04 Package installation
During installation, your internet connection must be working as it download some language packages and some modules, which are really important for Ubuntu installation.
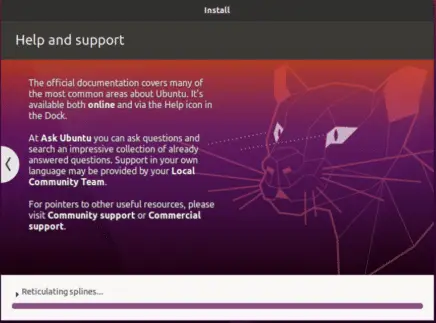
Step14:- Grub installation
The final step will be installing Grub (boot loader) and reticulating splines. it will then restart your Ubuntu virtual machine to boot from disk.
Step15:- Snapd issue resolution
During boot, it will install Vmware tools on Ubuntu 20.04 Linux machine, sometime you will get the error message “Failed to start, wait until snapd is fully seeded”. you can ignore this error as it happens, sometimes due to kernel behaviour changes due to Vmware tools installation.
if you feel it makes the login process slow, you can just press shift and click with your mouse, it will help with fast login.

Step16:- Finish installation
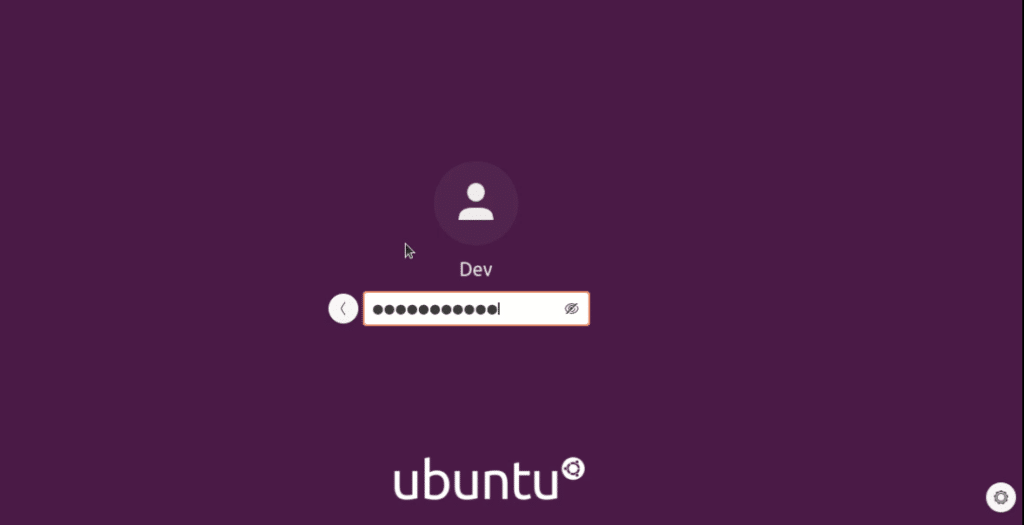
So finally, you are done with Installation and the login screen appears. Login with the password you provided during the pre-installation check of virtual machine creation and New Ubuntu 20.04 screen welcomes you.
Check out this article on the latest Ubuntu 21.04 installation on VMware
Step17:- Check VMware tool version
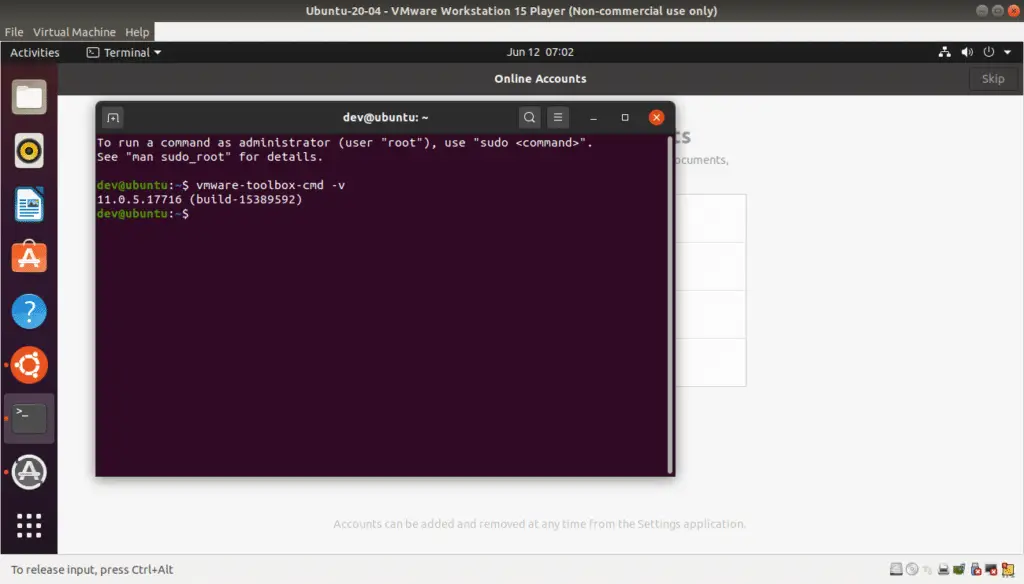
Finally, check on Vmware tools, but how to check Vmware tools version on Ubuntu Linux 20.04? it’s simple.
Open terminal — Run below-mentioned command —
$vmware-toolbox-cmd -v
How to install VMware Tools on Ubuntu
Ubuntu installation must have completed to this point. Now, you must also know VMware tools. These tools are really important for the guest operating system. Because it helps to improve the functionality and management of Virtual machine.
It helps to reduce problems like –
- Display related (low resolution, colour depth etc.)
- Restricted mouse movement and abrupt clicks
- Sound issues
- Copy-paste issues
- Network related issues and many more.
When you install Ubuntu 20.04, By-default Open-VM tools are installed with a Virtual machine as shown in step16 of this post. There are two ways to install or upgrade Vmware tools
i.) Install VMware Tools in Ubuntu GUI
ii.) VMware tools installation using CLI
let’s, deep dive on these options step by step
Install or update Vmware tools ubuntu using GUI
Before installation of Vmware tools, let’s check Vmware tools options available in VM settings-
-> To check these options, Click on Virtual machine > virtual machine settings > options > Vmware tools
A.) Update automatically – If you will select this option, you just need to click on Download and install. It will automatically download & install Vmtools in ubuntu.
B.) Update manually (do nothing) – This option will download Vmware tools and you have to manually install it in your ubuntu
C.) Use application default (Currently update manually) – Same as Option B.
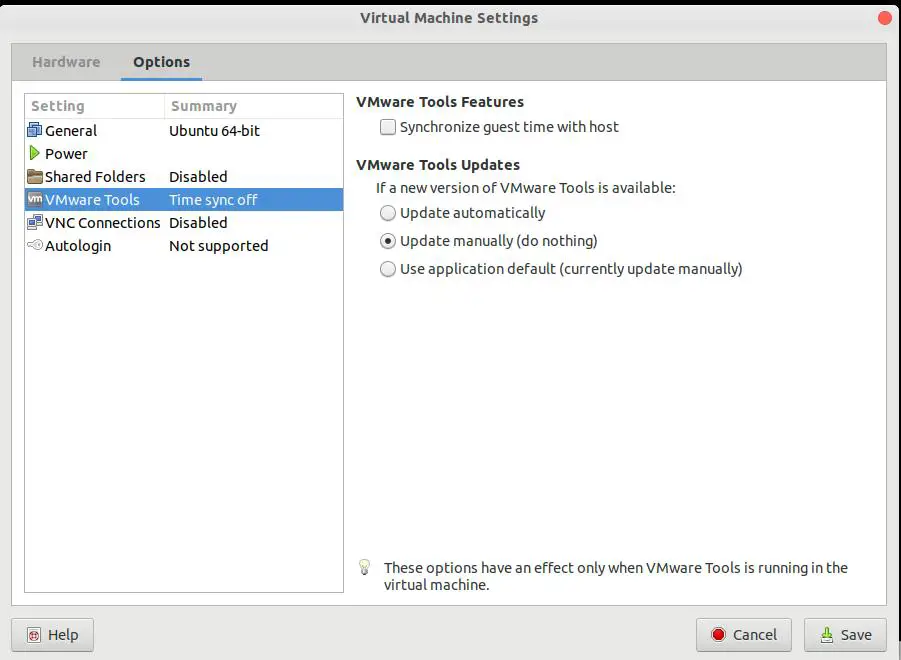
-> Select your preferred option and save. I have selected “update manually” to show you complete steps.
Step18:- Install Vmware tool using GUI
In case you don’t have Vmware tools installed or want to install from scratch. Follow these steps-
-> Log in to the virtual machine using root or sudo account.
-> Select VM > install VMware tools in workstation

-> Click “install” on the Question dialogue box to connect Vmware as a CD.
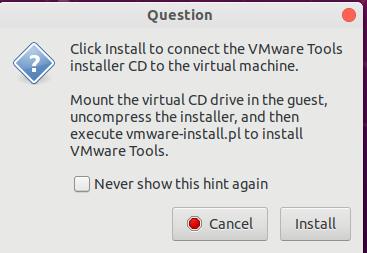
-> Open DVD (Vmware tools), you just mounted in ubuntu in the above step.
-> Copy VMwareTools.x.x.tar.gz to your desktop
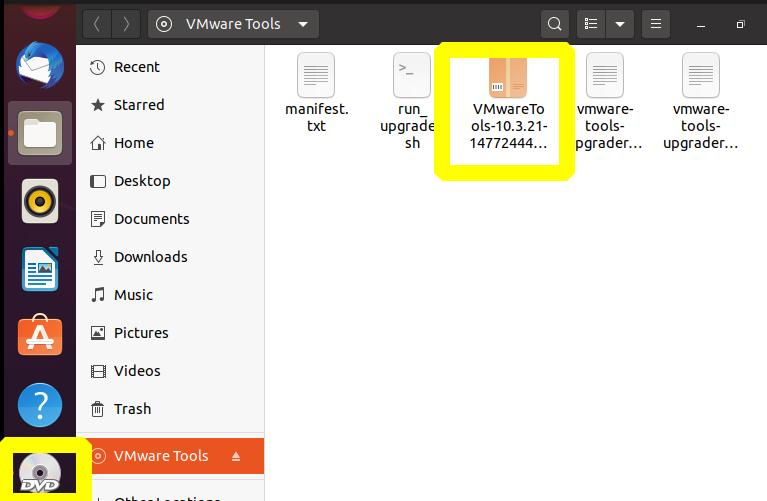
-> Double click VMwareTools.x.x.tar.gz file > Right click “Vmware-tools-distrib” file – Extract in archive manager application window
-> Select Desktop > Extract.
-> Open terminal > change directory to Desktop/vmware-tools-distrib
$ sudo cd ~/Desktop/vmware-tools-distrib
-> Run vmware-tools. pl script
$ sudo ./vmware-tools.pl
-> Follow on-screen wizard and select default options provided.
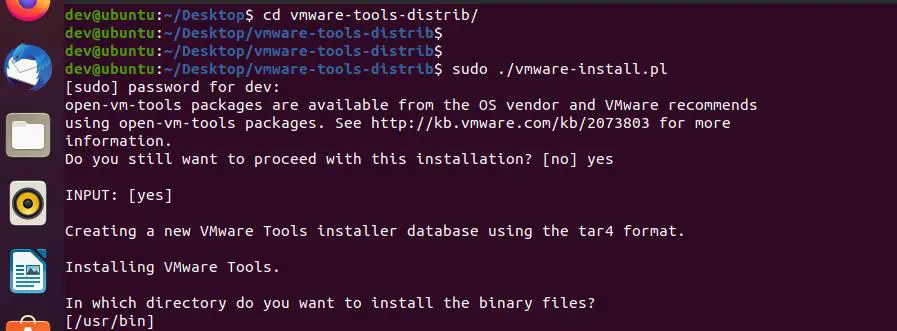
-> Once installation completes successfully. Restart your Virtual machine.
-> check VMtools version.
$ sudo vmware-toolbox-cmd -v
Step19:- Install VMware tools in ubuntu using CLI
You have two options to install Vmware tools on ubuntu using CLI
- apt-get (from ubuntu repository)
- Download & install from Vmware.
Let’s see both options one by one.
I. apt-get vmware tools installation
-> Open terminal > Update repository and then install open-vm-tools using apt-get command.
$ sudo apt-get update
$ sudo apt-get install open-vm-tools
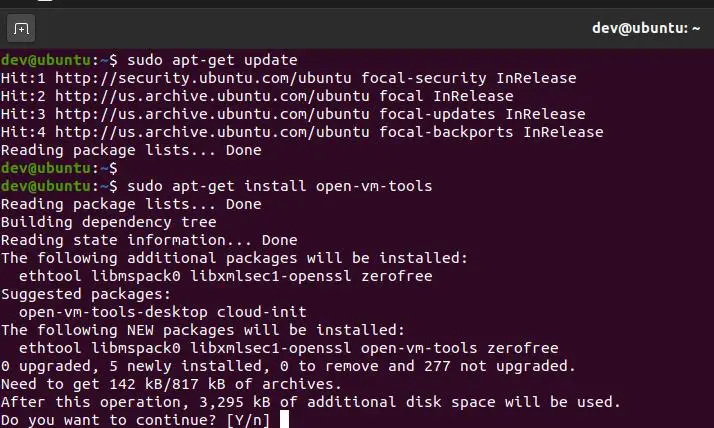
-> Restart your Ubuntu.
II. Download & install manually from Vmware
-> Log in to the virtual machine using root or sudo account.
-> Select VM > install VMware tools in workstation

-> Open Terminal > make a directory cdrom in /mnt.
$ sudo mkdir /mnt/cdrom
-> Mount CD-ROM { /dev/cdrom or /dev/sr0} to /mnt/cdrom.
$ sudo mount /dev/cdrom /mnt/cdrom
-> Extract VmwareTools file to temp directory. Please replace “VMwareTools10.3.21-14772444.tar.gz” with your VM file name. You can check it with “ls /mnt/cdrom” command.
$ sudo tar xzvf /mnt/cdrom/VMwareTools10.3.21-14772444.tar.gz -C /tmp/
-> Change directory to /tmp/vmware-tools-distrib directory.
$ cd /tmp/vmware-tools-distrib
-> Install VMware tool by this command. Follow the on-screen wizard and select default options.
$ sudo ./vmware-tools.pl

Restart your Ubuntu Virtual machine.
Issue: – VMware tool installation asking root password again and again
if you are trying to install Vmware tools and it’s asking for root password again and again. While you are giving the correct password, still it’s failing.
To resolve this, you just need to start Vmware workstation player with Root privileges from Terminal of your host operating system.

For more step by step details, visit this VMware link.
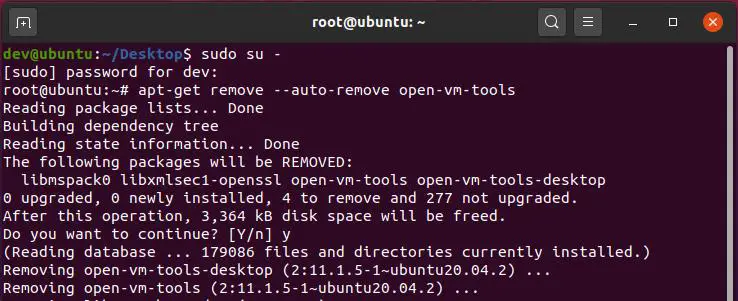
Step20:- How to remove open-vmtools from Ubuntu completely
$ sudo apt-get remove --auto-remove open-vm-tools
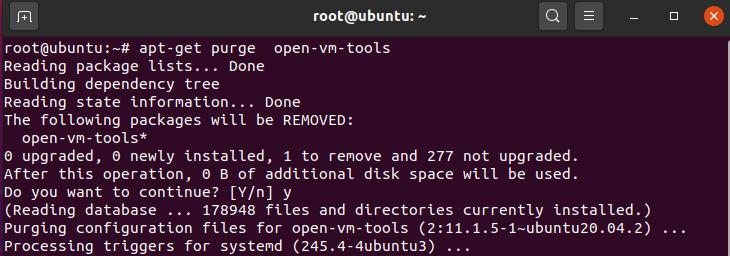
Purge open-VM-tools config files
$ sudo apt-get purge --auto-remove open-vm-tools
How to connect Ubuntu 20.04 VM remotely from the host machine
Now you know how to install ubuntu 20.04 on VMware workstation. Additionally, I have explained the importance and how to install VMWare tools.
I think this post will not be complete if I will not explain “how to connect ubuntu 20.04 remotely” from your host machine.
SSH is not enabled by default in ubuntu 20.04 distribution. So you need to install the required ssh package after installation of ubuntu 20.04. There may be scenarios, when you may need to access your Ubuntu VM (virtual machine) remotely. For example –
- You don’t have VM console or VMware workstation access.
- You don’t like to switch between the host (your machine) and guest (Ubuntu VM). You want to access the Ubuntu terminal from host machine itself.
To enable ssh in your machine, you need to install OpenSSH package inside your Ubuntu VM, once you are done with Ubuntu 20.04 and VMware tools installation.
Let me show you the step by step procedure to achieve the same –
1.) Power on your Ubuntu VM and log in
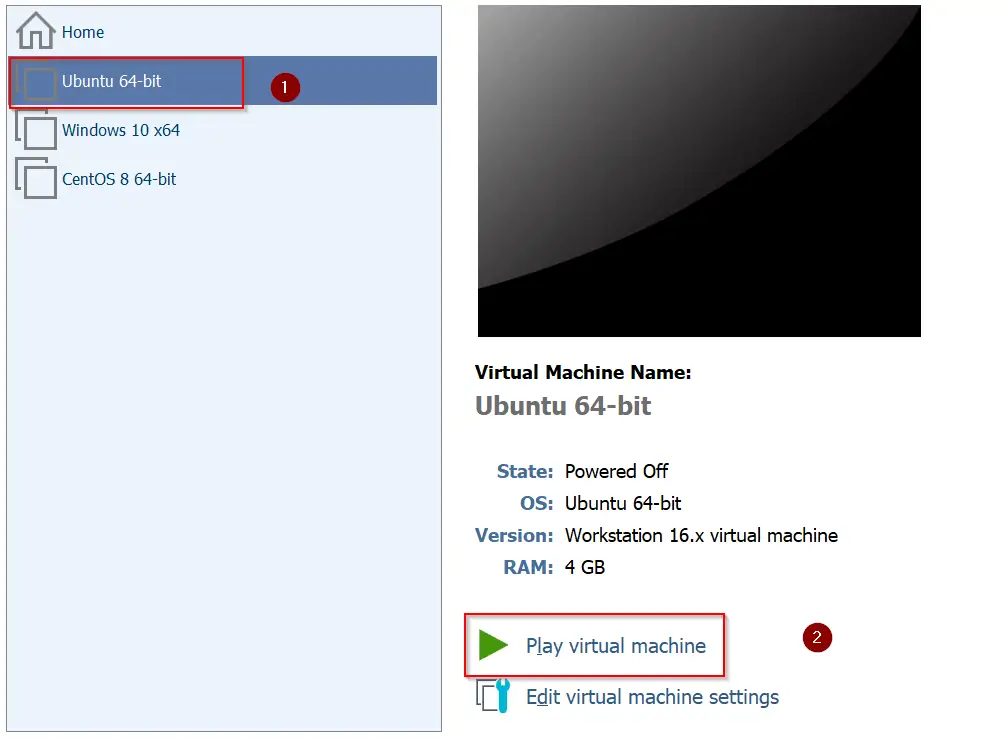
2.) Open Terminal <Ctrl + ALT +T> and run apt command to update repository
$ sudo apt update

3.) Install OpenSSH server package
$ sudo apt install openssh-server

Provide your sudo password, when it prompts.
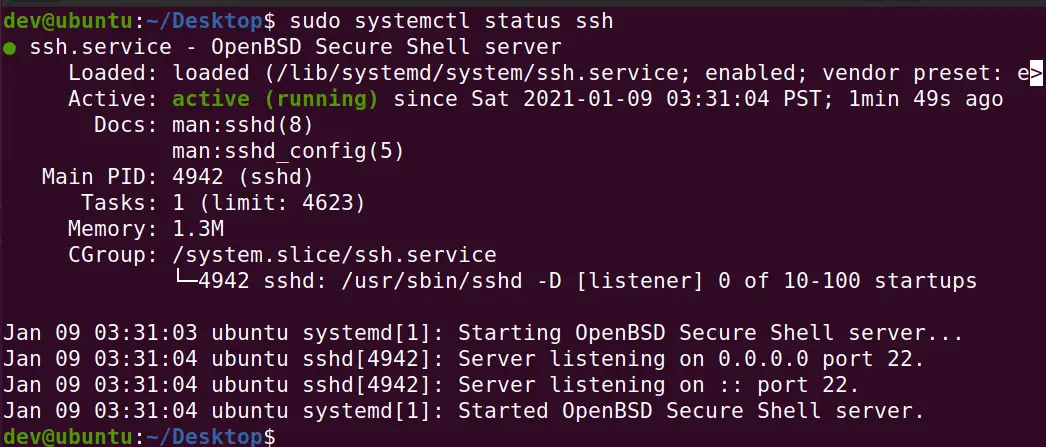
4.) Once OpenSSH package will install, it will automatically start ssh service.
$ sudo systemctl status ssh
5.) In case you have enabled ubuntu firewall (UFW), allow ssh protocol
$ sudo ufw allow ssh
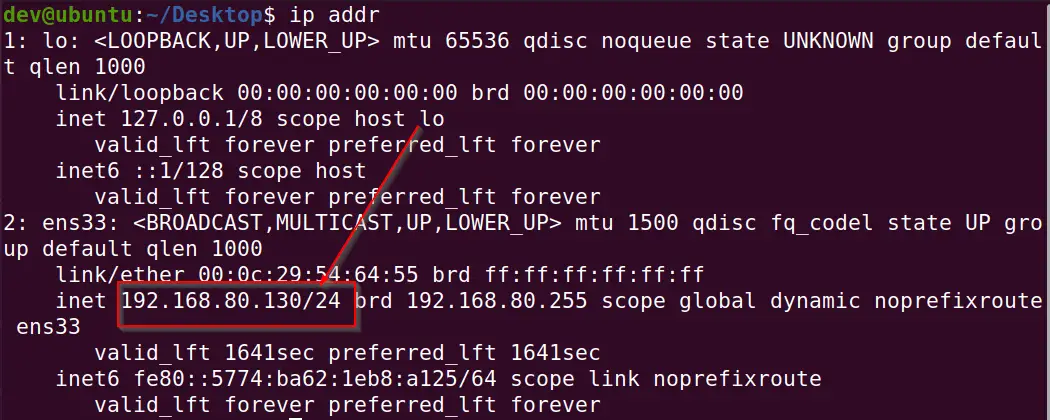
6.) Check IP address of your Ubuntu 20.04 virtual machine
$ ip addr
7.) SSH ubuntu 20.04 VM remotely
Depending upon your host machine, you can choose the method to ssh ubuntu VM remotely.
-
Ubuntu as host machine :
- Open terminal using <Ctrl + Alt + T > keys on your keyboard
- Run ssh command to connect your VM remotely.
$ ssh user@ip-address-of-ubuntu-VM
For example,
$ ssh dev@192.168.80.130

-
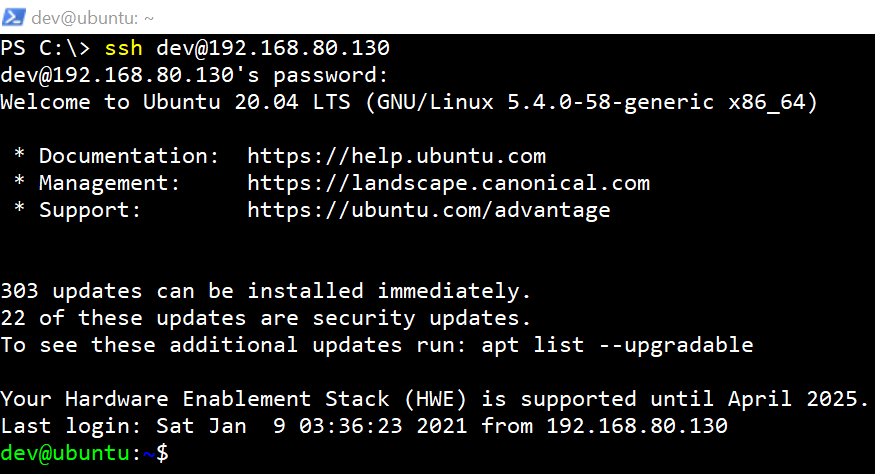
Windows 10 as host machine :
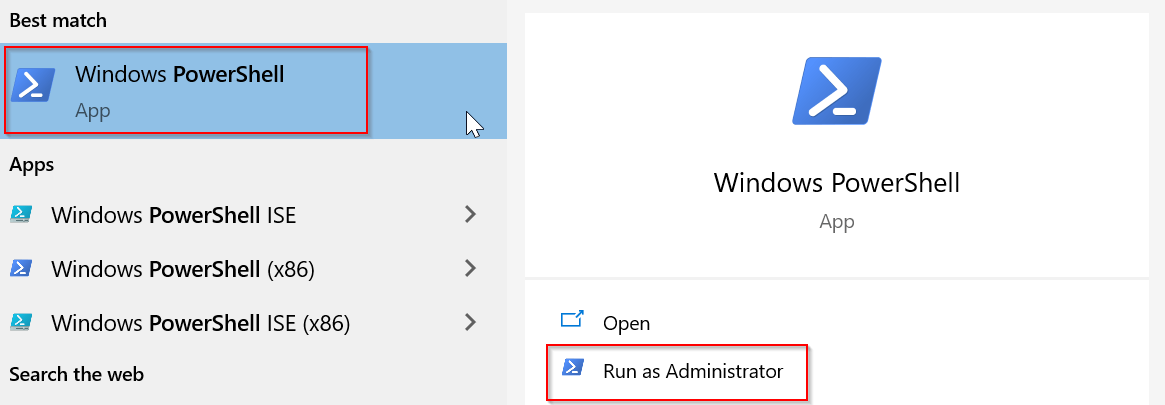
- Open elevated PowerShell: – Type Powershell in windows search bar > click “run as administrator“.
-
- Run ssh command to connect Ubuntu remotely from Windows 10.
c:\> ssh user@ip-address-of-ubuntu-VM
For example
C:\> ssh dev@192.168.80.130
Video tutorial
To make it easier on “how to install Ubuntu 20.04 on VMware workstation” for beginners, I have created a video also. Please watch, like and share, if you found it useful.
Further reading on Ubuntu installation:-
How to enable Remote Desktop in Ubuntu – Remmina
How to install Chrome in Ubuntu
Conclusion:-
Hope this tutorial on “How to install ubuntu 20.04 on Vmware Workstation” will help someone. It’s relatively easy and automated. Linux is nowadays more straightforward to install compared to windows in my view.
you can provide your feedback and suggestion through comments.
Signing off for now.. see you soon in the next post.


